
Product Manual


4
Setting the MODES in the
ONE-KEY™ App
The modes can be customized in the ONE-KEY™
app to the user's preferences for the application.
The options available for customization are:
UNIVERSAL SETTINGS
(aect all MODES)
Worklight Duration - Set the length of time the work-
light remains on after the trigger is pulled.
Brightness - Set the brightness of the worklight.
On-Tool Reset - Enable or disable the tool reset. Set
the On-Tool Reset to ON to allow the MODES to be
reset to factory defaults when the Mode Selector
Button on the tool is pressed for 5 seconds.
To set the Drive Control Settings:
Two types of drive control are available, Custom Drive
Control and Lug Nut Control. In the ONE-KEY™ app,
select the MODE to be updated, then select TASK to
pick Custom Drive Control or Lug Nut Control. The
task attributes will be displayed.
• Custom Drive Control
Set the Max Speed, Bolt Removal, Precision Mode,
and Trigger Ramp-Up for the mode.
• Lug Nut Control (available on 2869-20 only)
Set the Trigger Ramp-Up, and review the Torque
Level (estimate) and the Star Pattern for the mode.
The tool is shipped with the MODES preset, as follows:
MODE 1 MODE 2 MODE 3 MODE 4
Control
Type
Custom
Drive
Custom
Drive
Custom
Drive
Custom
Drive
Max
Speed
(forward)
600 700 900 1200
Bolt
Removal
(reverse)
1200 1200 1200 1200
Precision Mode Off Off Off Off
Trigger
Ramp-Up
Shorter Shorter Shorter Shorter
MODE SETTINGS
Max Speed - Select the max RPM to be reached
when running the tool in forward.
Bolt Removal - Select the max RPM to be reached
when running the tool in reverse.
Precision Mode - Enable or disable, and set the
limit on the torque output of the tool. For maximum
torque output, set the Precision Mode to OFF. To
control the torque, set the Precision mode to ON
and select the level. For lower torque applications
select lower levels, and for higher torque applications,
select higher levels. For torque-specic applications,
conrm the nal tightening torque with a calibrated
torque wrench.
Trigger Ramp-Up - Set the length of time it takes for
the tool to reach full speed.
Torque Level (Estimate) (2869-20 only) - Review
the torque range (350-450 ft-lbs). For precision ap-
plications, conrm the nal tightening torque with a
calibrated device.
Star Patterns (2869-20 only) - Review the star pat-
terns for bolt installation/removal.
ASSEMBLY
WARNING
Recharge only with the charger
specied for the battery. For spe-
cic charging instructions, read the operator’s
manual supplied with your charger and battery.
Removing/Inserting the Battery
To remove the battery, push in the release buttons
and pull the battery pack away from the tool.
WARNING
Always remove battery pack before
changing or removing accessories.
To insert the battery, slide the pack into the body
of the tool. Make sure it latches securely into place.
WARNING
Only use accessories specically
recommended for this tool. Others
may be hazardous.
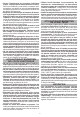
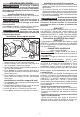
Installing the Side Handle
Knob
Detents
Groove
1. To install the side handle, loosen the side handle
knob until the ring loosens.
2. Slide the ring over the front of the tool until the
detents are resting in the groove.
3. Tighten the side handle knob until it is secure.
4. To adjust the side handle, loosen the knob and
rotate to the desired position. Tighten securely.
5. To remove the side handle, loosen the side handle
knob until the side handle can be removed.
Attaching and Removing the Tool Hanger
1. To attach, place the hanger ring through the tool
hanger.
2. Position the tool hanger on the tool over the two
screw holes.
3. Insert the two screws. Hand tighten the screws.
4. To remove, reverse the procedure.
Attaching and Removing Accessories
1. Use only the appropriate size Square Drive Sockets.
2. To attach a socket, align the accessory with the
anvil and push it rmly over the retaining ring.
3. To remove the accessory, pull the accessory o
the anvil.
WARNING
Use only sockets and other acces-
sories specifically designed for
use on impact wrenches and drivers. Other
sockets and accessories might shatter or break
causing injury.
ONE-KEY™
To learn more about the ONE-KEY™ functionality
for this tool, go to milwaukeetool.com/One-Key. To
download the ONE-KEY™ app, visit the App Store or
Google Play from your smart device.