
Use and Care Manual


5
OPERATION
WARNING
To reduce the risk of injury, always
remove battery pack before chang-
ing or removing accessories. Only use acces-
sories specically recommended for this tool.
Others may be hazardous.
Keep hands away from the bit and all moving parts.
Always wear proper eye protection marked to
comply with ANSI Z87.1.
When working in dusty situations, wear appro-
priate respiratory protection or use an OSHA
compliant dust extraction solution.
Always use a side handle when using this tool.
Always brace or hold securely.
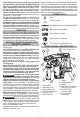
Selecting Action
MILWAUKEE Rotary Hammers have three settings:
rotation only, rotary hammer, and hammer only.
Always allow the motor to come to a complete stop
before changing the mode selection to avoid dam-
age to the tool.
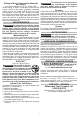
1. For rotation only, rotate the
mode selector so the arrow
on the lever points to the
twist drill symbol.
2. For rotary hammering, ro-
tate the mode selector so
the arrow points to the
hammer and twist drill
symbol.
3. For hammering only, rotate the mode selector so
the arrow points to the hammer symbol.
4. To freely rotate the bit to the desired angle for
hammering only, rotate the mode selector to the
symbol. Then, follow step 3.
NOTE: To engage the hammering mechanism, main-
tain pressure on the bit. When pressure on the bit is
released, the hammering action will stop.
Using the Control Switch
The control switch may be set to three positions:
forward, reverse and lock. Always allow the motor
to come to a complete stop before using the control
switch to avoid damage to the tool.
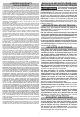
1. For forward (clockwise) rotation, push in the con-
trol switch from the right side of the tool. Check
the direction of rotation before use.
2. For reverse (counterclockwise) rotation, push in
the control switch from the left side of the tool.
Check direction of rotation before use.
3. To lock the trigger, push the control switch to the
center position. The trigger will not work while
the control switch is in the center locked position.
Always lock the trigger or remove the battery pack
any time the tool is not in use.
Starting, Stopping and Controlling Speed
For operation when using the Dust Extractor, refer
to your Dust Extractor manual.
1. To start the tool, grasp the handle(s) rmly and
pull the trigger.
NOTE: An LED is turned on when the trigger is
pulled and will go o shortly after the trigger is
released.
2. To vary the speed, increase or decrease the pres-
sure on the trigger. The further the trigger is pulled,
the greater the speed.
3. To stop the tool, release the trigger. Ensure the
tool has come to a complete stop before laying
the tool down.
Operating
Position the tool, grasp the handles rmly and pull
the trigger. Always hold the tool securely using both
handles to maintain control. This tool has been de-
signed to achieve top performance with only moder-
ate pressure. Let the tool do the work.
If the speed begins to drop o when drilling large or
deep holes, pull the bit partially out of the hole while
the tool is running to help clear dust. Do not use water
to settle the dust since it will clog the bit utes and
tend to make the bit bind in the hole. If the bit should
bind, a built-in, non-adjustable slip clutch prevents
the bit from turning. If this occurs, stop the tool, free
the bit and begin again.
The AUTOSTOP™ kickback control feature senses a
bind and when the tool turns too much in a bind up sit-
uation, the electronics shut the tool o. There is an on-
board light that will blink when AUTOSTOP™ activates.
NOTE: Applying greater pressure does not increase
the tool's eectiveness. If the applied working pres-
sure is too high, the shock absorber will be pushed
together making the vibrations to the handle notice-
ably stronger.
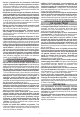
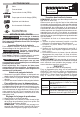
Operator Force
The Anti-Vibration System provides the operator with
comfort without sacricing power or performance.
Ideal operator force compresses the bellows slightly
and allows the tool to work aggressively while the
handle remains steady.
Excessive force compresses the bellows signicantly
and reduces vibration dampening. Users will be able
to feel the dierence and should adjust the force to
the handle accordingly.
Too little Correct Too much
force force force
APPLICATIONS
WARNING
To reduce the risk of electric shock,
check work area for hidden pipes
and wires before drilling.
Cut embedded rebar only if this operation does
not aect the integrity of the building. If in doubt,
consult a structural engineer. Tool operator fully
responsible for adverse structural eects.
Selecting Bits
When selecting a bit, use the right type for your job.
For best performance, always use sharp bits.
Drilling
1. Before drilling, be sure the workpiece is clamped
securely. Use backing material to prevent damage
to the workpiece during breakthrough.
2. When starting a hole, place the drill bit on the work
surface and apply rm pressure. Begin drilling at
a slow speed, gradually increasing the speed as
you drill.
3. Always apply pressure in line with the bit. Use
enough pressure to keep the drill biting, but do
not push hard enough to stall the motor.
4. Reduce pressure and ease the bit through the last
part of the hole. While the tool is still running, pull
the bit out of the hole to prevent jamming.