
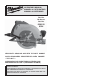
Jig Saw OPERATOR'S MANUAL


4 5
POWER TOOL USE AND CARE
16. Do not force the power tool. Use the
correct power tool for your applica-
tion. The correct power tool will do the
job better and safer at the rate for which
it was designed.
17. Do not use the power tool if the switch
does not turn it on and off. Any power tool
that cannot be controlled with the switch is
dangerous and must be repaired.
18. Disconnect the plug from the power
source and/or the battery pack from
the power tool before making any
adjustments, changing accessories,
or storing power tools. Such preven-
tive safety measures reduce the risk of
starting the tool accidentally.
19. Store idle power tools out of the reach
of children and do not allow persons
unfamiliar with the power tools or
these instructions to operate power
tools. Power tools are dangerous in the
hands of untrained users.
20. Maintain power tools. Check for
misalignment or binding of moving
parts, breakage of parts and any
other condition that may affect the
power tool's operation. If damaged,
have the power tool repaired before
use. Many accidents are caused by
poorly maintained power tools.
21. Keep cutting tools sharp and clean.
Properly maintained cutting tools with
sharp cutting edges are less likely to
bind and are easier to control.
22. Use the power tool, accessories and
tool bits etc., in accordance with
these instructions and in the manner
intended for the particular type of
power tool, taking into account the
working conditions and the work to
be performed. Use of the power tool for
operations different from those intended
could result in a hazardous situation.
SERVICE
23. Have your power tool serviced by a
qualifi ed repair person using only
identical replacement parts. This will
ensure that the safety of the power tool
is maintained.
SPECIFIC SAFETY RULES
1. Maintain labels and nameplates.
These carry important information.
If unreadable or missing, contact a
MILWAUKEE service facility for a free
replacement.
2. DANGER! Keep hands away from
cutting area and blade. Keep your
second hand on auxiliary handle or
motor housing. If both hands are hold-
ing the saw, they cannot be cut by the
blade.
Do not reach underneath the work-
piece. The guard cannot protect you
from the blade below the workpiece.
Adjust the cutting depth to the thick-
ness of the workpiece. Less than a full
tooth of the blade teeth should be visible
below the workpiece.
3. Check lower guard for proper closing
before each use. Do not operate the
saw if lower guard does not move
freely and close instantly. Never clamp
or tie the lower guard into the open po-
sition. If saw is accidentally dropped,
lower guard may be bent. Raise the
lower guard with the retracting handle
and make sure it moves freely and does
not touch the blade or any other part, in
all angles and depths of cut.
4. Check the operation and condition
of the lower guard spring. If the
guard and the spring are not operat-
ing properly, they must be serviced
before use. Lower guard may operate
sluggishly due to damaged parts, gum-
my deposits, or a buildup of debris.
5. Lower guard should be retracted
manually only for special cuts such
as "Plunge Cuts" and "Compound
Cuts". Raise lower guard by retract-
ing handle and as soon as blade
enters the material, the lower guard
must be released. For all other saw-
ing, the lower guard should operate
automatically.
6. Always observe that the lower guard
is covering the blade before plac-
ing saw down on bench or fl oor. An
unprotected, coasting blade will cause
the saw to walk backwards, cutting
whatever is in its path. Be aware of the
time it takes for the blade to stop after
switch is released.
7. NEVER hold piece being cut in your
hands or across your leg. Secure the
workpiece to a stable platform. It is
important to support the work properly to
minimize body exposure, blade binding,
or loss of control.
8. Hold power tools by insulated grip-
ping surfaces when performing an
operation where the cutting tool may
contact hidden wiring or its own cord.
Contact with a "live" wire will make ex-
posed metal parts of the tool "live" and
shock the operator.
9. When ripping always use a rip fence
or straight edge guide. This improves
the accuracy of cut and reduces the
chance for blade binding.
10. Always use blades with correct size
and shape (diamond vs. round) arbor
holes. Blades that do not match the
mounting hardware of the saw will run
eccentrically, causing loss of control.
11. Never use damaged or incorrect blade
washers or bolts. The blade washers
and bolts were specially designed for
your saw, for optimum performance and
safety of operation.
12. WARNING! Some dust created by
power sanding, sawing, grinding, drill-
ing, and other construction activities
contains chemicals known to cause
cancer, birth defects or other reproduc-
tive harm. Some examples of these
chemicals are:
• lead from lead-based paint
• crystalline silica from bricks and cement
and other masonry
products, and
• arsenic and chromium from chemically-
treated lumber.
Your risk from these exposures varies,
depending on how often you do this
type of work. To reduce your exposure
to these chemicals: work in a well ven-
tilated area, and work with approved
safety equipment, such as those dust
masks that are specifi cally designed to
fi lter out microscopic particles.
13. Causes and Operator Prevention of
KICKBACK:
KICKBACK is a sudden reaction to
a pinched, bound or misaligned saw
blade, causing an uncontrolled saw to
lift up and out of the workpiece toward
the operator.
When the blade is pinched or bound
tightly by the kerf closing down, the
blade stalls and the motor reaction
drives the unit rapidly back toward the
operator.
If the blade becomes twisted or mis-
aligned in the cut, the teeth at the back
edge of the blade can dig into the top
surface of the wood causing the blade
to climb out of the kerf and jump back
toward operator.
KICKBACK is the result of saw misuse and/or
incorrect operating procedures or conditions
and can be avoided by taking proper precau-
tions as given below:
14. Maintain a fi rm grip with both hands
on the saw and position your arms
to resist KICKBACK forces. Posi-
tion your body to either side of the
blade, but not in line with the blade.
KICKBACK could cause the saw to jump
backwards, but kickback forces can
be controlled by the operator, if proper
precautions are taken.
15.
When blade is binding, or when inter-
rupting a cut for any reason, release
the trigger and hold the saw motion-
less in the material until the blade
comes to a complete stop. Never
attempt to remove the saw from the
work or pull the saw backward while
the blade is in motion or KICKBACK
may occur. Investigate and take cor-
rective actions to eliminate the cause
of blade binding.
16. When restarting a saw in the work-
piece, center the saw blade in the
kerf and check that saw teeth are
not engaged into the material. If
saw blade is binding, it may walk up or
KICKBACK from the workpiece as the
saw is restarted.
17. Support large panels to minimize
the risk of blade pinching and KICK-
BACK. Large panels tend to sag under
their own weight. Supports must be
placed under the panel on both sides,
near the line of cut and near the edge
of the panel.
18. Do not use dull or damaged blade.
Unsharpened or improperly set blades
produce narrow kerf causing excessive
friction, blade binding and KICKBACK.