
Operator's Manual


8
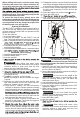
10. Press the trigger lock to the unlocked position.
11. Use the digital level to ensure the core drill is
level throughout the cut.
12. To start, pull the trigger
Rotate the trigger lock-on to
engage the trigger.
NOTE: A worklight is turned
on when the trigger is
pulled.
13. Feed bits very slowly into
the work surface. Use light
feed pressure until the bit
crown has penetrated or
"seated" into the material.
14. Once the bit is "seated", use the Performance
Indicator to determine if proper pressure is being
used throughout the cut. Increase or decrease
pressure as needed. Too much pressure will slow
-
sure slightly to allow the bit to regain speed. Too
little pressure will cause the bit to slide over the
work area and dull the point of the bit.
15. To vary the speed, increase or decrease the
pressure on the trigger. The further the trigger is
pulled, the greater the speed.
16.
so the water return is a muddy, solid color. Clear
water or clear streaks indicate too much water
volume and will reduce bit life. Adequate water
volume varies according to the bit diameter. Use
-
tings from the work surface.
17. When the cut is complete, raise the bit from
the cut.
18. To stop the machine, remove the bit from the hole
and release the trigger. When using the trigger
lock-on, rotate it to disengage the trigger. Make
sure the bit comes to a complete stop before
laying down the machine.
19. If the bit binds, release the trigger and wait for
the bit to stop completely. Free the bit from the
workpiece.
20. Press the trigger lock to the locked
position.
21. Close the water valve.
22.
23. See "Retrieving Cores and Deep Coring" for
instructions on removing cores.
Retrieving Cores and Deep Coring
When coring holes that are deeper than the core bit:
1. Core the hole. Once the maximum depth has
been cut, remove the bit from the hole and stop
the machine.
2. Remove the core by driving a chisel or slender
wedge into the cut between the core and the work
surface. Other items, such as core tongs, bent wire
or anchor bolts can also be used to remove the
core. Removing cores with diameters greater than
remove the pieces.
3. ,yrassecen fi ,noisnetxe tib a gnisu tib eht llatsnieR
and continue coring.
Troubleshooting
Vibration
1. Stop drilling.
2.
3. Remove battery.
4. Check for loose nuts and bolts. Tighten if required.
5. Check for excessive bit runout. Replace if required.
If vibration continues to occur, remove the core and
loose material. If vibration continues to occur after
attempting these measures, return the rig to the
nearest MILWAUKEE® service facility.
Bit Binding
Bit binding is caused by one of two things: a dull
(glazed) bit or a poorly stabilised stand.
Causes of bit glazing:
• Wrong RPM for bit diameter
• High feed pressure
• Low feed pressure
• High steel content in work surface
• Large, hard aggregate
• Too much water
• Low motor power
A sharp bit typically has good diamond exposure and
will cut/grind almost anything in its path, including
embedded steel.
MAINTENANCE
WARNING
To reduce the risk of injury, always
unplug the charger and remove the
battery pack from the charger or machine before
performing any maintenance. Never disassemble
the machine, battery pack or charger. Contact a
MILWAUKEE® service facility for ALL repairs.
Maintaining Machine
Keep your machine, battery pack and charger in good
repair by adopting a regular maintenance program.
Inspect your machine for issues such as undue noise,
misalignment or binding of moving parts, breakage
machine operation. Return the machine, battery
pack, and charger to a MILWAUKEE® service facility
for repair. After six months to one year, depending on
use, return the machine, battery pack and charger to
a MILWAUKEE® service facility for inspection.
If the machine does not start or operate at full power
with a fully charged battery pack, clean the contacts
on the battery pack. If the machine still does not work
properly, return the machine, charger and battery
pack, to a MILWAUKEE® service facility for repairs.
ONE-KEY™
WARNING
Chemical Burn Hazard.
This device contains a
lithium button/coin cell battery. A new
or used battery can cause severe in
-
ternal burns and lead to death in as
little as 2 hours if swallowed or enters the body.
Always secure the battery cover. If it does not
close securely, stop using the device, remove the
batteries, and keep it away from children. If you
think batteries may have been swallowed or en
-
tered the body, seek immediate medical attention.
Internal Battery
An internal battery is used to facilitate full ONE-KEY™
functionality.
cannot adjust speed, or if the Bluetooth communication
stops working, remove and reinsert the coin cell battery
to reset. Replace the battery if the problem continues.
To replace the battery:
1. Remove the battery pack.
2. Remove the screw(s) and open the battery door.
3. Remove the old battery, keep it away from children,
and dispose of it properly.