
User guide


Table Of Contents
- About MimioProjector
- Getting Started
- Changing the Projector Settings
- Caring for MimioProjector
- Getting Help
- General Troubleshooting
- Image Troubleshooting
- No image is displayed
- A partial, scrolling, or incorrect image is displayed
- The notebook computer display is not displaying an image
- Image is unstable or flickering
- Image has vertical flickering bar
- Image is out of focus
- Image is stretched when displaying 16:9 DVD image
- Image is too small or too large
- Image is displayed with slanted sides
- Image is reversed
- 3D Troubleshooting
- Sound Troubleshooting
- Remote Control Troubleshooting
- Contacting Mimio
- Compatibility Modes
- Technical and Environmental Information
Changing the Projector
Settings
You can adjust the projector image and change the projector settings using the projector
menus. The projector automatically detects the input source.
To change the projector settings
1. Press Menu on the control panel or on the remote control to display the projector main
menu.
2. Use the navigation keys to select the desired menu item.
3.
If the menu item has an arrow icon, , press ► to display the submenu for that
setting, and then use the navigation keys to select the desired menu item.
4. Press ◄ or ► to adjust the selected setting.
5. Press Menu to return to the previous menu or to exit the menu screen.
Navigating the Projector Menu
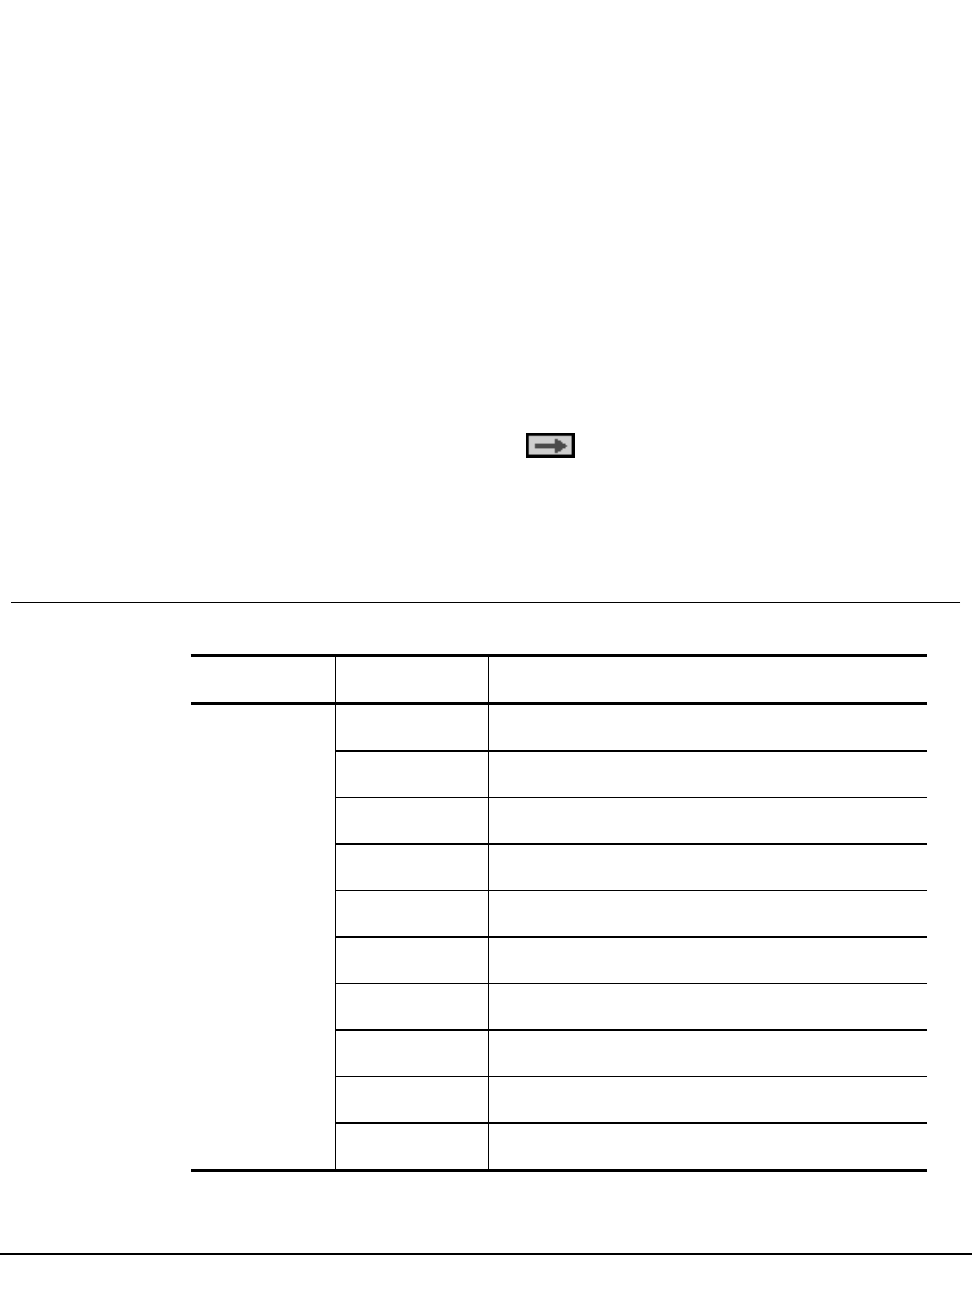
The following table describes the structure of the projector menu and submenus.
Main Menu Submenu Settings
PICTURE Color Mode Brightest / PC / Movie / Game / User
Wall Color White / Light Yellow / Light Blue / Pink / Dark Green
Brightness 0~100
Contrast 0~100
Sharpness 0~31
Saturation 0~100
Hue 0~100
Gamma 0~3
Color Temp. Low / Mid / High
Color Space AUTO / RGB / YUV
23
Chapter 3