INSTRUCTION MANUAL The Minelab SD2100v2 MINELAB
WARNING THIS DOCUMENT CONTAINS MINELAB ELECTRONICS LIMITED RIGHTS TECHNICAL DATA, OR RESTRICTED RIGHTS DATA, OR BOTH. © Minelab Electronics Pty Limited This work is copyright. Apart from any use as permitted under the Copyright Act 1968, no part may be reproduced by any process without prior written permission from Minelab Electronics Pty Limited 118 Hayward Avenue, Torrensville, SA 5031 Australia. 4901-0041-1.
Page 2 The Minelab SD2100v2 The Minelab SD2100v2 Instruction Manual Table of Contents 1. Introduction ................................................................................................ 3 2. List of Parts ................................................................................................ 5 3. Unpacking and Assembly .......................................................................... 6 4. Control Box ....................................................................
Page 4 1. The Minelab SD2100v2 Introduction Thank you for purchasing the Minelab SD2100v2. You will find this detector to be one of the finest available for the detection of metallic objects in highly mineralised environments. This detector can ‘see’ deeper than any other conventional detector available on the market today, and its simplicity of operation means it is easy for both beginner and professional alike.
Instruction Manual Page 5 Figure 1 - SD2100v2 List of Parts
Page 6 2. The Minelab SD2100v2 List of Parts The SD2100v2 is packed in a single box containing the detector and an 11” Double ‘D’ coil. The following parts are included (see Figure 1): Part Item Number 1. 2. 3. 4. 5. 6. 7. 8. 9. 10. 11. 12. 13. 14. 15. 16. 17. 18. 19. 20. 21. 22. 23. 24.
Instruction Manual 3. Page 7 Unpacking and Assembly a) Place the two armrest halves (7) on either side of the shaft assembly (6) and ensure that the bolt holes line up. b) Slide two nylon bolts (8) through the holes and screw nylon wing nuts (9) onto the bolts with a couple of turns. c) Slide the ‘T’ section on top of the control box (5) into the assembled armrest (7), with the detector stand at the rear. Tighten the nylon wing nuts (9) by hand.
Page 8 j) The Minelab SD2100v2 Fit the battery (12) into the battery bag (13). k) Plug the headphones (17) into the socket in the cap of the battery. l) Put on the battery bag. Ensure that the Power switch on the control box is set to “Off”. Plug the connector on the battery cable into the power connector on the control box. This cable connects the battery to the detector.
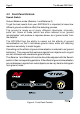
Instruction Manual 4. Page 1 Control Box 4.1 Rear Panel Controls Power Switch The Power switch controls the power supply from the battery to the control box. Always switch the control box “Off” before connecting or disconnecting the coil or battery, and when not in use. Threshold The Threshold control is used to adjust the loudness of background sound. Minelab recommends a soft audible headphone signal that is comfortable to listen to for extended periods.
Page 2 The Minelab SD2100v2 4.2 Front Panel Controls Search Switch Ground Balance mode (Balance 1 and Balance 2) To get the best results from your SD2100v2 it is important to know how different ground conditions affect the detecting process. The ground is made up of many different chemicals, minerals, salts, etc. Some of these (which are often referred to as ‘ground mineralisation’) will produce a response known as a ‘ground noise’ from the detector.
Instruction Manual 5. Page 1 Operation The SD2100v2 does not have an external speaker. All sound is heard through the headphones, which plug into the headphone socket in the top of the battery pack. 5.1 Quick Start Instructions These instructions can be followed by operators who are familiar with the workings and general terminology of detectors. If you are new to detecting, you are advised to proceed to the detailed Operating Instructions in Section 5.2. a) Switch the Power switch to “On”.
Page 2 The Minelab SD2100v2 5.2 Operating Instructions 5.2.1 Detector Sounds Threshold: This is the background sound produced by the detector. The loudness of the background sound is set with the Threshold control. Set this so that you can just hear it. The pitch of the threshold sound can be set to your preference using the Tone control. The threshold tone of the SD2100v2 will not drop below the level set with the Threshold control.
Instruction Manual Page 3 5.2.5 Set the Tune Control With the SD2100v2 switched On and the Threshold control and Tone control both set: a) Hold the coil vertical to the ground and at waist height, then move the coil slowly through a half circle. b) Listen for an increase in interference as you move the coil. When the interference is loudest, place the detector on the ground in this position, with the coil still vertical to the ground. c) Adjust the Tune control to minimise the effect of the interference.
Page 4 The Minelab SD2100v2 b) Adjust the Balance 1 control so that no variation in volume or pitch is heard as the coil is moved up and down. The greater the change in the volume or pitch of the threshold tone as the coil is moved above the ground, the further out of adjustment the balance controls are. c) When the detector is balanced with the Search switch in the Balance 1 position, switch to Balance 2 and, using the Balance 2 control knob, repeat the process as described above.
Instruction Manual 6. Auxiliary Parts 6.1 Battery Page 5 The 6 volt rechargeable battery supplied with your SD2100v2 can be used for approximately 14 to 15 hours after being fully charged. When the battery charge drops to a low level, the detector will indicate that the battery needs to be recharged by flashing the Battery Low light. The detector may become unstable when the charge drops to a low level. CAUTION Only use 6 volt batteries as recommended by Minelab.
Page 6 The Minelab SD2100v2 b) Plug the battery lead into the charger, then plug the mains charger into a mains outlet. Switch the mains outlet on. Check the charger nameplate; it will be rated at 1000 mAh or 500 mAh. The 1000 mAh charger will recharge at a rate of approximately ½ hour for each hour of past use, while the 500 mAh charger will recharge at a rate of 1 hour for each hour of past use.
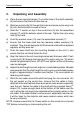
Instruction Manual Page 7 7. Detecting Techniques 7.1 Searching The SD2100v2 is a ‘motion’ detector, which means that it must be moving in relation to a target in order to detect it. DO NOT set your shaft length too short. If the coil is too close to your body it may detect your pick, the battery, or any other metal that you may be carrying. NOTE: DO NOT wear steel cap boots or shoes with metal eyelets when detecting.
Page 8 The Minelab SD2100v2 Each sweep should overlap the area covered by the previous sweep. This will ensure a full coverage of the searched area. Be aware of the search pattern of the coil and overlap your sweeps to take this into account. 7.2 Prospecting Tips The SD2100v2 has superior ground balancing features and is possible to find quite large objects near the surface in well-worked areas simply because other detectors have been unable to cope with the high degree of mineralisation.
Instruction Manual 7.3 Page 9 Hints for Maximum Gold Recovery a) Keep the coil as close to the ground as possible. b) Listen very carefully. This is more important than concentrating on looking. c) SLOW DOWN! DO NOT rush — take your time. 7.4 Identifying Target Signals Metallic targets will usually give a ‘solid’ sounding response when the coil is swept across the object from any direction and are generally narrow, sharp and mostly symmetrical.
Page 10 7.5 The Minelab SD2100v2 Pinpointing In order to save time in the recovery of an object and to reduce the size of the hole required to extract it from the ground, it is necessary to pinpoint the exact location of the object. The technique described here will be particularly useful with the Double ‘D’ coil, but will also work with a Monoloop coil. When a likely object is detected, sweep the general area with the coil, taking note of where the strongest signal is received.
Instruction Manual 7.6 Page 11 Digging the Target Once you have established the location of the target it is necessary to dig a small hole to recover it. In order to preserve the environment, it is essential to make the hole as small as possible and always replace any soil and grass that you have removed. Carry at least one of the following digging tools with you when searching.
Page 12 The Minelab SD2100v2 NOTE: Always refill the hole you have dug, and leave the area as you found it. 7.6.1 Digging Deep Targets The SD2100v2 has unparalleled depth capabilities which will surprise experienced and new prospectors alike. If the target appears to be buried deeply, it will help to use the following technique: · Use the cross-sweeping method to locate the target as accurately as you can. Scrape a hole about 100mm deep and large enough to take the coil.
Instruction Manual 8. Page 13 Maintenance The SD2100v2 is a high quality electronic instrument which is finely engineered and housed in a durable container. Taking care of it is common sense. · It is vitally important to keep all the connectors dry and clean. · DO NOT expose the detector to high temperatures, or leave it in the sun longer than necessary. Shading it will help protect it. Avoid leaving it in a closed vehicle, especially in the sun.
Page 14 9. The Minelab SD2100v2 Troubleshooting Use the following table to check for problems which you can diagnose: If you need to return your detector to Minelab for service, please supply as many details as possible about the fault. This will enable our service engineers to rectify the fault quickly and efficiently. Return the detector in a cardboard box for protection.
Instruction Manual 10. Page 15 Specification NOTE: In the interest of product improvement, Minelab reserves the right to make changes to this specification without notice. Length Maximum Minimum Weight Configuration Transmission Ground Rejection Search Mode Controls Complete (excl. battery) 2.
Page 16 11. The Minelab SD2100v2 Warranty There is a two-year parts and labour warranty on the SD2100v2 control box. Refer to your Product Warranty card for details. Search coils are warranted for one year against malfunction. In all instances, refer to your supplier or Minelab for service, either in or out of warranty. NOTE: This warranty is not transferable or valid unless the enclosed warranty registration card is returned to Minelab Electronics Pty.
Instruction Manual Page 17 12. Accessories Figure 9 - Coil Search Patterns 12.1 Search Coils The SD2100v2 is supplied with the 11” Double ‘D’ as its standard coil. Three other coils are available as accessories for use on the SD2100v2 — the 18”, 11”, and 8” Monoloop coils.
Page 18 The Minelab SD2100v2 Each Monoloop coil consists of only one coil of wire and gives a detection pattern similar to a concentric coil. Each Double ‘D’ coil contains two D-shaped coils of wire, which overlap and produce a ‘blade’ like detection pattern (see Figure 9).
Instruction Manual Page 19
Page 20 The Minelab SD2100v2
Instruction Manual Page 21
Page 22 The Minelab SD2100v2
Instruction Manual Page 23 Minelab Service Repair Form Today’s Date:.................................................... Detector Model: ....................................... Serial No.: .............................. Purchased From: .................................................................................... Purchase Date: ................................................ Part(s) Supplied for Service: ................................................................... ...........................