MINI BOX Easy Setup Guide CCI140122_User_Guide 1 8/6/14 3:29 PM JOB NO. CCI1400122 user guide ROUND 1 stage: FINAL DATE 8.5.14 Job Name New Customer Mini Box CD CLIENT AD/Designer Bruce B./ Michelle R. Laurie G. Writer N/A Cox Communications FILE NAME CCI140122_User_Guide LIVE N/A FLAT/TRIM width varies x 5" FOLDED 8" x 5" BLEED .125" COLOR CMYK C M Y K SCALE 100% Layout Designer N/A Account Mgr. Jenn P. Project Mgr. Stephanie W. Print Prod.
Welcome. Thank you for going all digital with Cox and taking your TV viewing experience to the next level. Just follow the 4 steps in this Easy Setup Guide. For future reference and faster support, please write down the numbers found on the bottom of the mini box.
Kit includes: MINI BOX Digital adapter HDMI Cable COAX Cables Power Cord Remote Control Provides a high-def signal to TV Provides a basic signal to TV (Qty.
1 Take a deep breath. You can do this! We’re with you every step of the way.
STEP 1 5 CCI140122_User_Guide 5 8/6/14 3:29 PM
HDMI 2 It’s time to play detective. Does your TV have an HDMI port? On the back of the TV, look for a port labeled HDMI NOTE: Most high-definition TVs should have this port. TVs purchased before 2004 generally will not. If the TV does not have an HDMI port, please turn the page.
STEP 2 7 CCI140122_User_Guide 7 8/6/14 3:29 PM
COAX 2 Skip this page if you have already plugged in your HDMI Cable. Really, you can skip it. If the TV does NOT have an HDMI port: Open the plastic bag found in tray 2 Connect the BLUE COAX Cable to the port on the back of the mini box labeled To TV Connect the other end of the BLUE COAX Cable to the COAX port on the back of the TV NOTE: Choose either the BLUE HDMI Cable or the BLUE COAX Cable. Do not use both.
STEP 2 9 CCI140122_User_Guide 9 8/6/14 3:29 PM
3 Way to go! You’re almost there. Connect the YELLOW POWER Cord into the yellow POWER port on the back of the mini box Plug the other end into the wall NOTE: The green light should start flashing on the front of the mini box.
STEP 3 11 CCI140122_User_Guide 11 8/6/14 3:29 PM
4 It’s time to program your new mini box remote to work with your TV.
If you used the HDMI Cable in Step 2: Using the mini box remote, press and select HDMI* STEP 4 If you used the COAX Cable in Step 2: Using your existing TV remote, turn your TV to channel 3 Make sure the CH 3/4 switch on the back of the mini box is set to 3 NOTE: If you do not see video or the on-screen guide on your TV, use your existing TV remote to turn the TV to channel 4 and change the switch on the back of the mini box to channel 4.
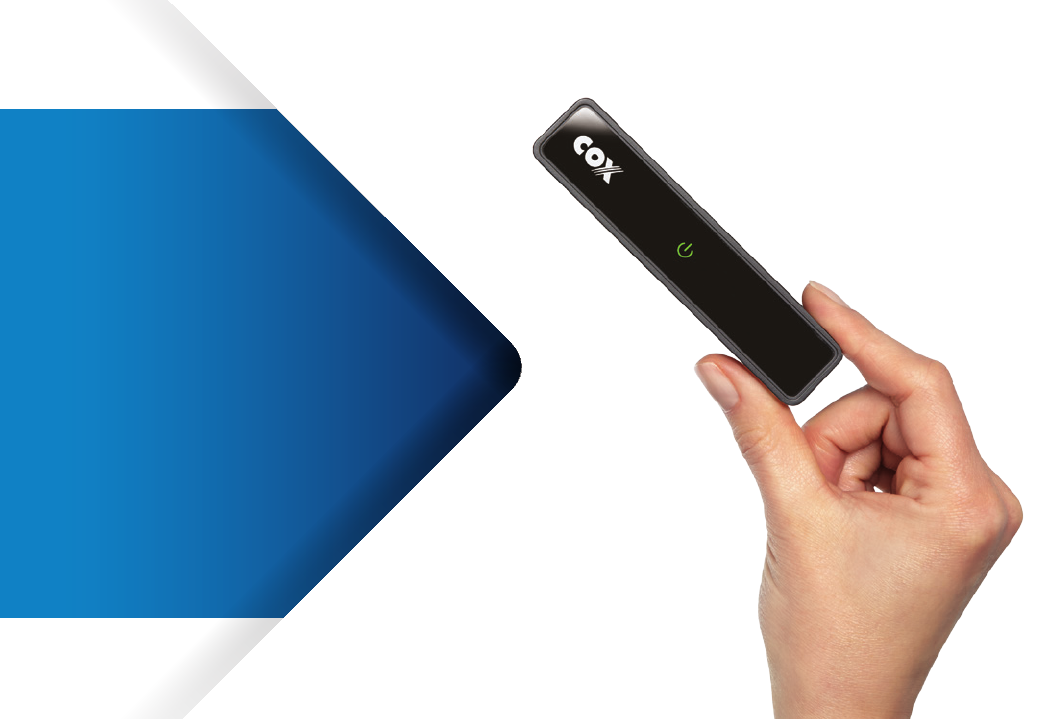
about the remote control power Turn on or off the television guide Open the guide select Select the highlighted item hd zoom Zoom and stretch video cc Turn on or off closed captioning last Return to the last channel or the previous screen cox menu One-touch access to the Main Menu info Get more information about programs arrow keys Move the highlight exit Exit the current screen PG/CH up/dn In the Guide, scroll up or down one page.
quick-start remote set-up Say goodbye to remote control clutter Your mini box remote not only controls your mini box, it can also be programmed to control your TV. 2. Press and hold 3. Press and release 4. P ress and hold blinks twice, then release. until . until the TV turns off, then release.
getting started Turning on Your TV Changing Channels Adjusting the Volume Level Press • If you know the channel number, enter it using the numbered buttons Use the to increase or decrease the volume • Use the to go one channel up or down • To see the previously tuned channel, press To turn the volume off completely, press To restore the volume and continue listening, press again 16 CCI140122_User_Guide 16 8/6/14 3:29 PM
using the guide Information About Shows Finding Shows by Channel Press to display the Channel Banner Press Press again to display extended program information Use the Press to close Use the to display the Guide to browse by channel to browse by page OR Enter a channel number using jump directly to that channel Press – to to view selected program PROGRAM GUIDE By pressing the right arrow button, you can view program listings up to 24 hours in advance 17 CCI140122_User_Guide 17 8/6/14
Controlling What Your Kids Can Watch Parental Controls let you control who watches certain TV programs. You can lock programs by rating or block whole channels so they cannot be viewed without the Parental Control PIN. Setting a Parental Control PIN Press Use to display the Menu to highlight “Settings.” Press “Parental Controls” will now be highlighted. Press to highlight “Set Parental Control PIN” and press Use the numbered keys – to set a four-digit PIN.
The Program Guide lets you restrict access to TV programs in several different ways. Setting Locking Status is the next step to turning on Parental Controls. Turning On Parental Control Settings Press Use to display the Menu to highlight “Settings.” Press “Parental Controls” will now be highlighted. Press “Parental Locks” will now be highlighted. Press PROGRAM GUIDE The “Locking Status” option will now be highlighted. Press The “ON” option in the center column will now be highlighted.
Controlling What Your Kids Can Watch (continued) After turning on Parental Controls, you have a number of different ways to restrict access to TV programs, including by channel, by rating and by content advisories. Customizing Parental Control Settings Press to display the Menu Use to highlight “Settings.” Press “Parental Controls” will now be highlighted. Press “Parental Locks” will now be highlighted.
Turning On Closed Captioning The Program Guide lets you adjust Closed Captioning settings. You can turn Closed Captioning on or off and you can customize how your Closed Captions look. You can turn Closed Captioning on or off by pressing on your remote control. Customizing Closed Captioning Control Settings NOTE: Closed Captioning must be turned on to access CC Options.
FAQs Q: D o I need to set my TV to a specific channel to use the Cox mini box? A: I f you used a coax cable to connect your TV to your mini box, you will need to set your TV to a specific channel to receive a signal from the mini box; your TV will need to be set to channel 3 or 4 depending on the area you live in. As a rule, set your TV to channel 3 first and be sure to set the switch on the back of your mini box to channel 3 to match the channel set on your TV.
Q: My remote isn’t working with my mini box. A: Make sure that you are pointing your remote directly at the mini box and not the TV screen. Try to see if your mini box changes channels. If this does not work, check to see if the red light on displays when you push any of the remote control buttons. If the red light does not display, the batteries for your remote may need to be changed.
Q: W hy do I get the message “No Signal” (or “Source Not Found” or “Weak Signal”)? A: T he mini box can be connected using a Coax or RF cable or an HDMI cable. If you are using an HDMI cable to connect your mini box to your TV, this message may indicate that the TV is not tuned to the proper input or source. If you have programmed the mini box remote to work with your TV, press on the mini box remote to change the input selection.
Q: W hy do I get the message “Temporarily Off Air” on my TV, or have no sound or video on some channels? A: C heck for loose connections from the wall to the mini box to make sure they are secure. The coax cable from the wall should be secured in the Cable from Wall port on the back of the mini box. Be sure to finger-tighten all cables coming from the wall, mini box, splitter, TV and other devices. Verify the cable is not damaged.
Thank you. At Cox, we care about the health of our planet as much as you do. That’s why we created this environmentally friendly package to send to all of our customers. All packaging materials are either recyclable, biodegradable or compostable. Let’s all work together to protect our planet from unnecessary waste and pollution. Recycle as much, as often and as responsibly as you can.
CCI140122_User_Guide 27 8/6/14 3:29 PM
1-866-961-0416 cox.