
User manual


Table Of Contents
- Important Information
- 1 Product Overview
- 2 Installation and Setup
- 3 Acoustic Measurement
- 4 Filter Design
- 5 Using the DDRC-88A audio processor
- 6 Optimizing gain structure
- 7 Additional Information
PRELIMINARY AND SUBJECT TO CHANGE
miniDSP Ltd, Hong Kong / www.minidsp.com / Features and specifications subject to change without prior notice 21
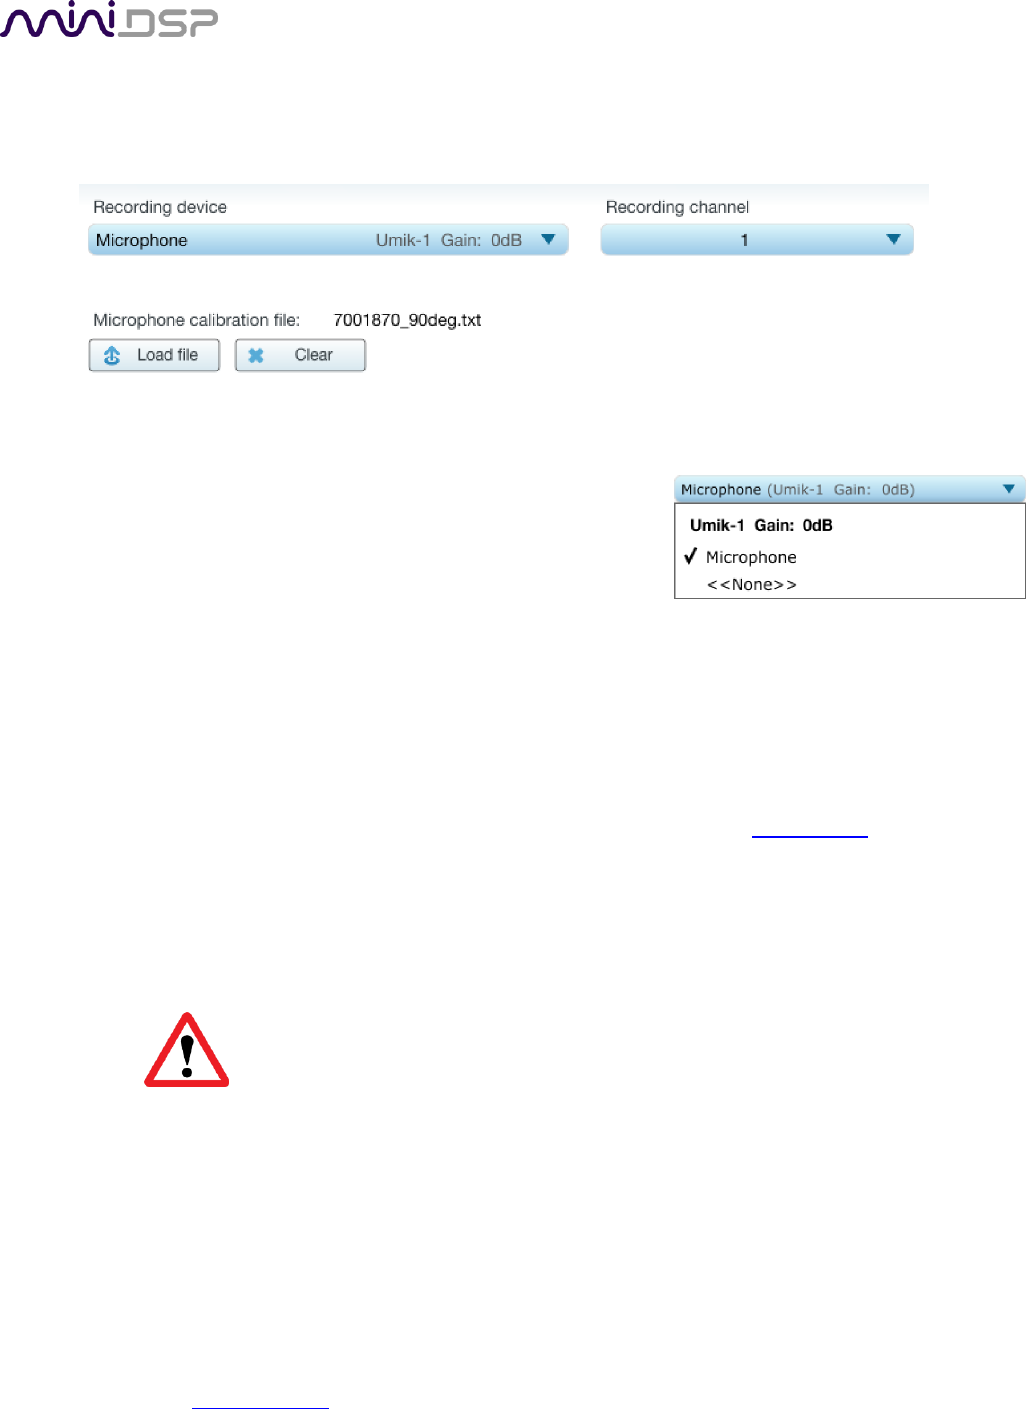
3.3.2 Mic Config tab
On the Mic Config tab, set the following parameters.
Recording device
Preset to the UMIK-1.
If UMIK-1 is not showing, ensure that the UMIK-1 is
connected securely to the computer via USB, and go back
to the Sound System tab and click on Rescan. Then use
the drop-down menu to select the “Microphone” item
underneath “UMIK-1”.)
Recording channel
Select 1 from the drop-down menu.
Microphone calibration file
Each UMIK-1 measurement microphone is individually calibrated to ensure accuracy. To
download the unique calibration file for your microphone, go to the UMIK-1 page and enter your
microphone's serial number. It is in the form xxx-yyyy and labelled on the microphone. Ensure
that you download both the regular calibration file and the “90-degree” calibration file. (The
latter is generated specifically for use with miniDSP’s multi-channel Dirac Live® processors such
as the DDRC-88A and the nanoAVR DL.)
Then click on the Load File button and select your calibration file.
For home theater applications, it is best to use the 90-degree calibration file as this is
created specifically for the vertical microphone orientation. This file is downloaded
with the suffix “_90deg” in the file name.
Once you have verified that this tab is correct, click the Proceed button.