
User manual


Table Of Contents
- Important Information
- 1 Product Overview
- 2 Installation and Setup
- 3 Acoustic Measurement
- 4 Filter Design
- 5 Using the DDRC-88A audio processor
- 6 Optimizing gain structure
- 7 Additional Information
PRELIMINARY AND SUBJECT TO CHANGE
miniDSP Ltd, Hong Kong / www.minidsp.com / Features and specifications subject to change without prior notice 24
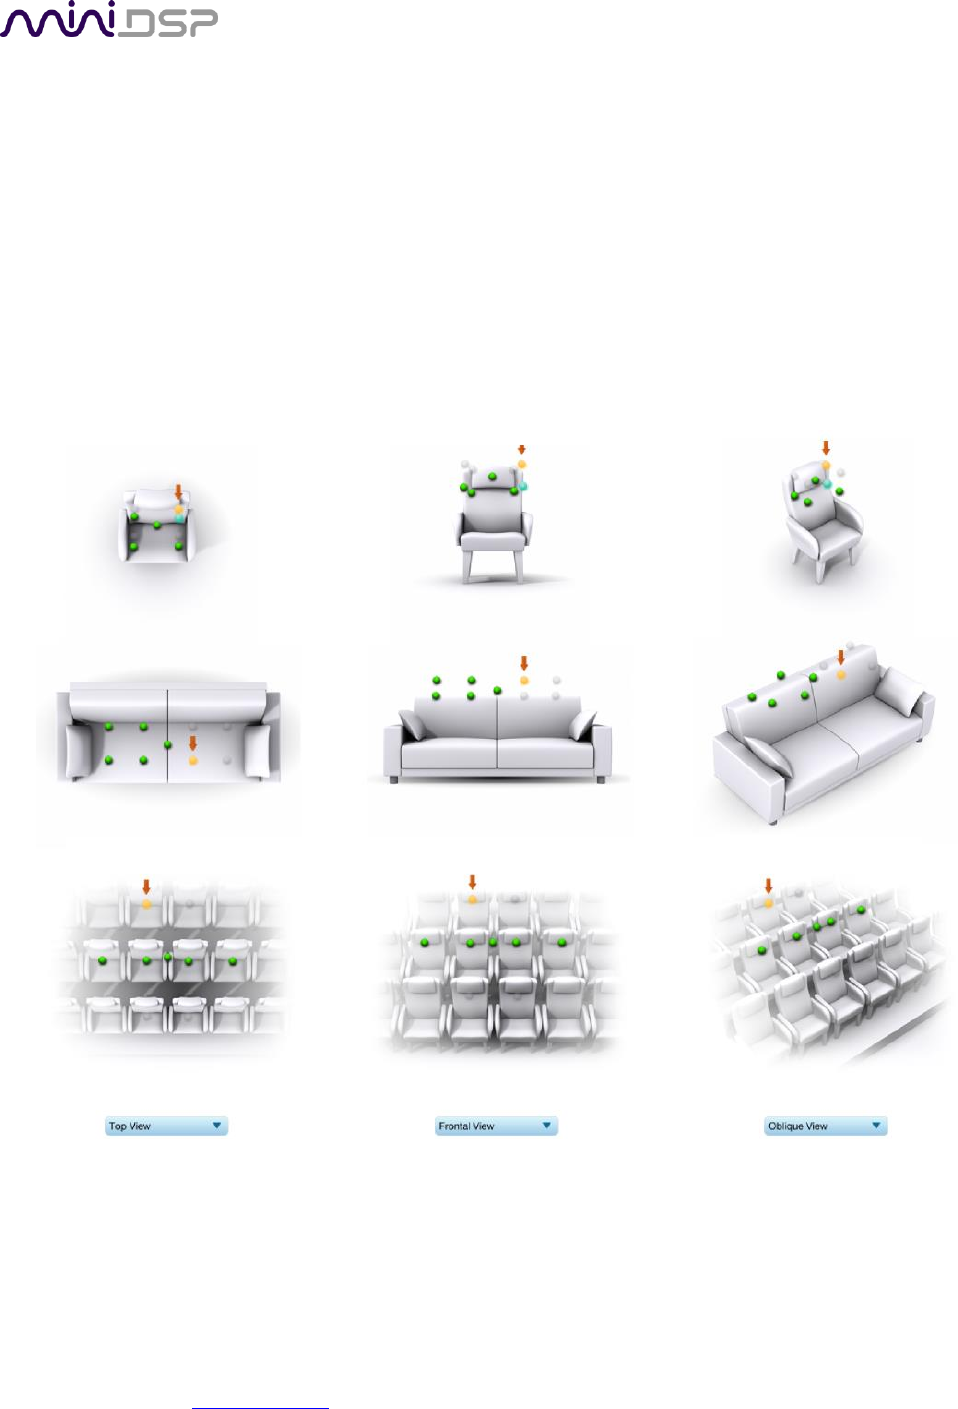
3.5.1 Listening environment
The Measurements tab presents three different listening environments as a visual guide to positioning the
microphone for each of the nine measurements: Chair, for a single listening seat; Sofa, for multiple listening
seats; and Auditorium, for a large dedicated home theater or larger venue with staggered seating. Use the icons
at the left of the screen to select the listening environment.
The center of the screen contains a pictorial representation of the selected listening environment, with dots
marking the recommended microphone locations. Completed measurements are shown in green, while the next
measurement to be done is highlighted in yellow and has a red arrow marker pointing to it. A drop-down menu
underneath selects three different views, which should be used to help you place the microphone in the correct
location.
It is important that measurements are performed over a sufficiently broad area. If the measurement area is too
small, the result may be over-correction that will sound dry and dull. If using the Chair listening area, spread the
microphone positions over a circle with a diameter of at least a meter (three feet). The microphone should be
varied in height from the central position by at least 30 cm (one foot) up and down. If using the Sofa or
Auditorium listening environment, spread the measurement locations over the full listening area and ensure
that microphone height varies by at least 30 cm (one foot) up and down.