7664-7714-01 CF2001P User Manual If used as a MicroPress printer, refer to the manual in the Minolta MicroPress Cluster Printing System server.
Energy Star® As an ENERGY STAR® Partner, we have determined that this machine meets the ENERGY STAR® Guidelines for energy efficiency. What is an ENERGY STAR® Product? An ENERGY STAR® product has a special feature that allows it to automatically switch to a “low-power mode” after a period of inactivity. An ENERGY STAR® product uses energy more efficiently, saves you money on utility bills and helps protect the environment.
Contents 1 2 Introduction 1.1 We Want You to Be a Satisfied Customer ..................................1-1 1.2 SAFETY INFORMATION................................................................1-1 Warning and Precaution Symbols...................................................1-2 Meaning of Symbols........................................................................1-2 WARNING.......................................................................................1-2 CAUTION .........................
Transporting the printer .................................................................. 2-4 Care of printer supplies .................................................................. 2-4 3 4 ii Before Making Prints 3.1 Components and Their Functions .............................................. 3-1 3.2 Parts Names and Their Functions .............................................. 3-4 Outside of Printer............................................................................
5 6 Control Panel Messages 5.1 Message List..................................................................................5-1 To load paper into Tray 1 (250-sheet multipurpose paper drawer) ..........................................5-4 To load paper into Tray 2 or the 500-sheet paper feed unit............5-5 To load paper into the large-capacity cabinet .................................5-7 5.2 When the Message “Xxxx toner nearly empty” Appears ..........5-8 To add toner..............................
iv CF2001P
1 Introduction 1 Introduction 1.1 We Want You to Be a Satisfied Customer Thank you for choosing a Minolta CF2001P. To ensure the best performance and effective use of your printer, this manual will provide information on the following topics: G Getting to Know Your printer. G Initial Steps . . . G Troubleshooting. Please read this manual carefully before using your printer and keep it handy at all times. Store the manual in the holder on the rear side of the printer. 1.
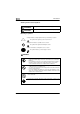
1 Introduction Warning and Precaution Symbols WARNING: CAUTION: Ignoring this warning could cause serious injury or even death. Ignoring this caution could cause injury or damage to property. Meaning of Symbols A triangle indicates a danger against which you should take precaution. This symbol warns against possible electrical shock. A diagonal line indicates a prohibited course of action. This symbol warns against dismantling the device. A black circle indicates an imperative course of action.
1 Introduction • Do not scratch, abrade, place a heavy object on, heat, twist, bend, pull on, or damage the power cord. Use of a damaged power cord (exposed core wire, broken wire, etc.) could result in a fire or breakdown. Should any of these conditions be found, immediately turn OFF the power switch, unplug the power cord from the power outlet, and then call your authorized service representative. • In principle, do not use an extension cord.
1 Introduction CAUTION • Do not use flammable sprays, liquids, or gases near this product, as a fire could result. • Do not leave a toner unit or drum unit in a place within easy reach of children. Licking or ingesting any of these things could injure your health. • Do not let any object plug the ventilation holes of this product. Heat could accumulate inside the product, resulting in a fire or malfunction.
1 Introduction Precautions for Routine Use • Do not store toner units, PC drum units, and other supplies and consumables in a place subject to direct sunlight and high temperature and humidity, as poor image quality and malfunction could result. • Do not attempt to replace the toner unit and PC drum unit in a place exposed to direct sunlight. If the PC drum is exposed to intense light, poor image quality could result. • Do not unpack a toner unit or PC drum unit until the very time of use.
1 Introduction USER INSTRUCTIONS FCC PART 15 - RADIO FREQUENCY DEVICES (For U.S.A. Users) NOTE: This equipment has been tested and found to comply with the limits for a Class A digital device, pursuant to Part 15 of the FCC Rules. These limits are designed to provide reasonable protection against harmful interference when the equipment is operated in a commercial environment.
Introduction 1 For users in countries subject to Class B regulations This device must be used with shielded interface (Parallel) cable and shielded network (10/100Base-T) cable. The use of non-shield cables is likely to result in interference with radio communications and is prohibited under CISPR 22 and local rules. For users in countries not subject to Class B regulations WARNING This is a Class A product.
Introduction 1 WARNING LABEL US: Europe: CAUTION Install this machine so that it can quickly be unplugged from the electrical outlet in case of an emergency. § The socket-outlet shall be installed near the machine and shall be easily accessible. LED Radiation Safety This product is a printer which operates by means of a LED (light emitting diodes) exposure system.
1 Introduction 1.3 Guide to Manuals Enclosed Manuals In order to refer to the User Manual quickly when necessary, store it near the printer. G User Manual The User Manual describes the functions, operating procedures, precautions, and basic troubleshooting for this printer. Before using this printer, be sure to read the User Manual thoroughly in order to ensure that the printer operates properly and is used efficiently.
1 Introduction Note (*May also appear as “Important” or “Tip”) Text highlighted in this manner contains useful information and tips to ensure safe use of the printer. 1 The number 1 as formatted here indicates the first step of a sequence of actions. 2 Subsequent numbers as formatted An illustration inserted here shows what operations must be performed. here indicate subsequent steps of a sequence of actions. formatted in this style pro? Text vides additional assistance.
Introduction 1.4 1 Explanation of Basic Concepts and Symbols The use of words and symbols in this manual are explained below. Paper Feeding During printing, paper is supplied from the right side of the printer and fed into the output tray on top or the output option at the left with the printed surface of the page facing down. The paper feed direction is shown by the arrows in the diagram below.
1 Introduction “Width” and “Length” Whenever paper dimensions are mentioned in this manual, the first value always refers to the width of the paper (shown as “A” in the illustration) and the second to the length (shown as “B”). Paper Orientation Lengthwise ( ) If the width (A) of the paper is shorter than the length (B), the paper has a vertical or portrait orientation, indicated by either “L” or .
1 Introduction 1.5 Features The Minolta CF2001P is a high-speed, high-quality full-color printer, combining the functionality and compactness best suited for any office.
1 1-14 Introduction CF2001P
2 Precautions 2 Precautions 2.1 Installation Precautions Installation site To ensure utmost safety and prevent possible malfunctions, install the printer in a location that meets the following requirements. - A location away from curtains, etc.
2 Precautions Space requirements To ensure easy printer operation, supply replacement, and maintenance, adhere to the recommended space requirements detailed below. 63.98 (1,625) 10.43 (265) 45.28 (1,150) 8.27 (210) 55 (1,397) 31 (787) 4 (100) 34.41 (874) 20 (510) Unit: inch (mm) 62.17 (1,579) 9.25 (235) 44.65 (1,134) 8.27 (210) 55 (1,397) 31 (787) 4 (100) 38.50 (978) 20 (510) Unit: inch (mm) Note Be sure to allow a clearance of 4 in.
2 Precautions 2.2 Operation Precautions Operating environment The environmental requirements for correct operation of the printer are as follows. G Temperature: 50°F (10°C) to 86°F (30°C) with fluctuations of no more than 18°F (10°C) within an hour G Humidity: 25% to 85% with fluctuations of no more than 20% within an hour Proper use To ensure the optimum performance of the printer, follow the precautions listed below.
2 Precautions CAUTION If the ventilation duct at the top of the printer becomes blocked, the inside of the printer will accumulate heat, resulting in a malfunction or fire. § Do not place any objects over the ventilation duct. CAUTION The area around the fusing unit is extremely hot. § Be careful not to touch any parts around the fusing unit, other than those indicated in this manual, in order to reduce the risk of burns.
2 Precautions CAUTION Precautions for handling toner: § Be careful not to spill toner inside the printer or get toner on your clothes or hands. § If your hands become soiled with toner, immediately wash them with soap and water. § If toner gets in your eyes, immediately flush them with water, and then seek professional medical advice.
2 2-6 Precautions CF2001P
Before Making Prints 3 Before Making Prints 3.1 Components and Their Functions 3 The following describes each of the units that the printer is composed of as well as their functions. G Printer Prints out the image received from the computer G 10-Mailbin sorter JS-1002 (optional) Feeds pages into the mailbin specified at the computer Note) If Fiery X3e has been installed, the 10-mailbin sorter is not operational.
3 Before Making Prints G Finisher FN-107/FN-108 (optional) finishes pages according to the mode (electronic sorting, stapling or hole-punching) selected at the computer, then feeds out the pages Note) If MicroPress PrintLink 2020m is installed, only FN107 is supported.
Before Making Prints 3 G Copy desk (optional) Used when the optional 10-mailbin sorter (JS-1002) or an optional finisher (FN-107/FN-108) is installed without an optional paper feed unit G Copy table (optional) Used when the optional 10-mailbin sorter (JS-1002) or an optional finisher (FN-107/FN-108) is installed with two optional paper feed units installed G Printer controller Fiery X3e Internal printer controller that allows the printer to be used as a color printer on a network G Printer controll
3 Before Making Prints 3.2 Parts Names and Their Functions Outside of Printer 1 6 2 7 3 8 4 9 5 10 12 11 13 14 * The copy desk shown installed in the illustration is optional.
3 Before Making Prints No. Part Name Description 1 Print output tray Holds printouts fed from the printer 2 Toner supply door Opened when adding toner 3 Front door Opened when servicing the printer. 4 Tray 1 Holds 250 sheets of paper The paper size can be adjusted freely. Special paper can be used. See p. 4-7. 5 Tray 2 Holds 500 sheets of paper The paper size can be adjusted freely. See p. 4-12. 6 Power switch Used to turn the printer on and off See p. 3-14.
3 Before Making Prints Inside of Printer 1 4 2 3 3-6 No.
3 Before Making Prints Supplies and Parts 1 3 2 4 5 7 CF2001P 8 6 9 No.
3 Before Making Prints Duplex Unit (Optional) 1 3-8 No.
3 Before Making Prints 10-Mailbin Sorter (Optional) 3, 4 1 2 CF2001P No.
3 Before Making Prints Finisher (Optional) 2 1 3 4 5 3-10 No. Part Name Description 1 Upper cover Opened when clearing paper misfed within the finisher 2 Upper paper output tray Collects printouts on special paper. (overhead projector transparencies, thick paper 1, thick paper 2, and postcards) 3 Lower paper output tray Collects printouts on normal paper.
3 Before Making Prints Paper Feed Unit (Optional) 1 2 3 CF2001P No. Part Name Description 1 Side door Opened when clearing paper misfeeds 2 Tray 3 3 Tray 4 Holds 500 sheets of paper The paper size can be adjusted freely. As many as two units can be installed. See p. 4-12.
3 Before Making Prints Large-Capacity Cabinet (Optional) 1 2 No. Part Name Description 1 Side door Opened when clearing paper misfeeds 2 Large-Capacity Cabinet Holds 2,500 sheets of paper See p. 4-14. Printer Controller Fiery X3e For more details, refer to the manual of the printer controller. Printer Controller MicroPress PrintLink 2020m For more details, refer to the manual of the printer controller.
Before Making Prints 3.3 3 Names of Control Panel Parts and Their Functions Names of Control Panel Parts and Their Functions 8 1 Ready Message 2 3 4 CF2001P Menu Set Cancel 5 6 7 No. Part Name Description 1 Ready light • Off when the Fiery X3e is off or starting up • Lights up in green to indicate the normal operating condition • Flashes green when the Fiery X3e is proceeding to RIP or printing a job, or communicating with a remote computer.
3 3.4 Before Making Prints Power Switch Turning the printer on and off To turn the printer on § Set the power switch to “1”. To turn the printer off § Set the power switch to “2”. Note Do not turn off the printer while it is printing, otherwise a paper misfeed may occur. Make sure that all print operations are finished before turning off the printer.
Before Making Prints 3 Turning On the Printer After the printer is turned on, the controller is initialized. After the controller has finished warming up, the Ready light lights up in green and “Info XXXX” appears in the display. However, a print operation is not performed until the printer has finished warming up (after about 5 minutes at normal room temperature (68 °F/20 °C)). Ready Message Info ×××× Menu Set Cancel Note “XXXX” indicates the name specified when the controller was set up.
Before Making Prints 3 Turning Off the Printer Note If Fiery X3e is installed, be sure to shut down the controller system before turning off the printer. If MicroPress PrintLink 2020m is installed, turn off the printer by performing just step 5. To turn off the printer 1 Check that “Info XXXX” appears in the display, and then press the [Menu] button in the control panel. Ready Message Info ×××× Menu Set Cancel 2 Press L or M until “Functions Shut Down” appears, and then press the [Set] button.
Before Making Prints 3 4 When the system has finished shutting down, “Safe to power off the system” appears. Ready Message Safe to power off the system Menu Set Cancel 5 Set the power switch to “2”.
Before Making Prints 3 3.5 Total Counter The total counter can be printed out by following the procedure below. To print the total counter 1 Check that “Info XXXX” appears in the display, and then press the [Menu] button in the control panel. Ready Message Info ×××× Menu Set Cancel 2 Press L or M until “Function Print Pages” appears, and then press the [Set] button.
Before Making Prints 3 4 The total counter is printed out. (Refer to page 4-7 for Loading Paper.) 2001 6 26 16 29 Serial # Total Check Full Color 0 0 0 0 Print Large 71 0 10 0 G.Total CF2001P Black Copy Large Dup. Copy 0 Dup.
3 3-20 Before Making Prints CF2001P
4 Print Paper 4 Print Paper 4.1 Paper Specifications Use paper that meets the following specifications. Paper Types Special Paper Paper Types Standard Paper Weight (lbs.) Thick Paper1 Thick Paper2 17.02 lbs. to 23.94 lbs. 24. 21 lbs. to 43.36 lbs. 43.62 lbs. to 55.59 lbs.
4 Print Paper Paper Sizes Standard paper: 12.25 × 18L*3 11 × 17 L 11 × 14 L LegalL LetterL LetterC ExecutiveL 2 2 2 2 2 2 2 Tray 2 — 2 2 2 2 2 — Manual bypass tray*1 2 2 2 2 2 2 2 Paper Feed Unit*2 — 2 2 2 2 2 — Large-Capacity Cabinet*2 — — — — — 2 — ExecutiveC 5.5 × 8.5L 5.5 × 8.
4 Print Paper A4C A5L A5C A6L*4 Tray 1 2 2 2 2 Tray 2 2 — — — Manual bypass tray*1 2 2 2 2 Paper Feed Unit*2 2 — — — Large-Capacity Cabinet*2 2 — — — Paper Size Paper Source, Etc. * 1: When Fiery X3e is installed, printing from the manual bypass tray is not supported. 2: The paper feed unit and large-capacity cabinet are optional.
4 Print Paper Paper capacity: Paper Type Paper Source, Etc. Special Paper Standard Paper Thick Paper1 Thick Paper2 Overhead Projector Transparencies Postcards 20 sheets — 20 sheets 20 sheets Tray 1 250 sheets Tray 2 500 sheets — — — — Manual bypass tray*1 1 sheet 1 sheet 1 sheet 1 sheet 1 sheet Paper Feed Unit*2 500 sheets — — — — Large-Capacity Cabinet*2 2,500 sheets — — — — * 1: When Fiery X3e is installed, printing from the manual bypass tray is not supported.
4 Print Paper Paper Types To Be Avoided The following types of paper should not be used, otherwise decreased print quality, paper misfeeds or damage to the printer may occur.
4 4.2 Print Paper Print Area When using a printer controller to print from a computer, any part of the original image within the areas indicated below is not printed. The sizes of the paper margins differ according to the controller that is used. B A C Paper output direction C 4.3 Fiery X3e A: 0.2 in. (5mm) B: 0.2 in. (5 mm) C: 0.12 in. (3 mm) MicroPress PrintLink 2020m A: 0.2 in. (5 mm) B: 0.2 in. (5 mm) C: 0.2 in. (5 mm) Paper Storage Observe the following precautions when storing the paper.
4 Print Paper 4.4 Loading Paper To load paper into Tray 1 (250-sheet multipurpose tray) 1 Pull out the paper drawer for Tray 1. ? Has the paper take-up roller been touched? § Be careful not to touch the surface of the paper take-up roller with your hands. If the roller has been touched, wipe it with a dry cloth. Paper takeup roller 2 Press down on the paper-lifting plate until it locks into place. 3 Slide the lateral guides to fit the size of paper to be loaded.
4 Print Paper H For “12-1/4 × 18” or A3Wide paper, adjust the trailing-edge guides as shown in the illustration. 4 Load the paper into the drawer so that the front side of the paper (the side facing up when the package was unwrapped) faces up. the paper been loaded cor? Has rectly? If the paper is not loaded correctly, a paper misfeed may occur. 4-8 § Do not load so much paper that the top of the stack is higher than the Ä mark.
4 Print Paper ? Are postcards loaded? § When loading postcards, load them as shown. § Do not load postcards crosswise, as shown. the recommended overhead projector transparencies (MI? Are NOLTA CF300D) loaded? § CF2001P When loading the recommended overhead projector transparencies (MINOLTA CF300D), load them as shown in the illustration.
4 Print Paper 5 Slide the lateral guides against the edges of the paper. H Make sure that the paper is not curled when it is loaded. Check that the lateral guides are pushed up against the edges of the paper. 6 Close the paper drawer. 7 Turn the media type selection dial on the drawer to the setting for the type of paper loaded. postcards loaded into ? Are Tray 1? § 4-10 If postcards (4 × 6 or A6) are loaded, the paper type setting cannot be selected using the media type selection dial on the drawer.
Print Paper 4 To set the paper size for Tray 1 1 Check that “Info XXXX” appears in the display, and then press the [Menu] button in the control panel. Ready Message Info ×××× Menu Set Cancel 2 Press L or M until “Engine Setup” appears, and then press the [Set] button. Ready Message Functions Engine Setup Menu Set Cancel 3 Press L or M until the desired paper size appears, and then press the [Set] button. Ready Message 1st Tray Setup LETTER Menu Set Cancel 4 Press the [Cancel] button.
4 Print Paper To load paper into Tray 2 or the 500-sheet paper feed unit 1 Pull out the paper drawer. Paper takeup roller the paper take-up roller ? Has been touched? § Be careful not to touch the surface of the paper take-up roller with your hands. If the roller has been touched, wipe it with a dry cloth. 2 Press down on the paper-lifting plate until it locks into place. 3 Remove the trailing-edge guide, and then re-install it for the size of paper to be loaded.
4 Print Paper 5 Load the paper into the drawer so that the front side of the paper (the side facing up when the package was unwrapped) faces up. the paper been loaded cor? Has rectly? If the paper is not loaded correctly, a paper misfeed may occur. § Do not load so much paper that the top of the stack is higher than the Ämark. § Special paper cannot be fed from Tray 2 or optional paper feed units. If you wish to make prints onto special paper, feed it through Tray 1.
4 Print Paper To load paper into the large-capacity cabinet 1 Pull out the paper drawer. 2 Load paper into the right side of the drawer so that the front side of the paper (the side facing up when the package was unwrapped) faces up. the paper been loaded cor? Has rectly? If the paper is not loaded correctly, a paper misfeed may occur. 4-14 § Make sure that the paper is not curled when it is loaded. § Do not load so much paper that the top of the stack is higher than the Ämark.
4 Print Paper 3 Load paper into the left side of the drawer so that the front side of the paper (the side facing up when the package was unwrapped) faces up. the paper been loaded cor? Has rectly? If the paper is not loaded correctly, a paper misfeed may occur. § Make sure that the paper is not curled when it is loaded. § Do not load so much paper that the top of the stack is higher than the Ämark. § Special paper cannot be fed from Tray 2 or optional paper feed units.
4 Print Paper To load paper into the manual bypass tray Paper can be fed manually through the manual bypass tray if you wish to print onto paper that is not loaded into a drawer or if you wish to print onto special paper, such as overhead transparencies, postcards, or thick paper 1 or 2. Note When Fiery X3e is installed, printing from the manual bypass tray is not supported. 1 Open the manual bypass tray.
4 Print Paper ? Is a postcard loaded? § When loading a postcard, load it as shown. § Do not load the postcard crosswise, as shown. the recommended overhead projector transparency (MINOLTA ? IsCF300D) loaded? § CF2001P When loading the recommended overhead projector transparency (MINOLTA CF300D), load it as shown in the illustration.
4 4-18 Print Paper CF2001P
5 Control Panel Messages 5 Control Panel Messages 5.1 Message List When a message appears in the control panel display, refer to the section for details about the message and the action to be taken. Note The display window only displays two lines of a message at one time. To view messages longer than two lines, press Ä to display the next line of the message. Message CF2001P Cause Action Busy The printer is printing. Wait for a while.
5 5-2 Control Panel Messages Message Cause Action Load xx OHP in tray1 Xx-size overhead projector transparencies is not loaded into tray 1. Load xx-size overhead projector transparencies into tray 1. Load xx in any tray Xx-size paper has not been loaded into any tray. Load xx-size paper into any tray. Load xx Thick 1 in tray1 Xx-size thick 1 is not loaded into tray 1. Load xx-size thick 1 into tray 1. Near trouble ## / ## Some malfunction occurred in the printer.
5 Control Panel Messages CF2001P Message Cause Action To print, clear 1st tray The upper paper output tray of the finisher is full of paper. Remove paper from the upper paper output tray. To print, clear elevator tray The lower paper output tray of the finisher is full of paper. Remove paper from the lower paper output tray. To print, clear mail bin # The mail bin # of the 10mailbin sorter is full of paper. Remove paper from the mail bin #.
5 Control Panel Messages To load paper into Tray 1 (250-sheet multipurpose paper drawer) 1 Pull out the paper drawer. ? Has the paper take-up roller been touched? § Be careful not to touch the surface of the paper take-up roller with your hands. If the roller has been touched, wipe it with a dry cloth. Paper takeup roller 2 Press down on the paper-lifting plate until it locks into place.
5 Control Panel Messages 4 Slide the lateral guides against the edges of the paper. H Make sure that the paper is not curled when it is loaded. Check that the lateral guides are pushed up against the edges of the paper. 5 Close the paper drawer. To load paper into Tray 2 or the 500-sheet paper feed unit 1 Pull out the paper drawer. the paper take-up roller ? Has been touched? § Paper takeup roller Be careful not to touch the surface of the paper take-up roller with your hands.
5 Control Panel Messages 3 Load the paper into the drawer so that the front side of the paper (the side facing up when the package was unwrapped) faces up. you loaded too much pa? Have per into the drawer? § Do not load so much paper that the top of the stack is higher than the Ä mark. ? Has the paper been loaded correctly? § Make sure to align the stack of paper.
Control Panel Messages 5 To load paper into the large-capacity cabinet 1 Pull out the paper drawer. 2 Load paper into the right side of the drawer so that the front side of the paper (the side facing up when the package was unwrapped) faces up. you loaded too much pa? Have per into the drawer? § Do not load so much paper that the top of the stack is higher than the Ä mark.
5 5.2 Control Panel Messages When the Message “Xxxx toner nearly empty” Appears Note Do not refill the toner until the message indicating that “Xxxx toner nearly empty” appears on the control panel display. In addition, do not refill the toner of any color other than the one indicated in the message on the control panel. CAUTION Be careful not to spill toner inside the printer or get toner on your clothes or hands. § If toner gets on your hands, wash them using water and a neutral soap.
Control Panel Messages 5 To add toner 1 Open the toner supply door, and then open the toner hopper lid for the toner that you wish to refill. H For example: If the yellow toner is empty, open the leftmost toner hopper lid. 2 With the opening of the new toner bottle pointing up, hit the bottom of the bottle against a strong surface, such as a desk or table, four or five times from a height of about 4 in. (10 cm).
5 Control Panel Messages 4 With the rounded side (marked with “▼”) of the bottle mouth facing towards you, place the toner bottle on top of the hopper, and then press down on the bottle until it snaps into place. 5 Fully pull the toner hopper shutter out toward you. Pulling out the toner hopper shutter allows the toner to fill the toner hopper. Check that all of the toner has emptied out of the toner bottle and into the hopper, which may take a while.
Control Panel Messages 5 7 Tilt the toner bottle backward, and then pull the opening of the bottle up and toward you to remove it. 8 Close the toner hopper lid, and then close the toner supply door.
5 5.3 Control Panel Messages When the Message “No xxxx staples” Appears Note Be sure to replace the staple cartridge only after the message “No xxxx staples” appears. Injuries may occur if the staple cartridge is removed before the message appears. To replace the staple cartridge 1 Slide the finisher away from the printer. 2 If finisher FN-107 is installed, open right-side door FN7. 3 Turn the dial to the left in order to position the stapler at the center.
5 Control Panel Messages 4 Pull the staple holder out toward you. H Finisher FN-107 Back Staple Front Staple H Finisher FN-108 Back Staple finisher FN-107 is equipped with two staple holders, which ? Since staple holder should be pulled out? § The message on the control panel indicates which staple holder should be pulled out. 5 (Finisher FN-107) Remove the empty staple cartridge from the staple holder.
5 Control Panel Messages 6 (Finisher FN-107) Insert the new staple cartridge into the staple holder, and then carefully remove the stopper. 1 2 3 7 (Finisher FN-108) Remove the empty staple cartridge from the staple holder. 8 (Finisher FN-108) Insert the new staple cartridge into the staple holder, and then carefully remove the stopper.
Control Panel Messages 5 9 Insert the refilled staple holder until it locks into place. H Finisher FN-107 H Finisher FN-108 10 If finisher FN-107 is installed, close right-side door FN7. 11 Slide the finisher back against the printer.
Control Panel Messages 5 5.4 Clearing a Paper Misfeed and Staple Jam If a paper misfeed or a staple jam occurs during printing, the message shown below appears. Ready Message Alert Paper jam at Menu Set Cancel Press ▼ once and check where the paper misfeed occurred. Ready Message J× Menu Set Cancel Follow the procedure below to clear the misfed paper or the jammed staples.
5 Control Panel Messages JI JI JH JH JF JG JA JF JG JE JA JB JE JB JC JC JD JJ JJ JI JL JI JL JH JH JF JE JA JF JG JG JE JA JB JB JC JC JD JJ JL JH JK JJ JL JI JI JH JK JF JG JA JF JG JE JA JB JE JB JC JC JD Message Description Message Description JA Paper drawers p. 5-21 JB Paper drawers p. 5-21 JC Paper drawers p. 5-21 JD Paper drawers p. 5-21 JE Manual bypass tray p. 5-18 JF Duplex unit p. 5-20 JG Printer p. 5-23 JH Printer p.
5 Control Panel Messages To clear a paper misfeed in the manual bypass tray CAUTION Decreased print quality may result if the surface of the image transfer belt at the bottom of the printer’s fusing unit is touched. § Be careful not to touch the surface of the image transfer belt at the bottom of the printer’s fusing unit. 1 Pull up the lock release lever to open the right-side door. 2 Carefully pull out the paper.
Control Panel Messages 5 3 Close the right-side door.
5 Control Panel Messages To clear a paper misfeed in the duplex unit 1 Open the duplex unit door. 2 Carefully pull out the paper. 3 Close the duplex unit door.
Control Panel Messages 5 To clear a paper misfeed in the paper feed unit 1 Open the lower right-side door. 2 Turn the green wheels to feed the paper so that it can be easily removed. 3 Carefully pull out the paper. ? Is the large-capacity cabinet installed? § CF2001P While turning the green dial in the direction of the arrow, carefully pull out the paper.
5 Control Panel Messages 4 Close the lower right-side door. 5 Pull out the paper drawer being used, and then remove any paper remaining in the drawer. 6 Load the paper in the drawer again, and then close the drawer. the paper take-up roller ? Has been touched? § 5-22 Be careful not to touch the surface of the paper take-up roller with your hands. If the roller has been touched, wipe it with a dry cloth.
Control Panel Messages 5 To clear a paper misfeed in the printer CAUTION Decreased print quality may result if the surface of the image transfer belt at the bottom of the printer’s fusing unit is touched. § Be careful not to touch the surface of the image transfer belt at the bottom of the printer’s fusing unit. CAUTION The area around the fusing unit is extremely hot. § Touching anything other than the paper within the area around the fusing unit may result in burns.
5 Control Panel Messages 2 Grasp the upper right-side door as shown, and then carefully open the door completely while making sure to support it. upper right-side door be? Isingtheopened correctly? § Be sure to support the door while carefully opening it; otherwise, it may be damaged. 3 While moving the green lever on the inside of the upper right-side door in the direction of the arrow, carefully pull out the paper. 4 Carefully pull out the paper.
Control Panel Messages 5 6 Move the levers (one on each end of the oil-coating unit) in the direction of the arrows and carefully pull out the paper. 7 While holding the levers on the ends of the oil-coating unit, move the unit back to its original position. 8 Fully move the two lock release levers for the oil-coating unit in the direction of the arrows. 9 Close the upper right-side door. 10 Close the right-side door. CAUTION The area around the fusing unit is extremely hot.
5 Control Panel Messages To clear a paper misfeed in finisher FN-107/FN-108 CAUTION Metallic parts inside Misfeed Clearing Guide [FN1] are very hot. (Part indicated in Step 10.) § Do not touch anything but the paper to prevent you from getting burned. 1 Slide the finisher away from the printer. 2 Open the cover of the horizontal transport unit.
Control Panel Messages 5 3 Remove any paper, and then close the cover of the horizontal transport unit. 4 If finisher FN-107 is installed, open right-side door FN7. 5 While holding open misfeed clearing guide FN8 (for finisher FN-107) or FN7 (for finisher FN-108), remove any paper.
5 Control Panel Messages 6 If finisher FN-107 is installed, close right-side door FN7. 7 Open front door FN4. 8 Turn knobs FN5 at the same time to feed out any paper. 9 Close front door FN4. 10 Open upper cover FN1. 11 While holding misfeed clearing guide FN2 open, remove any paper.
Control Panel Messages 5 12 While holding misfeed clearing guide FN3 open, remove any paper. 13 Close upper cover FN1. 14 While holding misfeed clearing guide FN6 open, remove any paper. 15 Slide the finisher back against the printer. Note Be careful about a protrusion on the backside of the horizontal transport unit cover. It can hurt you! (Part indicated in Step3.
5 Control Panel Messages To clear a paper misfeed in the 10-mailbin sorter 1 Slide the 10-mailbin sorter away from the printer. 2 Remove any paper from the mailbins. 3 Open the cover of the horizontal transport unit.
Control Panel Messages 5 4 Remove any paper, and then close the cover of the horizontal transport unit. 5 Open the upper door and the lower door.
5 Control Panel Messages 6 Remove any paper. 7 Close the upper door and the lower door. 8 Slide the 10-mailbin sorter back against the printer. Note Be careful about a protrusion on the backside of the horizontal transport unit cover. It can hurt you! (Part indicated in Step 4.
Control Panel Messages 5 To clear jammed staples 1 Slide the finisher away from the printer. 2 If finisher FN-107 is installed, open right-side door FN7. 3 Turn the dial to the left in order to position the stapler at the center.
5 Control Panel Messages 4 Pull the staple holder out toward you. H Finisher FN-107 Back Staple Front Staple H ? § Finisher FN-108 Since finisher FN-107 is equipped with two staple holders, which staple holder should be pulled out? The message on the control panel indicates which staple holder should be pulled out. Back Staple 5 Push the staple holder guide up, and then pull out one sheet of staples. 6 Move the guide back to its original position.
Control Panel Messages 5 7 Insert the staple holder until it locks into place. H Finisher FN-107 H Finisher FN-108 8 If finisher FN-107 is installed, close right-side door FN7. 9 Slide the finisher back against the printer. the staples still jammed, ? Are even after performing the above procedure? § CF2001P Contact a qualified technical representative.
Control Panel Messages 5 5.5 When the Message “Service Code Cxxxx” Appears When the message shown below appears in the control panel display, a malfunction has occurred within this printer. Ready Message Alert Service Code Menu Set Cancel Press ▼ once and check which error code is displayed. Ready Message C×××× Menu Set Cancel If this message appears, contact your technical representative and inform them of the error code that is indicated.
Control Panel Messages 5.6 5 When the Message “xxxx unit near life limit” Appears When it is almost time to replace a unit within this printer, a message like the one shown below appears in the control panel. When the message appears, replace the unit according to your maintenance agreement. Note The display window only displays two lines of a message at one time. To view messages longer than two lines, press Ä to display the next line of the message.
Control Panel Messages 5 5.7 When the Message “Near troble XX/XX” Appears When the message shown below appears in the control panel display, image stabilization and printing functions for the printer have become unstable. Ready Message Alert Near trouble Menu Set Cancel Press ▼ once and click which error code is displayed. Ready Message ×× / ×× Menu Set Cancel If this message appears, contact your technical representative and inform them of the error coad that is indicated.
6 Troubleshooting 6 Troubleshooting 6.1 Improving Print Quality Symptom Cause Action The image is too light. The setting in the printer driver is not set properly. Adjust the setting in the printer driver to the desired level. The paper loaded in the tray is damp. Replace the old paper with fresh dry paper. p. 4-7 The toner hopper is running out of toner. Refill the toner. p. 5-8 The imaging unit may be defective. Contact your tecnical representative.
6 Troubleshooting Symptom Cause Action Inconsistent image density. The imaging unit requires replacement. Contact your technical representative. The image transfer belt unit requires replacement. White lines. The imaging unit requires replacement. Contact your technical representative. The image transfer belt unit requires replacement. Black (or color) stripes The printer’s internal paper path is dirty. Run several prints to flush out the debris. The imaging unit requires replacement.
6 Troubleshooting Symptom Cause Action Blank pages The imaging unit requires replacement. Contact your technical representative. Paper wrinkles during printing. The paper being used is not compatible with the printer. See “4.1 Paper Specifications” for compatible types of paper. p. 4-1 Paper is not loaded properly in the tray. See “4.4 Loading Paper”. p. 4-7 The fusing unit requires replacement. Contact your technical representative. The paper loaded in the tray is damp.
6 6-4 Troubleshooting CF2001P
7 Appendix 7 Appendix 7.1 Specifications Printer CF2001P Specification CF2001P Type Desktop Photo conductor OPC Printing system Digital Full-Color Printing Developing system NMT(New Micro-toning) system Fusing system Belt-fixing Resolution 600 dpi × 600 dpi Paper types Standard paper (17.02 to 23.94 lbs.(64 to 90 g/m 2)), thick paper 1*1(24.21 to 43.36 lbs. (91 to 163 g/m2)), thick paper 2*2(43.62 to 55.59 lbs.
7 Appendix Specification First print Full color: Less than 15 seconds Black: Less than 12 seconds Print speed Full color/Black: LetterC/A4C: 20 sheets/min. LetterL/A4L: 14 sheets/min. A3L/11 × 17L: 10 sheets/min. Memory 304 MB Power Requirements US: 110/120/127 V; 15 A, 60 Hz, Europe: 220–240 V; 10 A, 50/60 Hz Power consumption US: Less than 1.3 kW Europe: Less than 1.5 kW Dimensions W: 23.46 in. (596 mm) D: 28.74 in. (730 mm) H: 20.59 in. (523 mm) Space requirements W: 25.28 in.
7 Appendix Large-capacity Cabinet PF-117 Specification Paper types Standard paper (17.02 to 23.94 lbs. (64 to 90 g/m2)) Paper sizes US: LetterC Europe: A4C Capacity 2500 sheets (21.28 lbs. (80 g/m2)) Power source Supplied from printer Power consumption Less than 45 W Dimensions W: 21.06 in. (535 mm) D: 22.36 in. (568 mm) H: 11.18 in. (284 mm) Weight About 36.82 lbs. (16.7 kg) Duplex Unit AD-14 Specification CF2001P Paper types Standard paper (17.02 to 23.94 lbs.
7 Appendix 10-Mailbin Sorter JS-1002 Specification 7-4 No. of bins 10 Paper types • Bin 1: Standard paper (17.02 to 23.94 lbs. (64 to 90 g/m2)), thick paper (24.21 to 55.59 lbs. (91 to 209 g/m2)), overhead projector transparencies, postcards • Bin 2 to Bin 10: Standard paper (17.02 to 23.94 lbs. (64 to 90 g/m2)) Paper sizes • Bin 1: 12.25 × 18L*1, 11 × 17L, 11 × 14L, LegalL, LetterL, LetterC, ExecutiveL, ExecutiveC, 5.5 × 8.5L, 5.5 × 8.
7 Appendix Finisher FN-107 Specification CF2001P No. of bins 2 (Upper paper output tray, Lower paper output tray) Paper types • Upper paper output tray Standard paper (17.02 to 23.94 lbs. (64 to 90 g/m2)), thick paper (24.21 to 55.59 lbs.(91 to 209 g/m2)), overhead projector transparencies, postcards • Lower paper output tray Standard paper (17.02 to 23.94 lbs. (64 to 90 g/m2)) Paper sizes • Upper paper output tray 12.
7 Appendix Finisher FN-108 Specification 7-6 No. of bins 2 (Upper paper output tray, Lower paper output tray) Paper types • Upper paper output tray Standard paper (17.02 to 23.94 lbs. (64 to 90 g/m2)), thick paper (24.21 to 55.59 lbs.(91 to 209 g/m2)), overhead projector transparencies, postcards • Lower paper output tray Standard paper (17.02 to 23.94 lbs. (64 to 90 g/m2)) Paper sizes • Upper paper output tray 12.25 × 18L*1, 11 × 17L, 11 × 14L, LegalL, LetterL, LetterC, ExecutiveL, ExecutiveC, 5.
7 Appendix 7.2 Care of the Printer Cleaning Turn the printer off before cleaning it. Housing cover § Clean the surface of the housing cover by wiping it with a soft cloth dampened with a mild household detergent. Control panel § Clean the control panel by wiping it with a soft, dry cloth. CAUTION Incorrectly cleaning the control panel may damage them. § Never use mild household detergent or glass cleaner to clean the control panel.
7 Appendix 7-8 CF2001P
8 Index 8 Index Numerics 10-Mailbin sorter ...................................................................3-1, 3-9 , 7-4 500-sheet Paper Feed Unit ................................................................. 7-2 C Care of the Printer ...............................................................................7-7 Control panel ....................................................................................... 3-5 Cancel button ..............................................................
8 Index L Large-capacity cabinet ....................................................... 3-2 , 3-12, 7-3 LED cleaning tool ................................................................................ 3-7 Left-side door ...................................................................................... 3-5 Lower right-side door .......................................................................... 3-5 M Manual bypass tray .........................................................................
8 Index Paper feed unit .............................................................................5-21 Printer .......................................................................................... 5-23 Paper orientation ...............................................................................1-12 Paper sizes ..........................................................................................4-2 Paper types ................................................................................
8 Index W Waste toner bottle ...............................................................................
Copyright 2001 MINOLTA CO., LTD. The information contained in this manual is subject to change without notice to incorporate improvements made on the product or products the manual covers. 2001. 8 MINOLTA CO., LTD.