
Operating Instructions


40
5.3 Using the Special Camera Functions
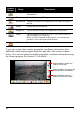
Using the Continuous Shot Function
The program offers a Continuous Shot function so each release of the shutter takes
four photos in a row.
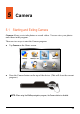
1. Tap
on the control panel.
2. The
icon will appear in the top right corner of the screen to indicate that
the Continuous Shot function is enabled. To take photos, follow the
instructions as described in the “Taking a Photo” section.
NOTE: Photos taken using Continuous Shot are limited to 640 x 480 resolutions.
3. Once the Continuous Shot function is enabled, it will remain active until you
turn it off or exit the program. To stop using this function, turn it off by
tapping the
button again.
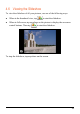
Using the Timer
The program offers the Timer function so a photo is only taken 5 or 10 seconds
after you release the shutter.
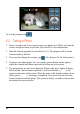
1. Tap
on the control panel. (The Timer can be set to 5 or 10 seconds. See
Section 5.4 for details.)
2. The
icon will appear in the top right corner of the screen to indicate that
the Timer function is enabled. To take photos, follow the instructions as
described the “Taking a Photo” section. The program will take a photo after
the set delay.
3. Once the Timer function is enabled, it will remain active until you turn it off
or exit the program. To stop using this function, turn it off by tapping the
button again.