
Operating Instructions


77
Important Notes
Due to a variety of business card formats, font styles and sizes, the way some
addresses are broken up on the card, or background artwork, the Card Scanner
program may not always recognize business cards perfectly.
After scanning your card and saving the data, it is important that you open
Contacts and use the edit function to make sure that the various address fields
contain the correct data.
For the navigation software to navigate to an address in Contacts, there should be
no Suite #, Apartment # or other additional information on the Street Address line,
as these may prevent correct navigation. You might consider saving the additional
Suite, Apartment or other numbers to a different field such as the “Department”
field.
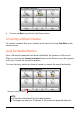
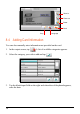
8.3 Manually Scanning a Specific Area
If there is missing or incorrect data that needs to be re-scanned, you can manually
select the area to be scanned. Only one part can be scanned at a time.
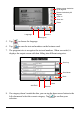
1. In the output screen, tap
to open the Re-scan screen. The black boxes
around the text/number indicate fields that have already been recognized.
2. You can zoom in or drag the screen to the appropriate area. You may also
need to specify a language.
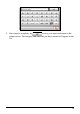
3. Tap
.
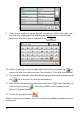
4. For the area you wish to re-scan, select its category from the categories list
and tap
.
5. Use your fingertip to drag and create a border around the part that you wish to
re-scan. This border will be in blue and once you complete dragging, the
program will begin recognizing the text/number inside.
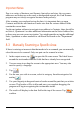
6. The result will display in the data field at the top of the screen. Tap
to
confirm.