
DigiWalker User Manual P350 P550


Table Of Contents
- 1 Warnings and safety information
- 2 General information
- 3 Operating Mio Map (Controls)
- 3.1 Hardware buttons
- 3.2 Screen buttons and controls
- 4 Discovering the program through the screens
- 4.1 Main menu
- 4.2 The map
- 4.2.1 2D and 3D map views
- 4.2.2 Zoom levels
- 4.2.3 Daylight and night colour schemes
- 4.2.4 Streets and roads
- 4.2.5 Other objects
- 4.2.6 Current position and Lock-on-Road
- 4.2.7 Selected map point, also known as the Cursor
- 4.2.8 Visible POIs (Points of Interest)
- 4.2.9 Speed cameras
- 4.2.10 Contacts
- 4.2.11 Elements of the Active Route
- 4.3 Screens with map
- 4.3.1 Turn preview (No. 1)
- 4.3.2 Zoom in and out (No. 2 & 3)
- 4.3.3 Tilt up and down (No. 4 & 5)
- 4.3.4 Lock to GPS position and heading (No. 6)
- 4.3.5 Cursor (No. 7)
- 4.3.6 Map scale (No. 8)
- 4.3.7 Menu (No. 9)
- 4.3.8 Map orientation and Overview (No. 10)
- 4.3.9 GPS position quality (No. 11)
- 4.3.10 Battery status (No. 12)
- 4.3.11 Sound muting (No. 13)
- 4.3.12 Track Log recording/playback indicator (No. 14)
- 4.3.13 Cursor menu (No. 15)
- 4.3.14 Current street (No. 16)
- 4.3.15 Travel and Route data (No. 17)
- 4.3.16 Distance to next turn (No. 18)
- 4.3.17 Next street / Next settlement (No. 19)
- 4.3.18 Approaching next turn (No. 20)
- 4.3.19 Current speed limit (No. 21)
- 4.4 GPS Data screen
- 4.5 Route Information screen
- 4.6 Menu
- 4.7 Speed cameras
- 4.8 TMC
- 5 Find
- 5.1 Main menu Find buttons (Address, Favourites, POI, History)
- 5.2 Selection by tapping the map
- 5.3 Using the Find menu
- 5.3.1 Find an Address, Street, Intersection or City
- 5.3.2 Find in History
- 5.3.3 Find Coordinates
- 5.3.4 Find a POI
- 5.3.5 Find one of the Favourites (Home/Work)
- 6 Settings
- 6.1 General settings
- 6.2 Sound settings
- 6.3 Route parameter settings
- 6.4 Language & Units
- 6.5 Advanced settings
- 6.6 About screen
- 6.7 Manual GPS configuration
- 7 Troubleshooting guide
- 8 Glossary
- 9 Index
Note: Using the Advanced settings, you can force Cockpit mode to always start in 3D
Track-up view (6.5.1). You can still rotate and tilt the maps in either mode, but the
next time you enter this screen, the preset look will reappear.
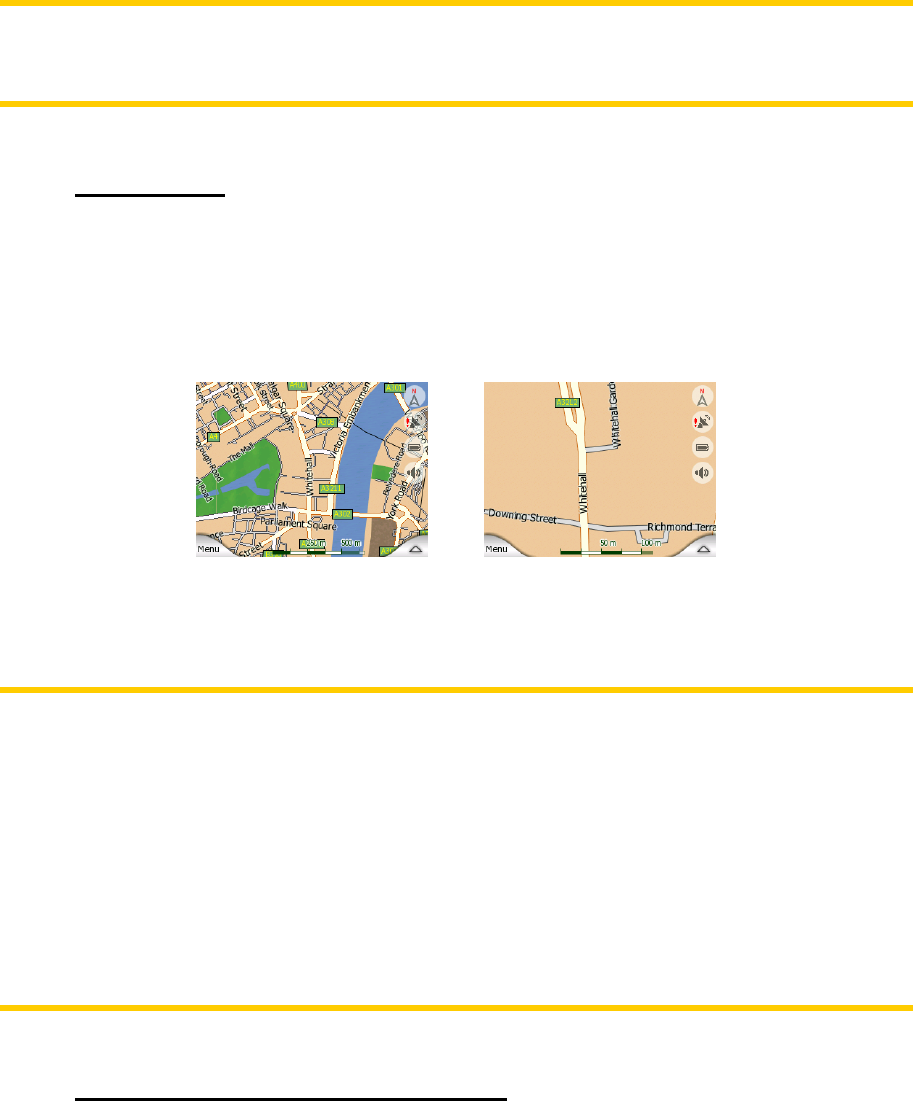
4.2.2 Zoom levels
Mio Map uses high quality vector maps that let you see the map at various zoom
levels, always with optimised content. Street names and other text objects are always
displayed with the same font size, never upside down, and you only see as many
streets and objects as needed to find your way around the map. Zoom in and out to
see how the map changes in either the 2D or 3D view.
Changing the scale of the map is very easy. You can drag and stretch the scale
(4.3.6) at the bottom of the Map screen, or use semi-transparent screen icons (4.3.2)
on both Map and Cockpit screens.
Note: If you need to zoom out briefly to locate your position on the map, use the
Overview mode instead of zooming out and back in. The Overview mode is a 2D
North-up view that can be started by tapping the compass button on the right (see
4.3.8).
Note: Mio Map has a special Smart Zoom function for navigation that automatically
rotates, scales and tilts the map in 3D map mode to always give you the optimal view
in your current situation. When approaching a turn, it will zoom in and raise the view
angle to let you easily recognise your manoeuvre at the next junction. If the next turn
is at a distance, it will zoom out and lower the view angle to flat in order to let you see
the road in front of you.
4.2.3 Daylight and night colour schemes
The different colour schemes let you adjust Mio Map to the brightness of the
environment. Use the daylight and night colour schemes accordingly. Daylight
colours are similar to paper roadmaps, while the night colour schemes use dark tints
for large objects to keep the average brightness of the screen low, with carefully
selected colours to still keep you informed about all the necessary information on the
screen.
20