
DigiWalker User Manual P350 P550


Table Of Contents
- 1 Warnings and safety information
- 2 General information
- 3 Operating Mio Map (Controls)
- 3.1 Hardware buttons
- 3.2 Screen buttons and controls
- 4 Discovering the program through the screens
- 4.1 Main menu
- 4.2 The map
- 4.2.1 2D and 3D map views
- 4.2.2 Zoom levels
- 4.2.3 Daylight and night colour schemes
- 4.2.4 Streets and roads
- 4.2.5 Other objects
- 4.2.6 Current position and Lock-on-Road
- 4.2.7 Selected map point, also known as the Cursor
- 4.2.8 Visible POIs (Points of Interest)
- 4.2.9 Speed cameras
- 4.2.10 Contacts
- 4.2.11 Elements of the Active Route
- 4.3 Screens with map
- 4.3.1 Turn preview (No. 1)
- 4.3.2 Zoom in and out (No. 2 & 3)
- 4.3.3 Tilt up and down (No. 4 & 5)
- 4.3.4 Lock to GPS position and heading (No. 6)
- 4.3.5 Cursor (No. 7)
- 4.3.6 Map scale (No. 8)
- 4.3.7 Menu (No. 9)
- 4.3.8 Map orientation and Overview (No. 10)
- 4.3.9 GPS position quality (No. 11)
- 4.3.10 Battery status (No. 12)
- 4.3.11 Sound muting (No. 13)
- 4.3.12 Track Log recording/playback indicator (No. 14)
- 4.3.13 Cursor menu (No. 15)
- 4.3.14 Current street (No. 16)
- 4.3.15 Travel and Route data (No. 17)
- 4.3.16 Distance to next turn (No. 18)
- 4.3.17 Next street / Next settlement (No. 19)
- 4.3.18 Approaching next turn (No. 20)
- 4.3.19 Current speed limit (No. 21)
- 4.4 GPS Data screen
- 4.5 Route Information screen
- 4.6 Menu
- 4.7 Speed cameras
- 4.8 TMC
- 5 Find
- 5.1 Main menu Find buttons (Address, Favourites, POI, History)
- 5.2 Selection by tapping the map
- 5.3 Using the Find menu
- 5.3.1 Find an Address, Street, Intersection or City
- 5.3.2 Find in History
- 5.3.3 Find Coordinates
- 5.3.4 Find a POI
- 5.3.5 Find one of the Favourites (Home/Work)
- 6 Settings
- 6.1 General settings
- 6.2 Sound settings
- 6.3 Route parameter settings
- 6.4 Language & Units
- 6.5 Advanced settings
- 6.6 About screen
- 6.7 Manual GPS configuration
- 7 Troubleshooting guide
- 8 Glossary
- 9 Index
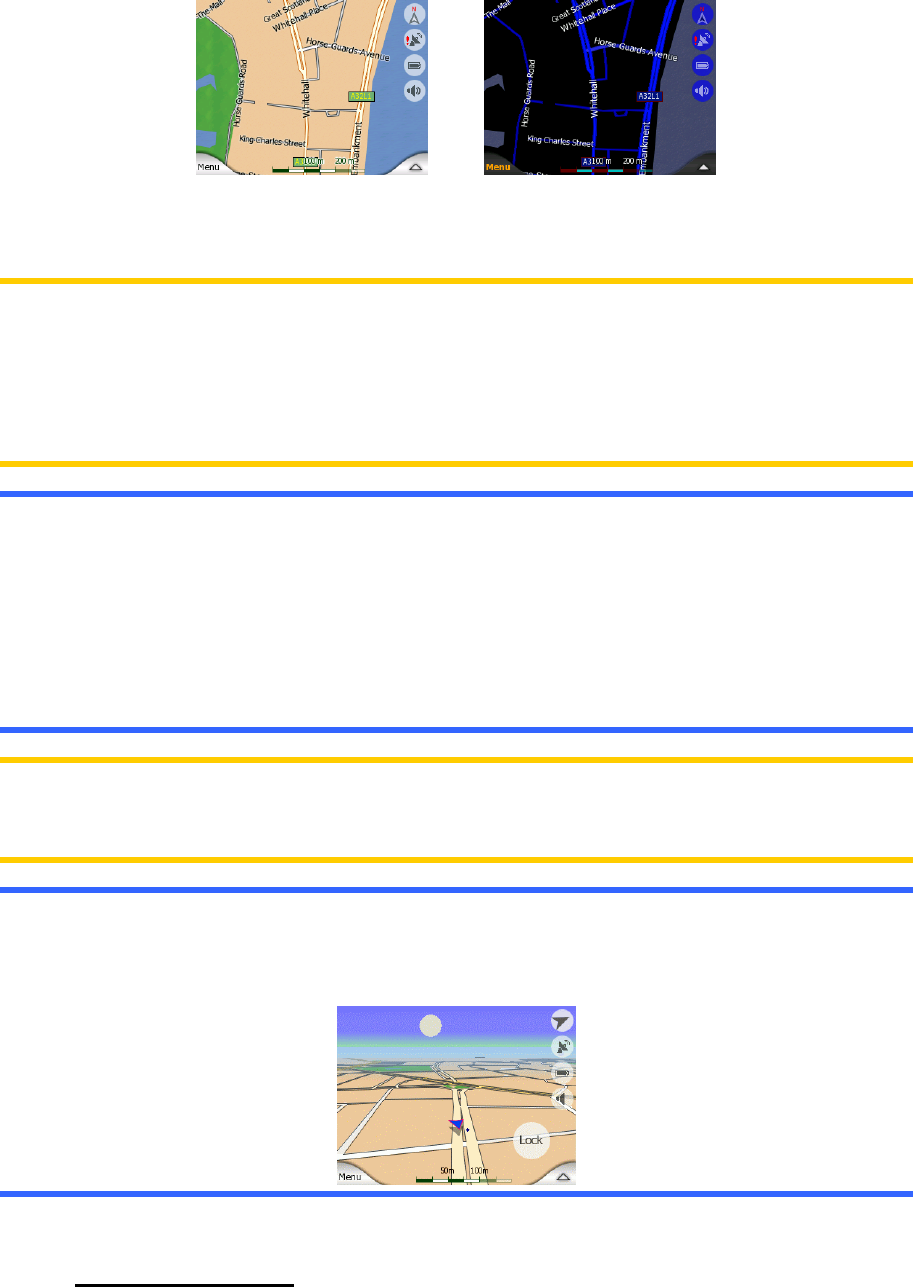
You can change between day and night views manually in the Quick Menu (4.6.2.3)
or let Mio Map do it automatically (6.1.2) for you.
Note: The automatic day/night mode is based upon the current date and GPS
position by which Mio Map calculates the exact sunrise and sunset times on the
particular day at the particular location. Using that information Mio Map can
automatically switch between the colour schemes a few minutes before sunrise,
when the sky has already turned bright, and a few minutes after sunset before it gets
dark.
Tip: There are several daytime and night colour schemes included with Mio Map. To
select the one that suits your needs the best, make your selection in Advanced
settings / Map options (6.5.4.1).
Tip: To further enhance the effect of the night colour scheme, you can instruct Mio
Map to decrease the display backlight when the night colours are used. Set the
desired backlight levels for both daylight and night modes in Advanced settings /
Backlight (6.5.2.2).
Note: The colours mentioned and screenshots included in this manual refer to the
default daytime and night colour schemes. They may not look the same in the
schemes you have chosen.
Tip: If you use Mio Map after sunrise or before sunset, look for the sun in the sky in
the map background using a flat 3D view. It is displayed at its actual position to give
you another way to orientate, and also to provide some eye candy.
4.2.4 Streets and roads
The similarity of Mio Map to paper roadmaps is also convenient when it comes to
streets, the most important elements of the map concerning navigation. Mio Map
uses similar colour codes to those you are accustomed to, and the width of the
21