
DigiWalker User Manual P350 P550


Table Of Contents
- 1 Warnings and safety information
- 2 General information
- 3 Operating Mio Map (Controls)
- 3.1 Hardware buttons
- 3.2 Screen buttons and controls
- 4 Discovering the program through the screens
- 4.1 Main menu
- 4.2 The map
- 4.2.1 2D and 3D map views
- 4.2.2 Zoom levels
- 4.2.3 Daylight and night colour schemes
- 4.2.4 Streets and roads
- 4.2.5 Other objects
- 4.2.6 Current position and Lock-on-Road
- 4.2.7 Selected map point, also known as the Cursor
- 4.2.8 Visible POIs (Points of Interest)
- 4.2.9 Speed cameras
- 4.2.10 Contacts
- 4.2.11 Elements of the Active Route
- 4.3 Screens with map
- 4.3.1 Turn preview (No. 1)
- 4.3.2 Zoom in and out (No. 2 & 3)
- 4.3.3 Tilt up and down (No. 4 & 5)
- 4.3.4 Lock to GPS position and heading (No. 6)
- 4.3.5 Cursor (No. 7)
- 4.3.6 Map scale (No. 8)
- 4.3.7 Menu (No. 9)
- 4.3.8 Map orientation and Overview (No. 10)
- 4.3.9 GPS position quality (No. 11)
- 4.3.10 Battery status (No. 12)
- 4.3.11 Sound muting (No. 13)
- 4.3.12 Track Log recording/playback indicator (No. 14)
- 4.3.13 Cursor menu (No. 15)
- 4.3.14 Current street (No. 16)
- 4.3.15 Travel and Route data (No. 17)
- 4.3.16 Distance to next turn (No. 18)
- 4.3.17 Next street / Next settlement (No. 19)
- 4.3.18 Approaching next turn (No. 20)
- 4.3.19 Current speed limit (No. 21)
- 4.4 GPS Data screen
- 4.5 Route Information screen
- 4.6 Menu
- 4.7 Speed cameras
- 4.8 TMC
- 5 Find
- 5.1 Main menu Find buttons (Address, Favourites, POI, History)
- 5.2 Selection by tapping the map
- 5.3 Using the Find menu
- 5.3.1 Find an Address, Street, Intersection or City
- 5.3.2 Find in History
- 5.3.3 Find Coordinates
- 5.3.4 Find a POI
- 5.3.5 Find one of the Favourites (Home/Work)
- 6 Settings
- 6.1 General settings
- 6.2 Sound settings
- 6.3 Route parameter settings
- 6.4 Language & Units
- 6.5 Advanced settings
- 6.6 About screen
- 6.7 Manual GPS configuration
- 7 Troubleshooting guide
- 8 Glossary
- 9 Index
streets also refers to their importance, so it will not be difficult to tell a highway from a
small street.
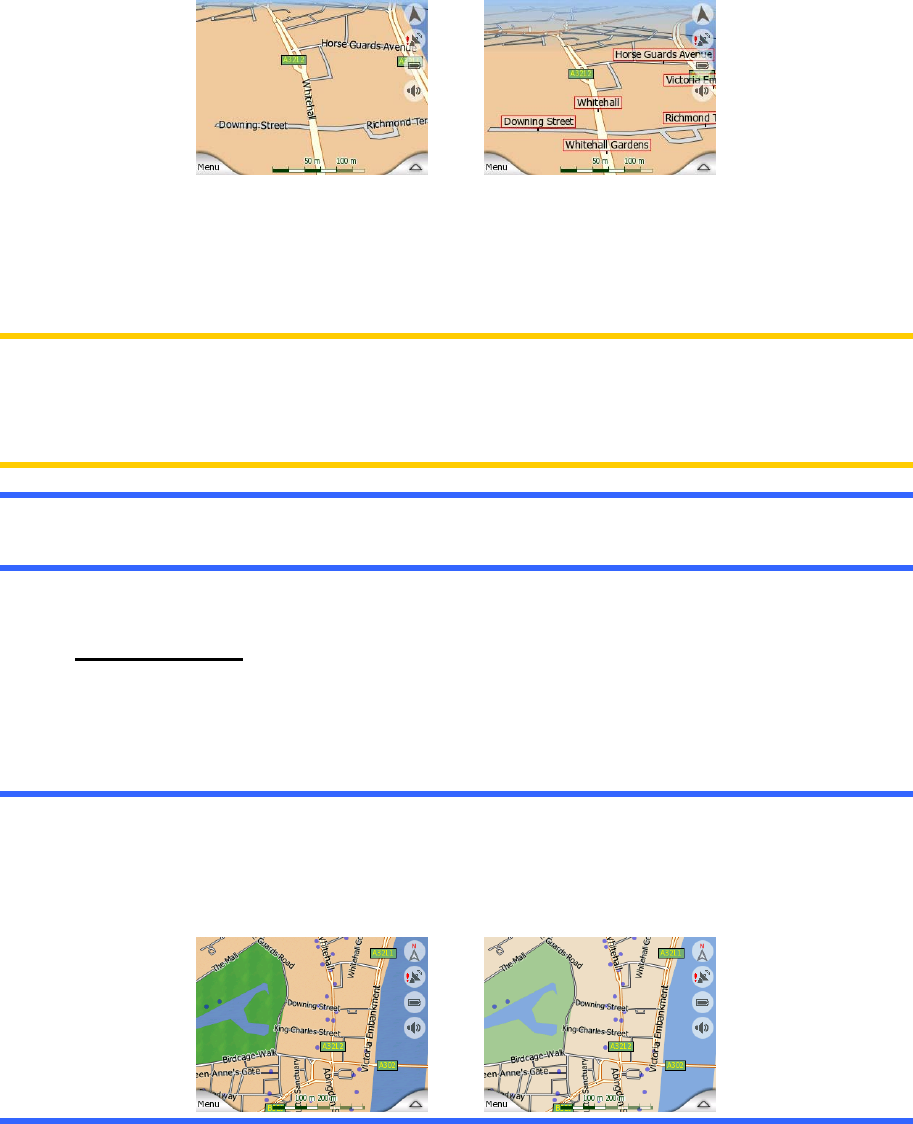
Streets and roads have names or numbers for identification. Of course, this
information can be displayed on the map. Mio Map uses two different ways to show
street labels. The conventional way is the same as a roadmap – it displays the name
of the street aligned with the street. The alternative is a kind of virtual signpost stuck
into the street itself.
You need not choose between the two modes. Mio Map will use the one best for the
current tilt and zoom level. Zoom in to have only a few streets on the map, and start
tilting up and down to see how Mio Map switches between the two modes in an
instant.
Note: The automatic switching is on even when using Smart Zoom. At first you may
find it odd, but later you will discover how it adjusts the displayed information to the
current view of the map. It is important, as the driver must be able to read the map at
a glance.
Tip: If you do not want to be bothered by street names during navigation, turn them
off on the Map Options screen (6.5.4.2).
4.2.5 Other objects
To help orientate you, the map also contains objects that have no other navigating
function than to help you recognise your location on the map. These are surface-
waters, large buildings, forests, etc.
Tip: These objects are normally displayed using textured polygons that look natural
to the eye. You may wish to switch the textured display off (6.5.4.3) to free some of
the resources of your Mio DigiWalker by replacing textures with plain coloured
surfaces.
22