
DigiWalker User Manual P350 P550


Table Of Contents
- 1 Warnings and safety information
- 2 General information
- 3 Operating Mio Map (Controls)
- 3.1 Hardware buttons
- 3.2 Screen buttons and controls
- 4 Discovering the program through the screens
- 4.1 Main menu
- 4.2 The map
- 4.2.1 2D and 3D map views
- 4.2.2 Zoom levels
- 4.2.3 Daylight and night colour schemes
- 4.2.4 Streets and roads
- 4.2.5 Other objects
- 4.2.6 Current position and Lock-on-Road
- 4.2.7 Selected map point, also known as the Cursor
- 4.2.8 Visible POIs (Points of Interest)
- 4.2.9 Speed cameras
- 4.2.10 Contacts
- 4.2.11 Elements of the Active Route
- 4.3 Screens with map
- 4.3.1 Turn preview (No. 1)
- 4.3.2 Zoom in and out (No. 2 & 3)
- 4.3.3 Tilt up and down (No. 4 & 5)
- 4.3.4 Lock to GPS position and heading (No. 6)
- 4.3.5 Cursor (No. 7)
- 4.3.6 Map scale (No. 8)
- 4.3.7 Menu (No. 9)
- 4.3.8 Map orientation and Overview (No. 10)
- 4.3.9 GPS position quality (No. 11)
- 4.3.10 Battery status (No. 12)
- 4.3.11 Sound muting (No. 13)
- 4.3.12 Track Log recording/playback indicator (No. 14)
- 4.3.13 Cursor menu (No. 15)
- 4.3.14 Current street (No. 16)
- 4.3.15 Travel and Route data (No. 17)
- 4.3.16 Distance to next turn (No. 18)
- 4.3.17 Next street / Next settlement (No. 19)
- 4.3.18 Approaching next turn (No. 20)
- 4.3.19 Current speed limit (No. 21)
- 4.4 GPS Data screen
- 4.5 Route Information screen
- 4.6 Menu
- 4.7 Speed cameras
- 4.8 TMC
- 5 Find
- 5.1 Main menu Find buttons (Address, Favourites, POI, History)
- 5.2 Selection by tapping the map
- 5.3 Using the Find menu
- 5.3.1 Find an Address, Street, Intersection or City
- 5.3.2 Find in History
- 5.3.3 Find Coordinates
- 5.3.4 Find a POI
- 5.3.5 Find one of the Favourites (Home/Work)
- 6 Settings
- 6.1 General settings
- 6.2 Sound settings
- 6.3 Route parameter settings
- 6.4 Language & Units
- 6.5 Advanced settings
- 6.6 About screen
- 6.7 Manual GPS configuration
- 7 Troubleshooting guide
- 8 Glossary
- 9 Index
road parallel to that recommended by the route. In this case Mio Map may not
recalculate the route for some time, but you can force recalculation here. This is also
the button you will most frequently use when the window appears automatically,
provided that the manual route recalculation is set in 6.1.8.2.
Drop Next Via Point / Delete Route
You can modify the route to skip the next via point if you decide it is no longer
needed. For example, you may have added the via point only to influence the route
but you do not want to actually reach it; or you have already almost reached it, and
Mio Map still keeps on navigating towards that point. When there are no via points
left (only the destination), the name of this button turns to Delete Route, and it
cancels the navigation.
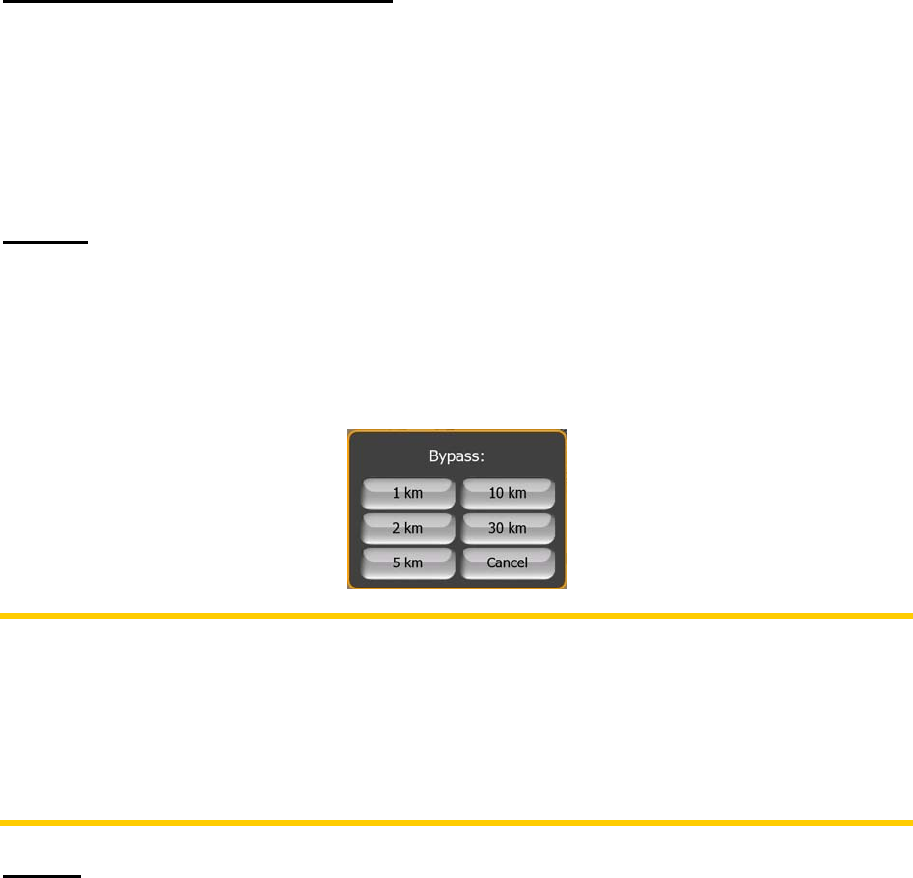
Bypass
When you run into a traffic jam or roadblock, you may want to have Mio Map
calculate a route that departs the original route as soon as it can. You will need to
select the minimum distance along the original route where your new route is allowed
to rejoin the original route. Select the one you feel appropriate for the traffic difficulty
you face.
Note: This function is to give you an alternative for the next section of the
recommended route. To change later parts of the route or to avoid specific streets or
turns, use the Avoid function in Itinerary instead (4.6.3.3).
Note: When you use this feature, Mio Map will keep on excluding the same part of
the map from later routes until you manually delete the route (
4.6.3.2), or restart Mio
Map.
Cancel
This option returns directly to the map screen without recalculating the active route. If
you choose this option when manual route recalculation is configured in
6.1.8.2,
navigation stops and will be activated again when you are back on your original
route.
4.6.3.2 Delete
Tap Delete to erase the active route along with all its route points (start, via points
and destination). If you later decide that you need the same route again, you will
have to rebuild it from scratch. Mio Map will warn you before deleting route data.
52