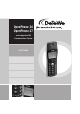
OpenPhone 26 OpenPhone 27 on the OpenCom 100 Communications System User Guide
Welcome to DeTeWe Thank you for choosing this DeTeWe product. Our product meets the strictest requirements with regard to quality and design. This User Guide will show you how to use your OpenPhone 26 or OpenPhone 27 and answer most of the questions that may arise. If you require further technical support or information about other DeTeWe products, please refer to our website at www.detewe.de. It provides additional notes and tips on the product.
Contents OpenPhone 26/27 on the OpenCom 100 Communications System 5 Commissioning 14 Handset Subscription (Checking In). . . . . . . . . . . . . . . 14 Background Information . . . . . . . . 14 General Information You Need Authorisation. . . . . . . . . . The Glossary . . . . . . . . . . . . . . . . . . . . Further Documentation. . . . . . . . . . Safety Precautions . . . . . . . . . . . . . . Conformity . . . . . . . . . . . . . . . . . . . . . Scope of Delivery. . . . . . . . . . . . . . . .
Visual Call Indicator . . . . . . . . . . . . . 27 Time/Alarm . . . . . . . . . . . . . . . . . . . . 27 Internal and External Telephone Numbers . . . . . . . . . . . . . . . . . . . 27 Multiple Connections . . . . . . . . . . . 27 DTMF Postdial/VF Signalling . . . . . 27 Call-charge Display . . . . . . . . . . . . . 27 Redialling. . . . . . . . . . . . . . . . . . . . . . 28 Telephone Lock. . . . . . . . . . . . . . . . . 28 Blocked/Unblocked Call Numbers. 28 Keypad Dialling. . . . . . . . . . . . . . . .
“Call forwarding” Menu . . . . . . . . “Messages” Menu . . . . . . . . . . . . . . “Phone settings” Menu . . . . . . . . . “Protection” Menu . . . . . . . . . . . . . “Connections” Menu. . . . . . . . . . . . “Phone book” Menu . . . . . . . . . . . . “Voicebox” Menu. . . . . . . . . . . . . . . “Central settings” Menu. . . . . . . . . “Info” Menu . . . . . . . . . . . . . . . . . . . “Active features” Menu . . . . . . . . .
4
OpenPhone 26/27 on the OpenCom 100 Communications System General Information The OpenPhone 26 and the OpenPhone 27 are cordless system terminals for use in conjunction with the OpenCom 100 communications system. The newly designed menus allow you to use and access your system's many features quickly and easily. The OpenPhone 26 and the OpenPhone 27 have the same functionality. They differ in the size of the display and in a few case with regard to the text displayed in the display.
Further Documentation Refer also to the other documentation supplied with the components of your telephone system. You can find this documentation on the OpenCom 100 product CD. Safety Precautions in areas where there is a risk of explosion. ■ Connect to approved accessories only. ■ Use the supplied AC adapter (no. 4512132) only. ■ Do not use AC adapters that show visible damage (e. g. cracks in the housing).
Conformity The CE symbol on the product confirms that it meets the technical guidelines on user safety and electromagnetic compatibility valid at the time of issue of the corresponding conformity declaration in line with European Directive de.99/5/EC. The Declarations of Conformity can be viewed at the DeTeWe web site at http://www.detewe. The charging station package includes ■ a charging station ■ a 230 V AC adapter plug (no.
Your Telephone's Features Using Your Telephone General Information The OpenPhone 26/27 is a cordless telephone designed for operation in the OpenCom 100 communications system. In addition to convenient softkey control of system features, this telephone also offers a variety of features that allow you to make calls more easily. You can also operate your handset in other communications systems, which means you can use the same handset in different places.
used by digital cordless telephones to establish connections. The GAP standard is not manufacturer-specific so it is possible to combine the communication systems and handsets of different vendors. The basic functions (making and receiving calls) are always possible with these combinations, but other functions provided by your OpenCom 100 communications system together with your handset (e. g.
Installation Installation Site Place the charging station on a flat, even surface.
Battery polarity Observe the correct polarity when replacing the batteries. The +/symbols in the battery compartment must correspond to the +/- symbols of the batteries. The batteries can be inserted without exerting force. Attempting to insert the batteries with incorrect polarity can cause the handset to be damaged. Installing the Charging Station To operate the charging station you need a 230 V AC mains connection.
Charging and Discharging The battery can be charged and discharged hundreds of times, but it will eventually be used up. When the operating time (i. e. talk and stand-by time) has become noticeably shorter than normal, the battery should be replaced. In order to achieve long operating times, you should discharge the battery at intervals by not placing the handset in the charging station and leaving it switched on until it switches itself off. Only use this method to discharge the battery.
OpenPhone 27: up to 140 hours (fully charged) status before it can display an accurate charge level. Note: Batteries with an unknown charging status are fully charged in approx. 14 hours. When the battery has been replaced, the charge level is not correctly displayed until a whole charge and discharge cycle has been completed.
Commissioning Handset Subscription (Checking In) Your handset can be operated in up to ten different communications systems. To be able to do this, it must be subscribed to every system, this means: the handset must be checked in. There are two check-in procedures. Depending on which procedure is used, there are different time limits for the completion of the procedure and you may also have to enter an authentication code.
system it has been checked into. Each subscription record includes a name; whenever the handset enters the range of a base station, this name will be appear in the handset’s display. Registration Once the handset has been subscribed to (checked into) one or more communications systems you can make and receive calls. If you have activated the Auto Search feature (see page 65), the handset will automatically register with the nearest base station in its range (provided the handset is in the idle state).
Displays, Keys and Symbols Receiver on the back: Loudspeaker Display Arrow keys Softkey Softkey Info key Loudspeaker key Receiver key Keypad Signal key Cancel key SOS Microphone Operating Elements on the OpenPhone 26 16 Displays, Keys and Symbols OpenPhone 26/27
Receiver on the back: Loudspeaker Display Arrow keys Softkey Softkey Info key Loudspeaker key Receiver key Keypad Signal key Cancel key SOS Connector for Headset Connector for PC Microphone Operating Elements on the OpenPhone 27 OpenPhone 26/27 Displays, Keys and Symbols 17
Displays Symbols in the Display œ ¢ ‰ OpenCom 100 ¤ ¬ ƒ 1 2 Menu 3 Call state (receiver key pressed) OpenPhone 26’s Display œ ¢ OpenCom 100 25 Smith 10:00 ¤ ¬ Menu OpenPhone 27’s Display 1 Symbol line (see page 18) 2 Text lines: one line on an OpenPhone 26, three lines on an OpenPhone 27 (see page 19) 3 Softkey line (see page 20) Quality of the radio connection (four bars means a stable radio connection; a single bar means an unstable radio connection) 1 Call state (speaker/handsfree activated)
You have received a voice box message. This requires a voicemail system to be connected to your communications system. The symbol is only visible if there is no active connection to the communications system. Telephone book (see page 50) OpenPhone 27 only: You have programmed and activated a local alarm (see page 67). OpenPhone 27 only: Your handset is checked in as “OpenPhone + Data” and is thus ready for use with data applications.
grammed for the handset (see page 69) and the current time. Selection lists (e.g. telephone book) and the Features menu are displayed in three line extracts. Use the arrow keys to scroll up or down. Items that can be selected are displayed with a dark background. PABX Menu Calls Call forwarding Messages §¨ OK Esc Softkey Line The texts and symbols in this line refer to the keys underneath. The contents of the line change according to the operating status.
Softkey: Arrow Keys Above the arrow keys you will see symbols that identify the individual functions of the arrow keys: OpenPhone 26 OpenPhone 27 Function The “up” arrow key allows you to select telephone numbers from the phone book of your communications system OpenCom 100. The “down” arrow key allows you to select telephone numbers from the local phone book of your telephone. When you are entering telephone numbers or names, you can make changes by moving a cursor.
Softkey: OK Softkey: Menu Press OK to confirm the selected function. A long key press in the idle state displays the main menu. Here you can edit all the phone settings. The individual menus are explained in the chapter entitled “Main” Menu starting on page 56. If a function only has one quickswitch option, it is operated by this key. Active settings (ON) are indicated by a “ ” next to the relevant item; inactive settings (OFF) are indicated by a “-”.
If you have saved your input in a menu, it remains saved when you leave the menu. Receiver Key A The receiver key has the same function as lifting or replacing the receiver of a normal telephone. Cancel Key C This key cancels your menu selection without saving the previous entry. If you are entering numbers or letters, this key deletes the last character. Holding C pressed deletes the complete entry. Signal Key L This key activates the speaker or hands-free mode.
When entering text, you can use the arrow keys to move the cursor to the beginning or end of the entry. The C key deletes individual numbers/ characters. The Esc key cancels the entire procedure. The cursor moves on automatically if there is input or no new character for a time. The input position moves on automatically when you do not enter any characters for a few sec- You can enter the following characters by pressing the number keys several times: Key Upper-case letter Lower-case letter 1 1?!,.
Key Upper-case letter Lower-case letter # OpenPhone 26: #(){}[]/\<> OpenPhone 26: #(){}[]/\<> OpenPhone 27: #(){}[]/\ OpenPhone 27: #(){}[]/\ The locking of your telephone interface by the system administrator The system administrator can lock your telephone’s interface via a setting for your user group. With the exception of the number keys and the receiver key, all keys of your telephone then have no functionality.
Telephoning General Information Description of Operating Steps The following descriptions list all the softkey functions of the left and right key below the display. These functions can be activated by pressing the arrow keys or the OK softkey. Switching the Handset On/Off You can switch the handset off by pressing C for longer than one second in the idle state. You switch it on by pressing C again or by placing the handset in the charging station. No ringer or alarm signal is emitted (e. g.
Visual Call Indicator Multiple Connections The receiver symbol ¢ in the display flashes and the display illumination is switched on to indicate an incoming call. Two calls can be made to your handset simultaneously. This means that you can telephone with two parties, toggle between these connections or initiate a 3-party conference. Any further callers will hear a busy signal. Time/Alarm In the idle state, the display shows the current communications system’s time.
Redialling The last telephone numbers you dialled are stored in the redial list (with the most recent entry at the top). If a telephone number is also stored in the OpenCom 100 telephone book, you will see the name. Telephone Lock You can switch the telephone lock on or off using the Protection - Telephone lock menu after entering your PIN. Switching on the telephone lock changes dialling rights. You may no longer be able to make external calls or only make them to a limited extent.
the Idle State starting on page 31). This is only necessary if LCR has been configured for you in the OpenCom 100. Consult your system administrator about this. Least Cost Routing (LCR) can be evaluated with call forwarding to external numbers, provided your system administrator has configured LCR and its application in the OpenCom 100 correspondingly. Ask your administrator for the configuration applicable to you.
depending on the system setting. Consult your system administrator for more information. Calls in the Call-waiting Queue The system administrator can configure and activate a call-waiting queue especially for your telephone in the OpenCom 100 system. While you are making a call, new calls can be queued. These callers first hear an announcement (if the system administrator has preset an announcement) and then the ring tone.
you hear the busy signal, press the Menu softkey and confirm Callback with OK. Pick-up:* You pick up a call made to another telephone in your pick-up group. The state-dependent menus are individually described at the end of the following chapters. Pick-up select.:* Once you have entered the telephone number, you can pick up a call to any other telephone. If the other telephone is in the call state (e. g. an answering machine is making an announcement), you pick up the call.
Suppress number: For the following (internal or external) call, your call number will not be presented to the called subscriber. This menu item is dependent on the system settings. Transmit number: For the following call, your call number will be presented to the called subscriber. This menu item is dependent on the system settings. LCR off:* This switches the least cost routing function off. When configuring your user group the system administrator can determine that LCR should not be used.
ceiver key and you can immediately dial an external number. For internal calls, press the star key ** twice before dialling the internal number. If you are dialling a number for a consultation call, or programming a destination number, enter the numbers in accordance with the type of external line seizure your telephone is set to. Example: You want to programme call forwarding. ■ ■ You can enter an external number directly if the telephone is set to automatic line seizure.
Making a Call from the Redial List ■ Phone book: You can add the number to the OpenCom 100 phone book (New Entry) or to an existing entry (Add). See also Add Phone Numbers to Phone Book from Lists or During a Call starting on page 52. ■ Delete all: Following a security prompt, you can delete the entire redial list. Redial 12345 OK §¨ Esc OpenPhone 26’s Display Redial Peter Smith Anne Johnson 12345678 ‘ OK Esc OpenPhone 27’s Display Selecting: Press the left softkey ¤ in the idle state.
Phone book Smith, Peter OK §¨ Esc OpenPhone 26’s Display TelBook Johnson, Anne Miller, Brian Smith, Peter ‘ OK Esc OpenPhone 27’s Display Dialling from the OpenCom 100 telephone book Enter the first letter/s of the desired name. Press the OK softkey. The first entry begins with the letter you specified. Use the arrow keys F to select an entry. Press A, the selected number will be dialled. Alternative: Press the OK softkey.
Entries in the list of missed calls are deleted from that list if the caller has subsequently been able to contact you. Voicebox Queries If a caller is stored in your phone book, the name will be displayed. ■ via OpenVoice (from a telephone whose number is not assigned to your voicebox) Selecting: In the idle state, press the Info key B briefly. ■ Select Missed calls or Voicebox mess..
telephone is switched off after a few seconds and you can be reached again. This also applies if you were connected to the other subscriber via your headset (only on the OpenPhone 27). The time frame after which the busy tone is switched off is configured by the system administrator. All other calls will be ended after 20 seconds if the handset is off-hook. Using Routes to Make Calls HZ (routing code, tel. no.) Enquiry calls: GRZ (routing code, tel. no.
call is unparked, the caller will hear music on hold, provided music on hold has been configured. If you do not unpark the caller after a certain amount of time, you will receive an automatic recall if your telephone is available again. This automatically unparks the caller. If, however, you are still making another call and have not hung up, the caller will hear the busy tone and will be “unparked”.
Pick-up:* You pick up a call made to another telephone in your pick-up group. Your first call is put on hold. “Pick-up” is not possible if there are already two active calls. Pick-up select.:* Once you have entered the telephone number, you can pick up a call to any other telephone. Your first call is put on hold. If the other telephone is in the call state (e. g. an answering machine is making an announcement), you pick up the call. “Pick-up selective” is not possible if there are already two active calls.
acoustically signalled on their telephone. Press the Menu softkey briefly and then select … Door opener:* This activates the door opener. Disconnect: The call will be disconnected. Menu During a Call You have dialled a telephone number and the called subscriber has not yet accepted the call. Door opener: This function activates the door opener. (This menu item is only displayed if you have been given the corresponding user authorisation.
tem administrator can forward a virtual number to another internal number, the number of your telephone for example. Such a forwarded call is signalled as a normal call on your telephone. Calls During a Conversation External or internal calls during a conversation are signalled acoustically and visually. VIP Calls These calls from authorised users are signalled even when call-waiting protection, call protection or call diversion have been activated. œ ¢ ƒ VIP call 24 œ ¢ ƒ Int. call wait.
“Call” Menu You receive an incoming call in the idle state. Press the Menu softkey briefly and then select … Reject call: You reject the waiting call by pressing the OK softkey. The caller hears the busy tone. Deflect call: You do not accept the call yourself, but deflect it to another subscriber. Enter the destination number and confirm this with OK. You can only use the “Deflect call” function if your user group is authorised to forward calls to internal and/ or external destinations.
Enquiry, Toggling, Transfer and Conference Enquiry/Toggling by Means of the R-Key During a call you can consult another subscriber. Press the R key. The first call is put on hold. Now dial the other internal or external telephone number (for manually-seized external lines with the external line seizure code digit, e. g. 0, see page 32). œ ¢ R: Anne Johnson Brian Miller 24 ‘ Menu OpenPhone 27’s Display The subscriber in enquiry and the current call-partner are displayed.
Or if you do not wish to wait for the called subscriber to answer: Press A and the other subscriber will be called. If the called subscriber accepts the call, he/she will be connected to the waiting call. If the call is not accepted within a certain period of time (by default 45 seconds), you get an automatic callback and are connected to the original subscriber when you press A again. The period of time after which a recall is made can be changed by your system administrator.
You have put a call on hold and are making a consultation call. Press the Menu softkey briefly and then select … Hands-free on or Hands-free off: Here you can activate/deactivate the hands-free functionality. This menu point is only displayed with an OpenPhone 27. Disconnect: You disconnect the current call and return to dialling mode. Enter a new telephone number for a further enquiry or press the R key. You will be connected with the subscriber on hold.
Press the A key to end the conference. Note: You can connect the two conference participants with each other or disconnect a specific participant only by selecting the corresponding item from the “Conference” menu. Hands-free on or Hands-free off: Here you can activate/deactivate the hands-free functionality. This menu point is only displayed with an OpenPhone 27.
connection and associate them with a booking number (see also “Calling …” Menu starting on page 37). Transfer:* You disconnect yourself from the conference. The other subscribers remain connected. End conference: You end the conference. Toggle: You terminate the conference and can now toggle between the two subscribers. Door opener:* This activates the door opener.
Doorbell, Door Opener ... opening the door while the telephone is in the idle state Press the A key. To open the door, select the Door opener menu item in the menu displayed. … opening the door during a call If the doorbell signal is triggered during a call, you will hear the discreet call-waiting tone. To open the door, select the Door opener menu item in the menu displayed. Note: The Door opener menu item is not dependent on an entrance intercom call.
entitled “Call forwarding” Menu starting on page 59). Announcements On: A*151* (trunk line Announcements can only be made to system terminals (corded and cordless system terminals). seizure code, e.g. 0 Z (Destination tel. no.) # Off: A#153# Several doorbells can be configured in the OpenCom 100. You can forward these doorbells using the appropriate code number procedure. For example, select 153, to forward calls for doorbell 3 or to switch off the forwarding of calls for doorbell 3.
cates Announcement and the caller’s name. Answering a Callback To respond, press the A key. Alternatively: briefly press the Menu softkey. Select Accept and confirm with OK. If you call another subscriber in your OpenCom 100 communications system and the line is busy, you can request an automatic callback using the corresponding menu item. To reject, briefly press the Menu softkey. Select Reject and confirm with OK. The subscriber making the announcement then hears the busy tone.
administrator has authorised you to do so. Consult with the system administrator regarding authorisation. For instructions on managing the the telephone book, refer to the section entitled “Phone book” Menu starting on page 71. “Phone book” Menu In the idle state briefly press the upper arrow key F and then select … Look up name: Enter the letter or name you are searching for (see also the section entitled Number Keys starting on page 23). Press the OK softkey.
Speed-Dialling Select the Phone Book menu item. All central telephone book entries can also be selected by two-digit or three-digit speed-dialling numbers once they have been configured. The two-digit speed-dialling numbers are in the range 00…99, the threedigit are in the range 000…999. Ask your system administrator how many digits are valid. ■ New Entry: You can add the phone number to a phone book. ■ Add: You can add the phone number to an existing phone book entry.
one which is not in use. Confirm with OK. For each number of the entry you can determine whether your own phone number is to be suppressed whenever you dial this phone number from the phone book. If you want your number to be displayed, confirm Transmit number with OK; if not, use the arrow keys to scroll down to Suppress number and confirm with OK. Then select the default number (Default office, Default mobile or Default private) and confirm with OK.
■ ■ the A key to dial the number; the Option softkey to display the local telephone book menu. The local phone book’s menu (OpenPhone 26) New Entry: You create a new entry. Enter the phone number and the name. Confirm with OK. Use number: The number is transferred and can be edited before dialling. The local phone book’s menu (OpenPhone 27) New: You create a new entry. Enter the phone number and the name. Confirm with OK. Edit: You edit the selected entry. Save your changes with OK.
Features and Menus How to Set Features There are different ways to set the features of your telephone and the system: supplied with the system). You can view the up-to-date online summary via the Codes item in the System info menu of your communications system’s Web console. Using Menus Activate the menus with the corresponding softkey as described under Displays, Keys and Symbols starting on page 16 and make the appropriate setting. Use the arrow keys and the OK softkey to select items.
The Menus Note: Some menu items are only displayed on your telephone if you belong to a user group that is authorised to use the corresponding feature. If you are unable to use a particular feature or have any questions, consult your system administrator. “Main” Menu This menu contains all available features. Some of the menu items can be found in other menus as well.
Phone book: You can edit the system telephone books in this menu group. Voicebox: If the system administrator has configured a voicebox for you, this menu will be available on your system telephone. Use this menu to listen to and to configure your voice box. Central settings: Here you can make system settings. This is an optional menu item, it is only available if your system administrator has configured the appropriate authorisation for your user group.
each of these terminals. For example, if you delete the call list from one terminal, it will be deleted from all others as well. ■ Accepted calls: You see the telephone numbers or the names of the callers with whom you last spoke. You can edit this list in the same way as the “missed calls list” (see previous section). ■ Voicebox mess.: You see the list of messages received. Each message is identified by the caller’s phone number or, if stored in your phone book, by the caller’s name.
Number and enter the internal call number of the other user. Alternatively you can select the Phone book menu entry and search for the call number in the OpenCom 100’s telephone book. Hunt group: If your device belongs to one or more hunt groups, a list of corresponding hunt groups will be displayed. You can switch hunt group calls to your telephone on or off using On / Off (for individual hunt group numbers or All if you are a member of several hunt groups).
Configuring call forwarding First select Call forwarding and then … Call diversion: Select Immediately, After delay or Busy for the forwarding mode. Then key in the call forwarding destination (please refer to the chapter entitled Making External/Internal Calls starting on page 32). Then select whether internal calls, external calls or all calls should be forwarded to the destination number. Activate call forwarding with on. Active call forwarding is indicated by a “+” sign.
starting on page 32). Activate call forwarding with On. Active call forwarding is indicated by a “+” sign. This is followed by the call forwarding destination. Remote divert: This function allows you to configure call forwarding for the phone numbers of other OpenCom 100 users. In order to do so, “Call forwarding for other user” authorisation is required, otherwise this menu item will not be displayed.
ject” text of the message, the sender and the date/time. mation on this in the OpenCom 100 online help. – Delete: You delete the message. E-mail: You will see the list (senders) of e-mails received. Select an entry: A selection menu appears allowing you to display the e-mail (subject, sender, date/time), delete the selected e-mail or delete the entire list of e-mails. Use the arrow keys to scroll through the display functions. – Forward: Select an entry. You can now edit the text of the message.
specially prepared message texts for this purpose. Select one of these message texts and press OK. If a subscriber now calls you from a system telephone, the selected text appears on that subscriber’s display, provided his telephone is a system terminal. If you don't want any message to be displayed, set the text to “Available”. Optionally you can create your own text (max. length 23 characters). Select the Text: menu entry, enter the text and press OK.
digits 10 … 30 or modify the displayed number with the arrow keys. selected. This means you may only hear parts of some melodies. ■ Info tones: Using the OK softkey you deactivate an info tone or activate it again (“). The following info tones are available: Key click: Every key press results in a click. Confirm. tones: Every time a handset setting is switched on or off you will hear a confirmation tone.
nalled with a flashing the display. ■ symbol in Volume: Select the ringer tone volume signalling (1 … 7) via entering the digit or with the arrow keys and confirm with OK. System: This menu contains the settings for subscribing (checking in) the handset to the base station. Refer also to the information given in the chapter entitled Commissioning starting on page 14. ■ Subscribe (OpenPhone 26) / Subscription (OpenPhone 27): Use this menu to subscribe the handset to one or more base stations.
– Edit Entry: You can edit the name and display of the telephone number (usually the internal/local telephone number) for the selected subscription record. This information appears in the idle state when the handset is registered on the corresponding base station. Note: With the OpenCom 100, you do not need to enter an internal phone number for the handset since the communications system manages internal numbers automatically.
OpenCom 100 online help. Enter the PARK and press Go on. Enter the Auth. code (Authentication Code) and press OK. After a successful check in, you can enter the name and number for the subscription entry. Confirm with OK. – Edit: You can edit the name and display of the call number (usually the internal/local call number) for the selected subscription record. This information appears in the idle state when the handset is registered on the corresponding base station.
– Active: With OK you activate (“) or deactivate the alarm. When a headset (only with the OpenPhone 27) is connected, calls are established automatically, and you can telephone without your hands. When the caller goes on-hook (i.e. puts the phone down), the call is disconnected. If you are not using the headset, then please deactivate this function as unnoticed listening-in by a caller is possible. Note: When the alarm is active, the idle display shows an alarm symbol ( ) next to the time.
■ Username (OpenPhone 26) / User Name (OpenPhone 27): Here you enter or edit the name that appears on the display when the handset is in the idle state. Use the OK softkey to save the setting. Note: The user name saved here is a two-character abbreviation displayed on this phone only. It is not identical to the user name the administrator enters for a user when configuring the OpenCom 100 and which is used in the central phone book, for example.
tially or fully restricted. Emergency numbers can be stored in a special list applicable to your user group and can then always be dialled, irrespective of your external authorisation. For more information ask your system administrator. Baby call: Enter the destination number and activate or deactivate the baby call (see also the chapter entitled Baby Call starting on page 47). Change PIN: Enter your current device PIN and then the new PIN twice.
one of the stored subscriber numbers (see also Making Calls from the Telephone Book starting on page 50). group for which the “Call removal” authorisation is activated, otherwise “Pick-up selective” is not possible. Or select Dial, then … “Phone book” Menu ■ Announcement: After entering the telephone number, you can initiate an announcement on another system terminal. Enter the telephone number under To:.
phone number should be automatically suppressed whenever you dial these numbers (from the telephone book). If your telephone number should be displayed, confirm Transmit number with OK. Otherwise use the lower arrow key to scroll to the Suppress number menu item and then press OK. Note: If you do not activate the “Suppress number” function for a telephone number saved in the telephone book, you can suppress the display of your telephone number from call to call, i. e.
marked by a “-”. Select a message and one of the following options. ■ Play: Listen to the message the caller recorded. You can also use the number keys 4 (rewind), 5 (pause) and 6 (fast forward) to control message playback. ■ Dial: Call the caller back. ■ Delete: The message will be deleted. ■ Phone book: You add the caller’s telephone number to a phone book (see also Add Phone Numbers to Phone Book from Lists or During a Call starting on page 52).
signalled on different telephones. Switching between these time groups can be done manually or automatically, in this case according to a timetable configured by the system administrator. Select Automatic to activate automatic time control. The configured time groups then change automatically according to the timetable configured by the system administrator. This setting remains active until one of the available time groups is set manually. The system administrator can configure up to ten time groups.
Appointments: This menu item is only available if you have at least one active appointment (refer to the section entitled “Appointments” on page 62). Charges: You see the charges for the last call and the total call charges for your telephone. Active features: You can access the Active Features menu (see next chapter) using this menu item. Note: In order to be able to use the Info key, your OpenCom 100 communications systems must be using a software version of at least 5.22.
USB Connection Updating the Software General Information With the aid of a data cable, the firmware for your OpenPhone 27 can be updated. For this, you will require the following: ■ PC with Microsoft Windows and a USB interface ■ A USB data cable for your OpenPhone 27 ■ CD with USB driver and updating programme 1. Under Windows 2000/XP you must log on as an administrator. 2. Connect the USB port of your PC to the OpenPhone 27 interface using the data cable supplied.
Note: Two drivers will be installed: USB and UART drivers. USB Connection 4. You can now start the OpenPhone 27 firmware actualisation application provided on the System CD.
Please follow the instructions given by the application to update the firmware. Now turn the device back on by holding the F key and at the same time, pressing the R key. Now the firmware will be updated. Once the program has obtained the configuration information, your telephone is switched off. Data Communication General information System prerequisites Your OpenPhone 27 enables data communication via ISDN.
Notes on the data application ■ ■ An internal link between two connected PCs is not possible. For technical reasons, an external connection between two PCs connected to the same system is not assured. Installing the Software Installation sequence Please install the software in the following order: 1. OpenPhone 27 USB driver (see Updating the Software starting on page 76). 2. OpenPhone 27 software (CAPI driver software) 3.
3. First install the driver software for your OpenPhone 27. Move the mouse to the text called Install OpenPhone 27 Software, which will then be highlighted, and press the lefthand mouse button. From the shown options, select the CAPI driver installation that corresponds to your hardware configuration. nents should be installed. Click on Next to proceed. In the port selection which follows Search port (recommended) click on Next.
When the PC has restarted, you will see on the right-hand side of the Windows taskbar a LED symbol for the CAPI driver. red – deactivated yellow – no link to the device green – ISDN data link exists grey – link exists to the device. The colour of the LED indicates the port status: 5. Now connect your OpenPhone 27 to the PC. The Device Manager will automatically complete the installation (this may take up to a minute). Note: For an optimal functionality you should set the data call number for the modem.
Internet Access Using the OpenPhone 27, there are several ways of connecting to an Internet Service Provider (ISP). If several PCs wish to go online simultaneously, then a connection via the OpenCom 100 dial-up interface has the advantage that only one connection to the ISP is required. In this way, money is saved. Access via the OpenCom dial-up interface (RAS) Via the integrated router, you can use the OpenCom dial-up interface to connect to the ISP.
Setting up the OpenPhone 27 First requirement is the configuration of the OpenPhone 27 as type “OpenPhone 27/28 + Data”. This can be done in the OpenCom Configurator under the menu option PBX Configuration: Ports: DECT Phones. The Telephone and Data options for the handset can either have the same number or two different internal numbers. In either case, the number(s) must be assigned to a user via the User Manager. These settings apply for both the internet connection via the OpenCom and via a PC.
Settings for an Internet connection via the PC dial-up network From the included System CD, as first step, install the driver for your OpenPhone 27, see Installing the Software starting on page 79. A dial-up connection to your Internet Service Provider can then be configured as explained in the following description. Configuring the connection Prerequisites: In order to be able to browse the Internet from your PC, you require access via a provider.
Note: When you create the dial-up networking connection, please ensure that you enter a “0“ as the prefix if automatic external line seizure is not configured for the selected user's user group. Setting up the OpenCom dial-up network access (RAS) Before connecting to your Internet Service Provider via the OpenCom RAS interface with integrated router, the following settings are necessary: One of the user’s assigned user groups must have NET Configuration/RAS set to active.
The option Prevent access from the Internet on … Internet under the menu NET Configuration: Safe Access must be deactivated. A connection must be configured in the dial-up network which has the same internal telephone number as the RAS interface. The settings are identical to those for the Internet dial-up connection. In the connection details window, the same user name and same pass- word must be entered as configured in the OpenCom User Manager.
Appendix Care and Maintenance Your telephone is a product that meets the highest standards of design and manufacture. It should therefore be treated with care. Follow the advice below, and you will be able to enjoy using this product for a long time. Please follow all the Safety Precautions starting on page 6. These precautions apply to the handset, the charging station, the rechargeable batteries (the entire telephone), as well as the accessories.
OpenPhone 27 with a MEM card General Information Inserting the MEM card The OpenPhone 27 can be equipped with a memory card (MEM card) which is provided. The MEM card stores the device’s local settings (including a local telephone book with 100 entries) and the device’s identification (IPEI). Therefore when exchanging the device it is possible to have this information (via the MEM card) on the other device, thus allowing (without re-enrolment) immediate telephony.
charge can cause the device to become defective. the cover complete covers the MEM card). 7. Insert the batteries (see page 11) and close the battery compartment (see page 10). Removing the MEM card It is only necessary to remove the MEM card if you pass on the handset or if you need the MEM card for a new handset. 4. Slide the MEM card (with the contact-surface facing downwards) under the half-moonholders (a) in the MEM card compartment.
Technical Data Standards: DECT, GAP, CAP Display: OpenPhone 26: 3-line graphic display OpenPhone 27: 5-line graphic display Handset weight: approx. 140 g (including batteries) Handset dimensions: 146 x 53 x 28 mm (L x W x H) Battery: 3x AAA cells (NiMh) Stand-by time: OpenPhone 26: up to 200 hours OpenPhone 27: up to 140 hours Talk time: OpenPhone 26: up to 20 hours OpenPhone 27: up to 14 hours 90 Charging time: approx.
Notes on disposal In order to avoid any possible effects resulting from the disposal of electrical and electronic equipment containing substances damaging to the environment and human health, the European Parliament and Council directives ■ 2002/96/EC on waste electrical and electronic equipment (WEEE) and ■ 2002/95/EC on the restriction of the use of certain hazardous substances in electrical and electronic equipment (RoHS) have been transferred into national law in all EU member states.
OpenPhone 26’s Main Menu Calls Call lists Charges Remote charges Hunt group Call forwarding Call diversion Divert MSN Divert Door Remote divert Follow me Messages 92 Short messages E-mail Appointments Messenger Phone settings Key lock Audio System Telephone Options Protection Call protect. Telephone lock Baby call Change PIN Availability Call wait. Prot. Connections Call pick-up Dial Phone book New entry Edit Voicebox Voicebox mess.
OpenPhone 27’s Main Menu Calls Call forwarding Messages Call lists Charges Remote charges Hunt group Call diversion Divert MSN Divert Door Remote divert Follow me Short messages E-mail Appointments Messenger Phone settings Key lock Ringer Settings System Telephone Options Protection Call protect. Telephone lock Baby call Change PIN Availability Call wait. Prot. Connections Call pick-up Dial Phone book New entry Edit Voicebox Voicebox mess.
Index Numerics C 3-party conference 27 Call A Active features (Menu) 75 Alarm 27, 67 Announcement 31, 49, 71 Appointment call 47 Appointments 62 Arrow keys 21 Audio 63 Automatic call answer 68 Automatic keypad lock 67 Availability 70 B Baby call 47, 70 Base station Automatic Search 66 Automatic search 65 Select 65 Selection 66 Batteries Charging and operating times 12 Charging status 18 Charging, discharging 12 Commissioning 12 Discharged (warning tone) 64 Inserting, removing 10 Blocked/unblocked call
Calling … (Menu) 37 Calling the Entrance Intercom 48 Calls Ending 36 Menu 57 Call-waiting (Menu) 42 Call-waiting protection 70 Cancel key 23 CAPI driver software 79 Care and maintenance 87 Central settings (Menu) 73 Central telephone book 50 Charge display 13 Charges 31, 58 Display 27 Charging station 11 Charging time 12 Checking in 14 CLIP 29 CLIR 29 Commissioning 14 Company telephone books 50 Conference 43, 45 Ending 47 Menu 46 Confirmation tones 64 Connections (Menu) 70 Coverage warning 64, 68 Customer s
E-mail 74 Hunt group 75 Menu 74 Missed calls 74 Short messages 74 Telephone lock 75 Time control 75 Voicebox messages 74 Info key 23 Info tones 64 Installation site 10 Intercept 39 Internet Access 82 IPEI 65 ISDN 78 K Key click 64, 67 Key lock 63 Keypad dialling 28 Keypad lock 18 Keypad protocol 28 Keys 16 L Language 69 Least Cost Routing (LCR) 28 switching off 32 Line seizure 32 Loudspeaker 16, 17 Loudspeaker key 23 M Main Menu 56 Main menu 32, 92, 93 Making a Call 33 Melody 63, 64 Menu 96 Active feat
P S Park call 37, 42, 45, 46 Personal telephone book 50 Pharmacy line 48 Phone book 37, 42, 45, 46, 71 Clear local telephone book 69 Delete preset 51 Edit entry 72 Local 53 Look up name 51 Menu 51, 71 New entry 71 New preset 51 Phone settings (Menu) 63 Pick-up 31, 39, 70 Group 39 Selective 31, 39, 70 PIN 70 Postdial (DTMF) 27 Power supply 8 PP Subscribe 66 Protection (Menu) 69 Safety precautions 6 Seizing a line 32 Short messages 18, 23, 61 Signal key 23 Silent charging 68 Softkey Arrow keys 21 Esc 22 Me
Transfer 43, 45, 47 To external subscriber 44 To internal subscribe 43 Transmission of Call Numbers 29 U Unparking calls 31 Updating the Software 76 USB Connection 76 Username 69 V VIP call 39, 41, 71 Initiating 32 Virtual number 40 Visual call indicator 27 Voicebox 72, 73 Call 73 Menu 72 Messages 19, 23 Querying 36 Voicemail system 59 Volume 63 Adjusting during a call 26 98 Index
Notes Index 99
Notes 100 Index
oc_op2627_en_covrback.fm Seite 102 Mittwoch, 5. Oktober 2005 2:49 14 DeTeWe Systems GmbH • Zeughofstraße 1 • D-10997 Berlin • Germany www.detewe.