
Installation manual


REV 2.4
31
Adjustment
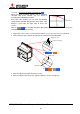
Perform the picture outline adjustment with remote control.
1. Make sure to release the locks in the adjuster (chapter
1.4.3.2.1 on page 29).
2. Display the internal crosshatch pattern for picture outline adjustment by pressing [TEST]
button twice in advanced mode. (Refer to the chapter
1.4.1.2 on page 26).
3. Press-and-hold [MENU2] button to display the system memory menu.
4. Select MECH ALIGNMENT in MAINTENANCE in the system menu.
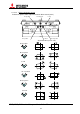
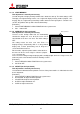
5. Select an axis menu by up/down buttons and adjust it by right/left buttons. The bird icon
moves its beak on screen during communication with the remote control. Also arrow mark
appears to indicate the direction of button pressing.
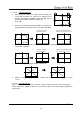
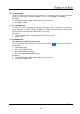
Note:
When you reach the end of the adjustment range,
mark appears on screen and the picture
outline doesn’t move ahead. In this case, turn back and readjust combining with other axes. If
you cannot turn the axis due to adjusting tool locking, follow the chapter
3.8.5, on page 98 to
recover from the error.
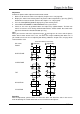
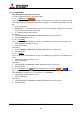
Seen from front (screen side)
Axis menu (left button) (right button)
ZOOM
H-KEYSTONE
V-KEYSTONE
TILT
H-POSITION
V-POSITION
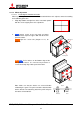
Detaching
After the adjustment, pull the latches to release the locks and detach the units in the reverse
order of attaching. Be careful not to load an excessive force to the adjuster.