IMMERSIVE SOUND LED LCD HDTV with Integrated Sound Projector MODELS 154 Series 164 Series 265 Series OWNER’S GUIDE • • • • For questions: -- Visit our website at www.mitsubishi-tv.com. -- E-mail us at MDEAservice@mdea.com. -- Call Consumer Relations at 800-332-2119 for operational or connection assistance. For information on System Reset, please see the back cover. To order replacement or additional remote controls, visit our website at www.mitsuparts.com or call 800-553-7278. 265 Series.
CAUTION RISK OF ELECTRIC SHOCK DO NOT OPEN CAUTION: TO REDUCE THE RISK OF ELECTRIC SHOCK, DO NOT REMOVE COVER (OR BACK). NO USER SERVICEABLE PARTS INSIDE. REFER SERVICING TO QUALIFIED SERVICE PERSONNEL. The lightning flash with arrowhead symbol within an equilateral triangle is intended to alert the user of the presence of uninsulated “dangerous voltage” within the product’s enclosure that may be of sufficient magnitude to constitute a risk of electric shock to persons.
Contents Important Information About Your TV Installation and Operating Notes. . . . . Important Safety Instructions. . . . . . . . . . . . . . . . 4 5 . . . . . . . . . . . . . . . . . . . . . . . . 6 . . . . . . . . . . . . . . . . . . . . . . . . . . 7 Stand Installation.. Wall-Mounting. . . . . . . . . . . 1 Basic Setup and Operation Package Contents. . . . . . . . . . . . . . . . . Before You Begin.. . . . . . . . . . . . . . . . . First-Time Power-On.. . . . . . . . . . . . . . .
Important Information About Your TV For Your Records Record the model number, serial number, and purchase date of your TV. The model and serial numbers are on the back of the TV. Refer to this page when requesting assistance with the TV. MODEL NUMBER SERIAL NUMBER PURCHASE DATE RETAILER NAME LOCATION Installation and Operating Notes Custom cabinet installation must allow for proper air circulation around the television.
Important Safety Instructions Please read the following safeguards for your TV and retain for future reference. Always follow all warnings and instructions marked on the television. 1) E XAMP LE OF ANT E NNA G R OUNDING Read these instructions. 2) Keep these instructions. ANT E NNA LE AD IN WIR E G R OUND C LAMP ANT E NNA DIS C HAR G E UNIT (NE C AR T IC LE 810-20) 3) Heed all warnings. 4) Follow all instructions. 5) Do not use this apparatus near water.
Stand Installation • • CAUTION Using this TV with other than the authorized accessories may cause the TV to become unstable, which can cause damage to the product or possible injury. At least TWO PEOPLE are required to install the stand. Support the TV near the corners as shown. Failure to follow these recommendations may result in personal injury and damage to the product. Note • 40- or 46-inch TV: If planning to wall-mount the TV, there is no need to install the stand.
Wall-Mounting To order a wall-mount kit, please contact Peerless Industries, Inc. at (800) 473-3753 or visit www.peerlessmounts.com. Order wall-mount kit model ST650. To order a wall-mount kit from Mitsubishi Digital Electronics America, Inc., please visit www.mitsuparts.com or call (800) 553-7278. Complete installation instructions are included with the kit. Stand Removal Prior to Wall-Mounting CAUTION At least TWO PEOPLE are needed to safely remove the stand.
Special Features of Your TV Your new high-definition widescreen television has many special features that make it the perfect center of your home entertainment system, including: 1080p High-Definition LCD Display System Your Mitsubishi LED LCD HDTV uses a full 1920 x 1080 LCD panel to create the picture you see on the screen. All images are displayed at 1080p. The TV uses new Plush 1080p® 5G digital video processing to convert lower-resolution signals to 1080p for display.
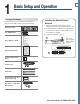
1 9 Basic Setup and Operation Package Contents Please take a moment to review the following list of items to ensure that you have received everything. Installing the Remote Control Batteries 1. Remove the remote control’s back cover by Remote Control Two AA Batteries 2. AA AA 3. gently pressing in the tab and lifting off the cover. Load the batteries, making sure the polarities (+) and (-) are correct. For best results, insert the negative (-) end first. Snap the cover back in place.
1. Basic Setup and Operation Before You Begin 1. Review the important safety, installation, and oper- ating information at the beginning of this book. Choose a location for your TV. • See the stand-installation or wall-mounting requirements starting on page 6. • Allow at least four inches of space on all sides of the TV to help prevent overheating. Overheating may cause premature failure of the TV. • Avoid locations where light may reflect off the screen. 2. 3.
1. Basic Setup and Operation TV Controls Remote Control For more on use and care of the remote control, see page 84. Emitter (Bulb) End TV CAB/SAT DVD AUDIO VCR Press the key for the device type to control. Leave in TV mode for normal TV viewing. Sleep Timer, page 29 Number/letter keys Channel tuning, page 16 Pass-code entry, page 57, page 43 Powers TV on or off. Adds a separator in digital channel numbers. Clears some menu entries.
1. Basic Setup and Operation TV Controls, continued The TOOLS Key and Menu Press the TOOLS key to check for shortcuts. The Tools menu lists shortcut keys for common functions. Press the number key to activate the shortcut. See the sample menu below. • Shortcuts specific to the current device are in the third column. • Shortcuts may be available for a CEC-enabled device. See Appendix C, “HDMI Control of CEC Devices,” page 81. • 265 Series.
1. Basic Setup and Operation 13 TV Controls, continued TV Control Panel System Reset Buttons on the control panel duplicate some keys on the remote control. • To display the main menu, press INPUT and VOL+ simultaneously for about 10 seconds. Press and hold INPUT and VOL+ for 10 seconds to clear the menu. • Refer to left labels when no TV menus are displayed. • Refer to right labels when using TV menus or after activating a special function.
1. Basic Setup and Operation Setting Up TV Inputs Using the ANT (Antenna) Input If using an antenna or direct cable service (no cable box), connect the incoming coaxial cable to the TV’s ANT input. Refer to page 26. You must perform a channel scan to enable reception of digital channels. If you skip this step, the TV will receive only analog channels. The channel scan will search for high-definition and standard-definition channels available in your area.
1. Basic Setup and Operation 15 Setting Up TV Inputs, continued About Auto Input Sensing Tips on Auto Sensing This TV’s Easy Connect™ Auto Input Sensing feature detects the following connections automatically: • Analog video jacks from inputs 1, 2, and 3 • HDMI inputs (when powered on) • USB device containing photo and music files (JPG and MP3 formats). • • Auto Input Sensing for Most Devices When you first connect a device, the TV will: a. Detect the connected device and automatically switch to it.
1. Basic Setup and Operation Basic TV Operation Selecting an Input to Watch Watching Broadcast TV TV Connected to an Antenna or Direct Cable Service (no cable box) 1. Press INPUT. Note: Perform channel memorization to enable reception of digital channels. See page 14. 2. Press 1. Press INPUT to display the Input Selection menu. 2. Highlight the antenna or cable icon and press ENTER. and to highlight an input icon.
1. Basic Setup and Operation 17 Basic TV Operation, continued Picture Settings Basic Audio Controls 1. To get the best picture under different viewing con- Controlling Sound Volume ditions, set the Picture Mode first before changing other video settings. See page 46. • • a. Press VIDEO. b. Press until Picture Mode displays. • c.
1. Basic Setup and Operation Basic TV Operation, continued The FORMAT Key and Picture Shape Repeatedly press the FORMAT key to cycle through displays for the current program. The TV will remember the format you last used on each input. For details, see page 33 Important Black bars at the edges of the screen are common in HD pictures. Black bars are not a defect of the TV. • Black bars are added by broadcasters to fill the 16:9 screen area while preserving the original aspect ratio of the picture.
1. Basic Setup and Operation Using the TV with a Personal Computer Connecting a Computer to the TV HDMI Connection Use one of the connection methods listed below based on your computer’s video output. Mitsubishi recommends using high-speed HDMI cables to connect newer devices incorporating HDMI technology.
1. Basic Setup and Operation Using the TV with a Personal Computer Computer Video Adjustments 1. Power on the computer. 2. Select PC from the Input Selection menu. To do 3. 4. 5. Tip Set the computer’s screen saver to display a pattern after several minutes of inactivity. This acts as a reminder that the TV is powered on. this, press INPUT to open the Input Selection menu, move the highlight to the PC icon, and press ENTER. Working from the computer, change the resolution of the computer image.
2 21 TV Connections Before You Begin Auto Input Sensing Surround Sound The TV’s Auto Input Sensing feature automatically recognizes many connections and prompts you to identify the type of device connected. See page 15 for more on Auto Input Sensing. • Connection Types Use the connection types available on your input devices that will give the best video quality. For example, choose HDMI over component video; choose component video over composite video.
2. TV Connections Inputs and Outputs DIGITAL 11 Audio OUTPUT (page 27) 12 CENTER-CH 14 INPUT (page 28) 6 AVR/surround OUTPUT (page 27, page 41) 13 SUBWOOFER OUTPUT (page 28) NetC OUT/IR IN (265 Series) NetCommand/ IR external controller jack.
2. TV Connections 23 Inputs and Outputs, continued 1. ANT (Antenna) Connect your main antenna or direct cable service (without a cable box) to ANT. The ANT input can receive digital and analog over-the-air channels from a VHF/UHF antenna or non-scrambled digital/analog cable source. 2. HDMI® Inputs (High-Definition Multimedia Interface) The HDMI inputs support uncompressed standard and high-definition digital video formats, bitstream Dolby Digital 5.1, and PCM digital stereo audio.
2. TV Connections Inputs and Outputs, continued 12. AVR/SURROUND OUTPUT • • Sends analog audio of the current program to an analog A/V surround sound receiver or stereo system. Digital audio from digital channels and HDMI devices is converted to analog audio by the TV for output on this jack. This is the only audio connection needed to the TV if using an analog A/V receiver or stereo system. Note: If connecting headphones, set Sound > Global > Analog Audio Out to Variable.
2. TV Connections DVI Video Device Y Pb Pr Component Video Device Commonly used with a Cable Box, Satellite Receiver, or DVD Player Commonly used with an HDTV Cable Box, Satellite Receiver, or DVD/Blu-ray Player If your source device has an HDMI output, use the connections for HDMI devices described on the opposite page instead of component video. Required: RCA-type component video cables Left/right analog audio cables.
2. TV Connections Antenna or Cable TV Service Connect the incoming cable to the TV’s ANT input. Antenna or Direct cable (no cable box) Cable TV service or IN ANT OUT VCR or DVD Recorder to an Antenna or Wall Outlet Cable Required: 1. Video cables 1a. Component video cables (red/blue/green) or 1b. Composite video cable (usually yellow) 2. Left/right analog audio cables. 3. Two-way RF splitter 4. Two coaxial cables Note: Older cable box • Not recommeded.
2. TV Connections A/V Receiver A/V Receiver with HDMI Output Most setups require either a digital audio cable or analog stereo audio cables. To send audio from TV channels received on the ANT input or devices connected directly to the TV, you must use one of the connections shown below. The TV makes all audio available in digital and analog formats: • Analog audio coming into the TV is available as output in digital stereo format on the DIGITAL AUDIO OUTPUT jack.
2. TV Connections Supplemental Audio Connections Adding a Subwoofer Using the TV Speakers as a Center Channel Add a subwoofer to complement the TV speakers with a fuller bass sound. If using an external surround sound system, you can make the TV’s speakers provide center channel sound. Your A/V receiver must have a center channel pre out that can supply an amplified center-channel signal to the TV. 1. Connect your A/V receiver’s HDMI output and center channel pre out to the TV as shown.
3 29 TV Features Sleep Timer The Sleep Timer turns the TV off after the length of time you set. To set the TV to turn on at a certain time of day, see the Setup > Timer menu on page 52. Setting the Sleep Timer FAV (Favorite Channels) The FAV key gives you quick access to favorite program sources. Sources can be channels from the ANT input or devices connected to the TV. You can store up to nine favorites. 1. Press SLEEP. 2. Press SLEEP additional times to increase the time in Adding 1.
3. TV Features ChannelView Channel Listings ChannelView displays program descriptions sent by broadcasters. This information may be unavailable in some areas. ChannelView Custom Channel Banks About ChannelView ChannelView™ shows memorized channels on the ANT input. It displays channel names and program information for digital channels. No program information is displayed for analog channels. ChannelView allows you to set up three banks of custom channels for convenient access.
3. TV Features Status Display 3 Press the INFO key to see the on-screen status display. The most common displays are shown here. 4 6 1 402-101 KABC Monday Night Football 2 TV-PG DLSV St. Louis vs. Tampa Bay, played in Tampa for 5 8 9 10 INFO 7 Sleep 30 min 13 Tuesday 9:10 PM HD 1080i Standard Sample information from the on-screen status display English Surround 11 12 14 1. Current Input 2. Audio Indicator.
3. TV Features Using an External Sound System Redirecting Audio Output Controlling A/V Receiver Sound Volume Selecting the Audio Output Use one of the methods below to control sound volume from an A/V receiver. 1. Press AUDIO. 2. Press to show the TV With a Standard TV Setup 3. Speakers option. Press to select either On (to hear sound from the TV speakers) or Off (to hear sound from an external sound system).
3. TV Features 33 Picture Shape and Display Formats Format Definitions Note: See page 18 for use of the FORMAT key to apply the formats described here. Standard: The full-screen format used by HDTV signals. Use this format to display anamorphic DVDs with a 1.78:1 or 1.85:1 aspect ratio. Anamorphic DVDs with a 2.35:1 aspect ratio are displayed correctly but with top and bottom black bars. Squarish (4:3) images are stretched evenly from side to side. Available for all signals.
3. TV Features Camera Images and Music Files • • • • The TV can read photo and music files from a USB device. Photos must be in JPEG format and music files must be in mp3 format. To play music files while displaying a photo slide show, see “USB Media Setup Menu” on the opposite page. The TV can display still images or motion video from a camera through the Y/VIDEO port. See page 36. To play music through the TV speakers from an audio-only device, see “Using an Audio-Only Device,” page 36.
3. TV Features 35 Camera Images and Music Files, continued Using the Photos and Audio Menus Use these keys with your photo and audio files. Key Use the USB Media Setup menu to set up play of a slide show or playlist. For Photos or Audio Tracks • • or ENTER USB Media Setup Menu Moves the highlight left/right through icons to select Photos, Audio, or Setup. Moves the highlight from item to item. Plays the slide show or playlist starting from the highlighted item. Pauses a slide show or playlist.
3. TV Features Camera Images and Music Files, continued Photos and Motion Video as Composite Video Connect the camera to the TV using a composite video cable and control the slide show or movie through the camera. The display resolution will be standard-definition (480i). 1. Refer to the owner’s manual supplied with the camera for instructions needed for this setup. 2. Set the camera’s output signal type to NTSC and 3. put the camera into playback mode.
3. TV Features 37 Camera Images and Music Files, continued Wireless Audio Playback 164 and 265 Series. The TV’s built-in speaker array can play audio from a handheld device using Bluetooth® A2DP (stereo audio) wireless technology. Tips for Wireless Playback Note: • Make sure the TV is on any input other than the USB port before starting Bluetooth pairing. Press the INPUT key to change. Pairing the TV with an Audio Playback Device 1. Turn on the wireless device you wish to use for play2. back.
3. TV Features Sound Projector This setup is unnecessary if using the TV speakers as a center channel. See page 28. Sound Projector Technology The TV’s built-in speaker array can be adjusted to reflect sound off the room walls to create a surround sound effect. Setup can be performed either manually or automatically. • To create the surround sound effect, the room walls must reflect sound and not be covered with soundabsorbent material.
3. TV Features 39 Sound Projector, continued 1. From the Sound > SoundPro menu go to the CUSTOM menu. How to Make Adjustments in the Custom Menu • Press to select an audio beam; colors of the adjusters correspond to audio beams in the onscreen diagram. • Press to redirect the audio beam or change the sound level. 2. Position yourself in your usual viewing location. Remain in this position, looking at the TV, while making the following adjustments. 3. Adjusting Beam Angles a.
3. TV Features Sound Projector, continued Auto Setup 265 Series Auto setup uses the included calibration microphone to optimize Sound Projector performance for most room conditions. Initial Preparation 1. Position and connect the TV as described under 2. 3. “Before You Begin,” page 38. Power on the TV and external subwoofer, if any. Plug the microphone cable into the TV’s INPUT 3 left audio jack. Microphone Placement • • Make sure there are no large obstacles between the TV and microphone.
3. TV Features Sound Projector, continued External Rear Speakers You may wish to supplement surround sound from the TV with external rear speakers. External speakers can fill in rear sound if your room lacks a rear wall suitable for reflecting sound. The addition of wireless rear speakers is a convenient way to enhance rear sound. Mitsubishi recommends Polk Audio’s F/X Wireless Surround system.
3. TV Features StreamTV™ Internet Media Internet services provided by VUDU™ Apps let you access many popular on-line applications. In addition to free content, VUDU’s movie service lets you buy and rent movies through the TV. Visit www.VUDU.com to learn more about available movie titles, prices, and services offered. For a list of recommended routers and switches, see the Support > FAQ section at VUDU. com.
3. TV Features 43 StreamTV™ Internet Media, continued 4. Highlight the desired network and press ENTER to Wireless Connection • • 164 and 265 series models have built-in wireless capabilities and can communicate directly with your wireless router. 154 series TVs require an AzureWave AW-NU231 USB wireless adapter. connect. A check will appear next to the connected network. Press CH/PAGE to see more networks if the list fills more than one screen. 1. Disconnect the Ethernet cable if present. 2.
3. TV Features StreamTV™ Internet Media, continued Using StreamTV Internet Media 1. After establishing internet connectivity as described 2. 3. Troubleshooting If You Are Unable to Connect to the Internet • Check all power and data connections. • If you can reach the internet with a computer or other device on the same internet service used by the TV, consult the router or modem owner’s guide for reset instructions. • If you cannot reach the internet, contact your service provider.
3. TV Features Introduction to Home-Theater Control This TV offers a choice of home-theater-control systems. This summary offers some examples of the control methods available using the TV’s remote control. You may wish to use one or more of these methods in your home theater after completing Auto Input Sensing. Source device connected directly to the TV Remote Control Programming (Any Connection Type) Program the remote control to operate the A/V device.
4 TV Menus Main Menu Press MENU on the remote control to open the main menu. Picture Picture settings. 46 Sound Sound settings. 49 Captions Closed captions on/and off; caption displays. 51 Setup Basic TV setup. 52 Inputs Name assignments for TV inputs, HDMI Control setup 265 Series. NetCommand IR “learning.” 55 Lock Setting a pass code and restrictions TV use. Disabling the control-panel buttons.
4. TV Menus 47 Picture, continued Contrast • • • Brightness Color Tint Sharpness Color Temp Low contrast shows a variety of shades in darker images In most home lighting situations, medium contrast looks best. High contrast shows darker images more uniformly black and makes colors appear more vibrant. High contrast is good for brightly lit environments. Adjusts the white-to-black level Settings are stored independently for each Picture Mode. Adjusts overall picture brightness.
4. TV Menus Picture, continued True 120 Hz (154, 164 series) True 240 Hz (265 series) When active, reduces motion blur in action scenes but may show pixel structure during slower motion or in still images. Works in conjunction with Film Mode. The adjustment side of the screen only shows changes if the content was a film source shot at 24 frames per second. Test Picture Displays a test picture. Picture Reset • • Picture Press to make adjustments.
4. TV Menus 49 Picture, continued 164 Series • • 265 Series Select SPECIAL if settings were saved by your professional installer. Otherwise select ADV. • • Select ISF Day or ISF Night if settings were saved by your professional installer. Otherwise select ADV1 or ADV2. To return to the default values for Advanced Display the Picture > Advanced menu and: 164 Series 265 Series Highlight RESET Pic Mode and press ENTER. 1. Highlight the Advanced mode to change. 2.
4. TV Menus Sound, continued Sound Mode Stereo No special audio effects from the TV speakers Surround Modifies audio from the TV speakers. • For monaural (non-stereo) programs, creates a simulated stereo effect. • For stereo programs, creates a simulated surround sound effect. • The TV’s speaker array plays surround sound if available. Music Optimizes the TV’s speaker array for music listening.
4. TV Menus 51 Captions Captions on Digital Channels • The TV can decode captions from the ANT input only. Broadcasters can send up to six different captioning selections or can send analog captions for a program that originated in analog format. A TV station may broadcast only one or two types of captions or none at all. • Captions on Analog Channels The TV can decode captions from the ANT input and the composite VIDEO jacks. Broadcasters can send either standard closed captions or text service.
4. TV Menus Setup Setup Menu Antenna Digital Audio Setup Language English Spanish Displays on-screen menus in either English or Spanish. Selects the current language for a digital program from the ANT input. Each digital program may include up to seven language choices or there may be no language choice offered.
4. TV Menus Setup, continued Setup Channel Ant Air, Ant Cable All Channels, New Only Scan You must perform a channel scan to receive digital channels. The scan searches for broadcast channels and adds them to TV memory. To start channel scan: 1. Highlight one of the input selections based on your connection to the ANT input: • Air when connected to an indoor or outdoor antenna. • Cable when connected to direct cable (no cable box) 2. Select the scan type.
4. TV Menus Setup, continued Setup Energy Blue Glow. (265 series). Select On to see blue accent lighting when the TV is powered on. Setup Network See “Home Network Setup” on page 42 for use of this menu. Ethernet Connection DHCP (automatic), Manual [Connection Data] Wireless Connection [Network ID] [Connection Data] Off. Turns off the radio receiver. Use this option if there is RF interference with other devices.
4. TV Menus 55 Inputs Inputs Name INPUT and HDMI jacks: Cable box, Cam(corder), CD, DVD (DVD, DVD2, Blu-ray), DVR, Game (Game, PS, Xbox, Wii), Media Box, PC, Satellite, AVR On/Off (Ant, Bluetooth only) INPUT jacks only: CD/Audio, MP3 Player, VCR HDMI jacks only: PC, AVR, Delete • • • • • Lets you assign or change names of inputs appearing in the Input Selection menu. Highlight an input and press ENTER multiple times to cycle through the name choices.
4. TV Menus Inputs, continued Inputs Order Lets you rearrange icons in the Input Selection menu. 1. 2. 3. 4. Press to highlight an input icon. Press ENTER to confirm the selection. Press to drag the icon to the desired position. Press ENTER to confirm the new position. Inputs Demo See demonstrations showcasing selected TV features.
4. TV Menus 57 Lock TV Locks Parental Menu Parental Lock by Program Ratings Restricts access using U.S.-based ratings sent by broadcasters. Time Lock by Time Restricts TV use by time of day. Channel Lock by Channel Blocks access to the channels you specify. Panel Lock Control Panel Disables the buttons on the TV’s control panel. Use this feature if small children in the home try to press buttons on the control panel. Other Lock by Other Program Ratings Restricts access using non-U.S.
4. TV Menus Lock, continued Lock Parental Lock TV Rating Movie Rating Start Time/ Stop Time Disables or enables blocking based on V-Chip signals and the U.S. rating system. Highlight the rating level you wish to change and press ENTER to block it ( ) or allow it ( ). You can apply supplemental content blocking to the age-based ratings by using the TV content categories. (FV, D, L, S, V) Highlight the rating level you wish to change and press ENTER to block it ( ) or allow it ( ).
4. TV Menus 59 Lock, continued Lock Time Lock by Time Lock Time, Unlock Time Blocks all use of the TV during the time period you specify. You must enter a pass code to use the TV when the time lock is in effect. After releasing the lock with the pass code, the lock does not go back into effect until the next time the TV is powered on. Enables/disables Lock by Time. To set the lock and unlock times: 1. Highlight the lock or unlock time. 2. Press ENTER to start editing. 3. Press to make changes. 4.
5 NetCommand IR Control About NetCommand IR Control • • • • • NetCommand IR home-theater control is available on 265 series TVs. IR emitter cables are available for purchase from Mitsubishi. Visit www.mitsuparts.com or call 800-553-7278 and request one of the following: -- 242D483020 (two-ended cable) -- 299P254020 (four-ended cable). NetCommand setup is optional. You can perform NetCommand setup for a device any time after the TV has detected the device.
5. NetCommand IR Control (265 Series) *O GSPOU PG B TJOHMF BWFSBHF TJ[FE EFWJDF *3 TFOTPS IR Emitters *3 TFOTPS *3 TFOTPS Placement The NetCommand system uses emitters connected to the IR–NetCommand Output jack to control other devices such as DVD players, cable boxes, satellite receivers, and VCRs. IR emitter cables are available for purchase from Mitsubishi. Request either part number 242D483020 (two-ended cable) or part number 299P254020 (fourO GSPOU PG B ended cable).
5. NetCommand IR Control (265 Series) NetCommand Setup Initial NetCommand Setup 3. Switch the TV to the desired input to control. Press To perform this procedure, you need: • The remote controls for both the TV and the device you want to control. • An IR emitter cable available from Mitsubishi. 4. 5. The first function highlighted in the Learn screen Note: To set up an A/V receiver, see “Setting Up A/V Receiver Control,” page 68. 1.
5. NetCommand IR Control (265 Series) NetCommand Setup, continued Adding or Removing Device Keys from NetCommand Control After performing initial setup, you can add or remove individual keys under NetCommand control. 1. Switch the TV to the device. Press INPUT, highlight the device’s icon, and press ENTER. 2. Open the Inputs menu and highlight the Learn icon. 3. When the Learn screen displays: • To add keys: Continue as described earlier under “Initial NetCommand Setup” on the opposite page.
5. NetCommand IR Control (265 Series) Operating NetCommand-Controlled Devices, continued Special Operation Methods Key Name in Learning Screen Special Operation Description and Setup How to Use Power On Manual Power On/Off Use for devices that have only one POWER key. 1. Press INPUT. 2. Highlight the icon for the device to be powered on or off. 3. With the Input Selection menu still displayed, press POWER to send the power signal; you may need to press POWER twice.
5. NetCommand IR Control (265 Series) 65 Operating NetCommand-Controlled Devices, continued Key Name in Learning Screen Special Operation Description and Setup Enter (digits) When ENTER is for channel changes, i.e., the original remote control has a separate ENTER key for this function): How to Use Press digit key(s) and then press ENTER. NetCommand will send the Enter signal for channel selection. Learn the ENTER key for channel selection in the NetCommand Enter (digits) learning position.
5. NetCommand IR Control (265 Series) Operating NetCommand-Controlled Devices, continued NetCommand Specialized Device Keys Refer to this chart when “learning” device keys. “Learn” some, all, or none of the keys used for each device type. See page 64 for more on keys marked in the “Special Operation Method” column.
6 NetCommand IR Control of an A/V Receiver NetCommand IR home-theater control is available on 265 series TVs. See the description of NetCommand on “About NetCommand IR Control,” page 60. Two levels of NetCommand A/V receiver control are available through the Inputs > AVR menu. • Power and volume. See the next page. • Automatic audio and video switching over HDMI. See “Setup to Control Automatic Audio and Video Switching via HDMI,” page 70.
6. NetCommand Control of an A/V Receiver (265 Series) Setting Up A/V Receiver Control Power and Volume 3. When the Power text starts flashing, aim the A/V receiver’s remote control at the TV and hold the POWER or POWER ON key until a check mark appears next to Power. • If the text stops flashing before the check mark appears, repeat this step. • To remove the key from NetCommand control, press the CANCEL key while the key name is highlighted.
6. NetCommand Control of an A/V Receiver (265 Series) 69 Setting Up A/V Receiver Control, continued Automatic Audio/Video Switching Over an HDMI Connection If your A/V receiver has an HDMI output, it may be convenient to send audio and video to the TV over a single HDMI cable through the A/V receiver. The following setup enables the A/V receiver to switch automatically to the correct input when you select a device in the TV’s Input Selection menu.
6. NetCommand Control of an A/V Receiver (265 Series) Setting Up A/V Receiver Control, continued Before You Begin To complete these steps you will need: • The remote controls for both the TV and the A/V receiver. • An IR emitter cable available from Mitsubishi. • An HDMI-to-HDMI cable to connect the A/V receiver to the TV and cables necessary to connect devices to the A/V receiver. 4. 5. 1. Connect the A/V receiver to the TV with an HDMI2. 3. to-HDMI cable.
6. NetCommand Control of an A/V Receiver (265 Series) 71 Setting Up A/V Receiver Control, continued NetCommand Control of a Device Connected to an HDMI A/V Receiver Use this setup to have NetCommand control a device sending audio and video through the A/V receiver to the TV via HDMI. You must have already completed the procedure under “Setup to Control Automatic Audio and Video Switching via HDMI” on the opposite page.
Appendices Appendix A: Programming the Remote Control. . . . . . . . . . . . 73 Appendix B: Bypassing the Parental Lock. . . . . . . . . . . . . . . 79 Appendix C: HDMI Control of CEC Devices.. . . . . . . . . . . . . . 81 Appendix D: TV Care. . . . . . . . . . . . . . . . . . . . . . . . . . . . 84 Appendix E: Troubleshooting. . . . . . . . . . . . . . . . . . . . . . .
Appendices Appendix A: Programming the Remote Control This appendix explains programming the TV’s remote control to operate other A/V devices. This is distinct from NetCommand or HDMI CEC. Functions Available for Other A/V Devices The TV’s remote control can be programmed to operate other types and brands of A/V products. The functions performed in each device mode vary depending on the product. Not all functions work for all models. The most common functions available are listed on this page.
Appendices Appendix A: Programming the Remote Control, continued Programming the Remote Control 1. Press one of the upper buttons on the remote control to change to the correct mode for the product you want to control. Refer to the table below. Only one of each device type can be controlled in each mode. IMPORTANT You may need to reprogram the remote control after changing the batteries. Record the codes for each mode in the space provided to make this faster.
Appendices Appendix A: Programming the Remote Control, continued Audio Amplifiers Altec 41742 Lansing Anthem 42220 Bel Canto 41583 Design Cary Audio 41879 Design Classe 41461 Denon 42134 Durabrand 41561 Flextronics 41879 Halcro 41934 Harman/ 40892 Kardon Krell 42463, 41837 Left Coast 40892 Lenoxx 41561 Lexicon 41802, 41145 Marantz 42138, 40892 Mark 42405, 41483 Levinson Parasound 42245, 41934 Philips 40892 Polk Audio 42242, 40892 Cable Boxes Amino Bright House Cable One Cablevision Charter Cisco Comcas
Appendices Appendix A: Programming the Remote Control, continued A/V Receivers Marantz 42114, 41289, 41269, 41189 McIntosh 41289 Micromega 41189 Mitsubishi 41957, 41922, 41921, 41920, 41393 Myryad 41189 Nakamichi 41313 Onkyo 41805, 41531, 41320, 41298, 40842 Optimus 41023 Panasonic 41763, 41633, 41548, 41518, 41316, 41308, 41288, 41275, 42967, 42452, 42221, 41764 Philips 42470, 42459, 42311, 41269, 41266, 41189, 40891 Pioneer 41935, 41384, 41023, 40630 Polk Audio 42270, 41289 Proscan 41254 RCA 42041, 4
Appendices Appendix A: Programming the Remote Control, continued VCRs Kodak Linksys Lloyd’s LXI Magnasonic Magnavox Marantz Marta Matsushita Media Center PC MEI Memorex MGA Microsoft Mind Minolta Mitsubishi Motorola MTC Multitech NEC Nikko Niveus Media Northgate Olympus Optimus Panasonic Penney Pentax Philco Philips Pilot Pioneer Polk Audio Portland Presidian Proscan Pulsar Quarter Quartz Quasar RadioShack Radix Randex 20037, 20035 21972 20000 20037 20593 21593, 20593, 20081, 20039, 20035, 20000 20081
Appendices Appendix A: Programming the Remote Control, continued DVD Players Harman/ Kardon Helios Hello Kitty Hitachi Hiteker Humax iLo Initial Insignia Integra JBL JVC jWin Kawasaki Kenwood KLH Lenoxx LG LiteOn Magnavox Marantz McIntosh Memorex Microsoft Mintek Mitsubishi Myryad NAD Norcent Olevia Onkyo Oppo Panasonic Philco Philips PianoDisc 31229, 30702, 30582 32192, 32080 30831 30664, 30573 30672 31588, 31500 31472, 31348 31472 32596, 32428, 32095, 30675 32147, 31769, 30627, 30571 30702 32365, 3
Appendices Appendix B: Bypassing the Parental Lock 79 Mitsubishi Home Theater TV 154 Series 164 Series 265 Series Lock Bypass Instructions Have Been Filed for Future Reference Bypassing the Parental Lock After you set the lock, you must use your pass code to: • View a locked program • View a locked channel • View the locked TV • Cancel the lock • Enter the Lock menus If you forget your pass code, you can view the locked TV without entering your pass code.
Appendices This page intentionally left blank For assistance call 1(800) 332-2119
Appendices 81 Appendix C: HDMI Control of CEC Devices Many new HDMI devices have a feature called Consumer Electronics Control (CEC) or HDMI Control. HDMI Control allows one device, such as the TV, to control other devices, such as an A/V receiver or disc player. Use of CEC is optional. Each manufacturer chooses which CEC functions to support so it is difficult to predict which devices and features are compatible with Mitsubishi’s HDMI Control.
Appendices Appendix C: HDMI Control of CEC Devices, continued HDMI Control of an HDMI A/V Receiver and Connected Devices Note: Connect the A/V receiver to the TV with an HDMI cable before making other connections. 1. Enable HDMI Control for the A/V receiver as 2. 3. 4. 5. described in “Enabling HDMI Control of CEC Devices” on the previous page. Power on the HDMI device you wish to connect to the A/V receiver (such as a disc player, cable box, or satellite receiver).
Appendices Appendix C: HDMI Control of CEC Devices, continued Resolving CEC Conflicts Using HDMI Control Because each manufacturer selects which CEC functions to support, some devices can conflict with other devices. If control conflicts arise, you can: • Turn off TV control of an individual CEC-enabled device (see below). • Turn off CEC in the setup menu of one of the devices.
Appendices Appendix D: TV Care Cleaning Recommendations Normally, light dusting with a dry, non-scratching duster will keep your TV clean. If cleaning beyond this is needed, please use the following guidelines: First, turn off the TV and unplug the power cord from the power outlet. Occasionally clean dust build-up from the air-intake grilles on the back and sides of the TV. Clean using a vacuum cleaner with a brush attachment.
Appendices 85 Appendix E: Troubleshooting TV Reset Comparison Guide You can resolve many common TV problems using the reset functions described in the following table. See also the troubleshooting suggestions later in this appendix. IMPORTANT Before you change sound or picture settings: If picture or sound settings seem wrong for a broadcast channel (a channel from the ANT input, a cable box, or satellite receiver), first check other channels from the same input before changing settings.
Appendices Appendix E: Troubleshooting, continued Reset Name When to Use How to Use Resulting Action A/V Reset (for all inputs) To reset audio and video adjustments for all inputs to the original factory settings. While viewing the TV, press the control-panel buttons INPUT and VOLUME DOWN at the same time for at least two seconds. All Audio and Video settings are returned to the original factory settings, including global settings not affected by Picture > Reset.
Appendices 87 Appendix E: Troubleshooting, continued Reset Name When to Use How to Use Resulting Action VUDU Reset VUDU Account Password You have forgotten your account password. Using a computer, go to www.VUDU.com. Reset your account password from the VUDU website (requires access to e-mail). VUDU Reset Parental Controls Pass Code You have forgotten your pass code. Call VUDU Customer Care at 1-888-554-VUDU (8838). VUDU Customer Care will reset your pass code.
Appendices Appendix E: Troubleshooting, continued TV Channels 1. Symptom Remarks The TV takes several seconds to respond to channel changes. • • • • 2. You cannot access a channel. • • • • • • 3. When ChannelView list is displayed, information appears incomplete • • • • It is normal for digital channels to take longer to tune in. Press ENTER after entering a channel number to minimize delays. Use a 4-digit number for an over-the-air digital channel.
Appendices 89 Appendix E: Troubleshooting, continued Picture Symptom Remarks 1. Picture does not look like a high-definition picture. Not all signals are high-definition signals. To receive high-definition programming from your cable or satellite provider, you must subscribe to the provider’s high-definition service. Some overthe-air broadcasts are in high-definition and can be received with a high-quality antenna suited to your location. 2. TV has sound but no picture.
Appendices Appendix E: Troubleshooting, continued Sound 1. Symptom Remarks There is no sound even when the volume is turned up. • • • • • • Check if the MUTE key is on. The TV’s analog Listen to setting may be set to SAP (analog program from the ANT input) but no SAP is being broadcast. Check that the Sound > Audio > TV Speakers option is set to On to hear sound from the TV speakers. Possibly the TV Speakers option is Off or set to Center but there is no A/V receiver connected.
Appendices 91 Appendix E: Troubleshooting, continued NetCommand IR Control (NetCommand-equipped models only) Symptom Remarks 1. • NetCommand unable to learn specific device keys. • • • • A/V Device does not use IR format for remote control signal. ITT and RF formats cannot be learned. Room lighting may affect the signal. Have the remotes very close (6 inches or less) to the TV during Learning. Some, but not all, device key functions can be learned by NetCommand.
Trademark and License Information Trademark and License Information LICENSOR’S SUPPLIERS DO NOT MAKE OR PASS ON TO END USER OR ANY OTHER THIRD PARTY, ANY EXPRESS, IMPLIED OR STATUTORY WARRANTY OR REPRESENTATION ON BEHALF OF SUCH SUPPLIERS, INCLUDING, BUT NOT LIMITED TO THE IMPLIED WARRANTIES OF NON-INFRINGEMENT, TITLE, MERCHANTABILITY OR FITNESS FOR A PARTICULAR PURPOSE. Manufactured under license from Cambridge Mechatronics Ltd. Rapidfire and the 1...
Trademark and License Information 93 Mitsubishi TV Software END-USER LICENSE AGREEMENT FOR EMBEDDED SOFTWARE IMPORTANT – READ CAREFULLY: This License Agreement is a legal agreement between you (either an individual or an entity) and Mitsubishi Digital Electronics America, Inc. (MDEA) for all software pre installed and/or provided along with this television (“Software”). By utilizing this television and Software, you agree to be bound by the terms of this License Agreement.
Trademark and License Information GNU GENERAL PUBLIC LICENSE Version 3, 29 June 2007 Copyright © 2007 Free Software Foundation, Inc. Everyone is permitted to copy and distribute verbatim copies of this license document, but changing it is not allowed. Preamble The GNU General Public License is a free, copyleft license for software and other kinds of works. The licenses for most software and other practical works are designed to take away your freedom to share and change the works.
Trademark and License Information 95 4. Conveying Verbatim Copies.
Trademark and License Information However, if you cease all violation of this License, then your license from a particular copyright holder is reinstated (a) provisionally, unless and until the copyright holder explicitly and finally terminates your license, and (b) permanently, if the copyright holder fails to notify you of the violation by some reasonable means prior to 60 days after the cessation.
Trademark and License Information 97 GNU General Public License Version 2, June 1991 Copyright (C) 1989, 1991 Free Software Foundation, Inc. 675 Mass Ave, Cambridge, MA 02139, USA Everyone is permitted to copy and distribute verbatim copies of this license document, but changing it is not allowed. Preamble The licenses for most software are designed to take away your freedom to share and change it.
Trademark and License Information a medium customarily used for software interchange; or, b) Accompany it with a written offer, valid for at least three years, to give any third party, for a charge no more than your cost of physically performing source distribution, a complete machine-readable copy of the corresponding source code, to be distributed under the terms of Sections 1 and 2 above on a medium customarily used for software interchange; or, c) Accompany it with the information you received as to
Warranty 99 Mitsubishi LCD Flat Panel HDTV Limited Warranty MITSUBISHI DIGITAL ELECTRONICS AMERICA, INC. (“MDEA”) warrants to the original purchaser of this LCD Flat Panel HDTV that if purchased from an authorized MITSUBISHI Audio/Video Dealer, should it prove defective by reason of improper workmanship and/or material: a. Parts. All parts (except any software incorporated into this HDTV) are warranted for a period of one year from the date of the original purchase at retail.
Warranty wall mountings, or set-ups, any adjustments of user controls (including contrast, brightness, color, tint, fine tuning, sharpness), other adjustment necessary to prepare the unit for display or use, connection with any external audio receiver, antenna, cable or satellite systems, or service of products purchased or serviced outside the U.S.A. Please consult the operating instructions contained in the Owner’s Guide furnished with the product for information regarding user controls. 3.
Index Index A Accent Lighting 54 Anamorphic Picture Format 33 Antenna Input (ANT) 23 Setting Up 14 Signal Strength for Digital Channels 31 Audio Lock (A/V receiver control) 74 Auto Input Sensing 15 Auto-Off (Sleep Timer) 29 Auto-On (Timer) 52 A/V Receiver and TV’s Remote Control 73 Audio Lock 74 Center Channel 28 Connecting 23, 24, 27 Controlling Sound Volume 32 Disconnecting Analog 32 NetCommand IR Control 67, 68 Controlling a Device Connected to the A/V Receiver 45, 71 Video and Audio Switching via HDMI
Index R Ratings (TV and Movie) 58 Remote Control Keys and Functions 11 Programming Instructions 74 Reset 84 Reset A/V Memory Reset (for the current input) 85 A/V Reset (for all inputs) 86 HDMI Auto Input Sensing 15 Pass Code 79 PerfectColor/PerfecTint 85 Remote Control 84 Remote Control Audio Lock 74 System Reset 13 TV Reset Comparison Guide 85 S Safety Instructions 4, 5 SAP (second audio program) 50 Satellite Receiver and the Remote Control 73 Connecting 19, 24, 25 Scan (memorize channels) 53 Scre
Website: www.mitsubishi-tv.com E-mail: MDEAservice@mdea.com For questions, call Consumer Relations at 800-332-2119 To order replacement or additional remote controls, Visit our website www.mitsuparts.com or call 800-553-7278 SYSTEM RESET If the TV does not respond to the remote control, control-panel buttons, or will not power on/off, press and hold the POWER button on the control panel for ten seconds. The TV will turn off. Power on the TV and the green LED will flash quickly for about one minute.