
- Mitsubishi Digital Electronics DVR User Manual


63
63
••••••••••••••••••••••••••••••••••••••••••••••••••••••••••••••••••••••••••••••••••••••••••••••••••••••••••••••••••••••••••••
Operations
Data cannot be erased when accessing to HDD as
playing/recording/copying/restoring.
3. Turn the SHUTTLE ring counterclockwise or press the SET
UP button to exit.
■ PASSWORD
The unit is equipped with 2 lock functions : SIMPLE
LOCK which does not require a PASSWORD to unlock
and PASSWORD LOCK which does require a PASS-
WORD to unlock.
• If the PASSWORD has not been set : Lock function
will be SIMPLE LOCK
• If the PASSWORD has been set : Lock function will
be PASSWORD LOCK.
When the MAIN switch on the rear of the unit is set to
ON, SIMPLE LOCK/PASSWORD LOCK setting can be
made even with the POWER button on the front set to OFF.
When the MAIN switch on the rear of the unit is set
to OFF or when a menu is being displayed, SIMPLE
LOCK/PASSWORD LOCK will not function.
♦ SIMPLE LOCK
When SIMPLE LOCK is on, buttons other than the
SPLIT/SEQUENCE button, ZOOM button, camera
number buttons 1 ~ 16 and the MAIN switch become
inoperable and the unit will be locked in the current state.
To apply simple lock • • •
1. Press the LOCK button using a ballpoint pen, etc., when
the MAIN switch is set to ON.
• The lock turns on and the LOCK indicator lights.
To unlock simple lock • • •
1. Press the LOCK button.
• The lock is unlocked and the LOCK indicator turns off.
♦ PASSWORD LOCK
PASSWORD LOCK is divided into the two types of “OP-
ERATION CONTROL” and “HDD DATA CLEAR”. “OP-
ERATION CONTROL” can be locked in three levels by
operation functions. “HDD DATA CLEAR” makes it pos-
sible to lock the settings “MAIN HDD DATA CLEAR”,
“SUB HDD DATA CLEAR”.
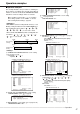
<About PASSWORD LOCK for OPERATION CON-
TROL (level 1 to 3)>
1) Input the PASSWORD of level 1 to 4.
2) Set the PASSWORD LOCK.
• The PASSWORD LOCK of level 1 will be active.
When The PASSWORD LOCK of level 1 is active,
functions of all operations can be locked.
3) Unlock the PASSWORD LOCK of level 1.
• The PASSWORD LOCK of level 2 will be active.
When The PASSWORD LOCK of level 2 is active,
only the SPLIT/SEQUENCE button, ZOOM button,
camera number buttons, OUTPUT A button and OUT-
PUT B button are operable.
♦ RESET TO FACTORY SETTINGS
All of the unit’s menu screen are reset to factory settings.
1. Press the SET UP button
}
<SETTINGS>
}
<INITIAL SET
UP/INFORMATION>
}
Select “RESET TO FACTORY
SETTINGS” in the <INFORMATION/SERVICE> screen. Turn
the SHUTTLE ring clockwise.
• The <RESET TO FACTORY SETTINGS> screen appears.
• When not resetting menu screen settings, turn the SHUTTLE
ring counterclockwise.
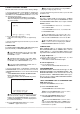
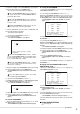
<RESET TO FACTORY SETTINGS>
>>
EXECUTE
SHUTTLE>>:EXECUTE,<<:CANCEL
2. Turn the SHUTTLE ring clockwise.
• The menu screen settings are reset to original factory
setting.
3. Turn the SHUTTLE ring counterclockwise or press the SET
UP button to exit.
♦ DATA CLEAR
For deleting data in MAIN HDD, SUB HDD, CFC (Com-
pact Flash Card), or ARCHIVE/COPY device.
“SUB HDD DATA CLEAR” appears when the “HDD
SETTING” is selected on “PARTITION” of the <INI-
TIALIZATION> screen.
“ARCHIVE DATA CLEAR” and “COPY DATA
CLEAR” appear when “ARCHIVE•COPY” is selected
on “ID4•ID5” of the <INITIALIZATION> screen.
Performing “MAIN HDD DATA CLEAR” while in
“MIRRORING” mode deletes all data.
1. Press the SET UP button
}
<SETTINGS>
}
<INITIAL SET
UP/INFORMATION>
}
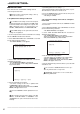
Select the desired item to clear in the
<INFORMATION/SERVICE> screen. Turn the SHUTTLE ring
clockwise.
• “PUSH WARNING RESET KEY FOR 1 SECOND TO CLEAR”
appears on the bottom of the screen.
• To cancel the deletion, turn the SHUTTLE ring counter-
clockwise.
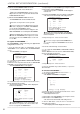
<MAIN HDD DATA CLEAR>
PUSH WARNING RESET KEY
FOR 1 SECOND TO CLEAR
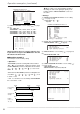
When a password for level 4 has been registered
and locked, and the settings for “MAIN HDD DATA
CLEAR” and “SUB HDD DATA CLEAR” are made, the
<UNLOCK PASSWORD> screen will be displayed and
the lock must be unlocked.
2. Press the WARNING RESET button for 1 second.
• “CLEARING ...” appears on the screen.