
Specifications


Gravimetric Batch Blenders w/Mitsubishi Control Chapter 3: Installation 51
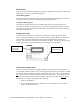
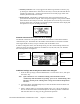
Mixer Options
Press the “Timed/Continuous Mixing” key (In the top right hand corner) when in “Mixer and
Dump Setup” screen to set the following options:
Timed Mixing Option
This mode of operation turns the mixer on only during dumping and during the re-mix time
set into the control to jog the mixer during high level mixer operation.
Continuous Mixing Option
This mode of operation turns the mixer on after initial startup and will continue to run
continuously, unless the remix time is set to jog the mixer during high level mixer operation.
This option is used for sticky materials that tend to bridge and block off the mixer discharge
to the processing machine.
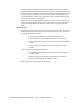
Setting Date & Time
The Set Date & Time feature is located in the “Panel View Config” menu of the Setup
Screen. This feature allows the operator to set the Slide Gate/Auger Blender’s internal time
clock and date. The clock data must be entered in the traditional Hours, Minutes, and
seconds. The date must be entered in Years, Months, and Days. All values in this screen can
be entered by pressing on the related button and choosing the correct number.
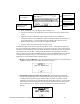
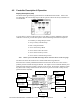
Feeder Alarm Setup & Flags
This screen allows the operator to configure the alarm settings for each individual feeder. It
can configure whether a feeder will retry during the metering of a batch, and enable or disable
the “Out of Material” alarm for any feeder. If the alarm flag is set to “Stop”, the blender will
not
continue. It stops on that component continuing to try and meter. The optional low level
proximity switches have their own separate alarm. The alarm will sound, but does not
stop
the blender. To configure each hopper do the following:
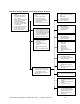
1. Enter the Setup Menu.
2. Once in the Setup menu, press “Alarm Setup.” This will take you to the “Alarm
Flags & Feeder Setup” screen.
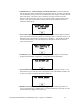
Go back to
Setup Directory
Press to
Access the
Panel View