
Instruction manual


12
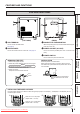
CONNECTIONS
OTHERS
PRECAUTIONS
FEATURES
PREPARATION
TROUBLE-
SHOOTING
CONTENTS
44
44
4 Install the print paper into the unit.
Make sure to install the print paper firmly.
NOTE
Install the print paper into the unit slowly. If it is dropped along the ditches, the unit or
accessories may be damaged.
Roller
Print paper
55
55
5 Remove the sticker, insert the print paper between the rollers as
shown right, and feed the print paper until it reaches the black
cover.
• Remove the sticker before inserting the print paper between rollers. Make sure to
insert the paper straight.
NOTE
• Keep the roller clean. Dirt on the roller may degrade the print quality.
NOTE
• When taking the print paper out, pull it up toward you.
• Make sure to turn on the power before replacing the print paper.
• Make sure to eliminate any slack from the print paper. If you carry out the following
steps without eliminating the slack, the print paper may be damaged.
Black cover
22
22
2 Press the POWER switch on the rear panel to turn on the power.
33
33
3 After the mechanical initialization is completed, press the DOOR
OPEN button to open the door.
Take the ink cassette in the printer out.
Direction of paper
insertion
BEFORE OPERATION
CAUTION
• Do not touch the thermal head right after
printing because it is extremely hot.
Otherwise you may get burned or injured.
NOTE
• Note that the thermal head is quite
sensitive to static electricity. When you
touch the thermal head while carrying
static electricity on your body, the thermal
head may be damaged.
Thermal head (inside)
POWER switch
Downloaded From ManualsPrinter.com Manuals