
Instruction manual


20
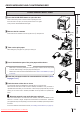
CONNECTIONS
PREPARATION
TROUBLE-
SHOOTING
FEATURES
PRECAUTIONS
OTHERS
CONTENTS
BEFORE CALLING FOR SERVICE
Symptom
The power is not turned on.
The door doesn't close.
The image is not printed.
An error can not be resolved.
Check & Remedy
Is the power cord plug disconnected from the outlet?
→ Connect the power cord plug to the outlet firmly.
→ The protective circuit may be working. Turn off the power and wait for
about two minutes. Then turn on the power again.
Are you turning off the power during printing procedure?
→ Turn on the power and then close the door.
Is the image data sent to this unit?
→ Make sure that the image data is sent to this unit.
Is the print paper or the ink ribbon used up?
→ Check them.
Is the ink cassette installed correctly?
→ Install the ink cassette correctly.
→ Press the DOOR OPEN, CANCEL and FEED&CUT buttons simultaneously.
This printer starts initialization.
INSTRUCTIONS FOR TRANSPORTATION
When transporting this unit for some reason such as repair, follow the instructions below.
1. Use the original packaging.
The genuine package unit may not endure more than one round trip. If the unit is transported with the package unit more than
one round trip, it may not be guaranteed.
Purchase another package unit when transporting this unit again.
Pack the unit with all the accessories (ink ribbon, print paper, ink cassette, and paper flanges) removed.
2. Turn off the power after the PAPER/INK RIBBON indicator blinks.
After removing all the accessories, close the door with the printer’s power on. After the PAPER/INK RIBBON indicator blinks,
turn the power off.
3. If the ink ribbon, print paper, or ink cassette can not be taken out, consult with your dealer.
For the following symptoms, check the unit again before calling for service.
ERROR MESSAGES AND COUNTERMEASURES
Downloaded From ManualsPrinter.com Manuals