VIDEO CASSETTE RECORDER OWNER’S GUIDE HIGH DEFINITION DIGITAL VCR VCR POWE R CHANNE L VOLU ME TV POWE R EJECT MUTE 1 2 IP 5 7 QUICK 3 CM SK 4 6 8 9 PROGR AM INPUT 0 VCR Plu s+ PLAY VCR TV REW FF REC STOP PAUSE DISPLA Y IEEE 139 INPUT 4 INDEX AUDIO/V IDEO ADJUS T CANCEL MENU ENTER VCR/TV SP/EP ADJUS T MODEL HS-HD1100U VCR Plus and PlusCode are registered trademarks of Gemstar Development Corporation.
Special Features HS-HD1100U ♦ High-Definition Digital Recording and Playback ♦ IEEE 1394 Interface for Digital Home Networking ♦ Rew/FF at 500X speed (:43 seconds for a T-120 tape) ♦ S-VHS quasi playback ♦ PerfecTape® ○ ○ ○ ○ ○ ○ ○ ○ ○ ○ ○ ○ ○ ○ ○ ○ ○ ○ ○ ○ ○ ○ ○ ○ ○ ○ ○ ○ ○ ○ ○ ○ ○ ○ ○ ○ ○ ○ ○ ○ ○ ○ ○ ○ ○ ○ ○ ○ ○ ○ ○ ○ ○ ○ ○ ○ ○ ○ ○ ○ ○ ○ ○ ○ ○ ○ ○ ○ ○ ○ CAUTION RISK OF ELECTRIC SHOCK DO NOT OPEN CAUTION: TO REDUCE THE RISK OF ELECTRIC
SHORTCUTS To connect your VCR, go to page 4. To play a tape, go to page 11. To record a program, go to page 20. To learn about Advanced Features, go to page 42. ○ ○ ○ ○ ○ ○ ○ ○ ○ ○ ○ ○ ○ ○ ○ ○ ○ ○ ○ ○ ○ ○ ○ ○ ○ ○ ○ ○ ○ ○ ○ ○ ○ ○ ○ ○ ○ ○ ○ ○ ○ ○ ○ ○ ○ ○ ○ ○ ○ ○ ○ ○ ○ ○ ○ ○ ○ ○ ○ ○ ○ ○ ○ ○ ○ ○ ○ ○ ○ ○ ○ ○ ○ ○ TABLE OF CONTENTS IMPORTANT SAFEGUARDS ...................... 2 Hooking Up Your VCR................................. 4 Playback ......................................................
IMPORTANT SAFEGUARDS Please read all these instructions carefully regarding your VCR before you begin operating it. Follow all warnings and instructions marked on the VCR. Thank you. 1 Read Instructions All the safety and operating instructions should be read before the product is operated. 2 Retain Instructions The safety and operating instructions should be retained for future reference. 3 Heed Warnings All warnings on the product and in the operating instructions should be adhered to.
16 Power Lines An outside antenna system should not be located in the vicinity of overhead power lines or other electric light or power circuits, or where it can fall into such power lines or circuits. When installing an outside antenna system, extreme care should be taken to keep from touching such power lines or circuits as contact with them might be fatal. 17 Overloading Do not overload wall outlets, extension cords, or integral convenience receptacles as this can result in fire risk or electric shock.
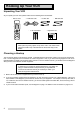
Hooking Up Your VCR Unpacking Your VCR As you unpack your new VCR, please make sure the following items are included: • Remote control • 1 Audio/Video cable • 1 Coaxial cable • 2 "AA" size batteries • IEEE 1394 cable • Registration card PRODUCT REGISTRATION Register and Win in the $100,000 Give Away III! See inside... IMPORTANT Never place any heavy objects on top of the VCR. Use caution when placing the VCR on top of the television as the surface may not be stable.
Hooking Up Your VCR IMPORTANT You must use one of the connections shown on page 5 and 6 in order to record television or cable programs. VCR Rear Panel IN Connecting Antenna or Cable Connect VCR ANTENNA OUT to the TV’s Antenna jacks (varies by TV). 3 If your TV has audio video inputs, continue with the connections on page 7. If not, plug in power cords of VCR and TV.
Hooking Up Your VCR Connecting Cable and Cable Box, if only some channels are scrambled 1 You will need a cable splitter, five lengths of coaxial cable, and a cable A/B switch. This connection will allow you to watch one non-scrambled channel while you record another non-scrambled channel. 2 Connect cable from wall outlet to IN terminal on the cable splitter. 3 Connect the coaxial cable to OUT terminal on the cable splitter and A-IN on the A/B switch.
Hooking Up Your VCR Connections to TV with Audio Video Inputs Because you purchased a Hi-Fi VCR, you will want to take advantage of its superior sound capability and connect it to a stereo TV system with audio and video inputs. This connection also helps maintain the best picture quality. Connect the red and white audio cable to AUDIO OUT R (right) and AUDIO OUT L (left) on the VCR. Connect the other end to the TV’s AUDIO INPUT RIGHT and AUDIO INPUT LEFT. Match the colors of the connectors to the cables.
Hooking Up Your VCR Connections to Integrated HDTV or IEEE 1394-equipped HDTV Receiver If you connect the HS-HD1100U to an integrated HDTV or an IEEE 1394-equipped HDTV receiver with an IEEE 1394 cable, you can record digital broadcasts in D-VHS format, which records digital broadcasts as digital signals, so programs can be recorded as is with no loss of quality. And this connection also makes it possible to playback a recorded digital signal in D-VHS format.
Hooking Up Your VCR Notes about IEEE 1394 network The IEEE 1394-equipped devices that are available to be connected to the HS-HD1100U are an integrated HDTV, an IEEE 1394-equipped HDTV receiver or another D-VHS VCR. The data may not be sent/received correctly if you are connecting IEEE 1394-equipped devices other than Mitsubishi integrated HDTV or Mitsubishi D-VHS VCR.
Hooking Up Your VCR Connections to Home Theater Receiver You may wish to connect your VCR to a Home Theater Receiver so that you can take advantage of the Surround Sound audio recordings that are common with many movies. Home Theater Receivers will often control both the sound that is heard from the speakers and the picture shown on your TV. Below is the basic connection between your VCR and Home Theater Receiver. If you use this connection, you will not use Connections to TV with Audio Video Inputs.
Playback Setting Up Your VCR to Playback/Recording the Digital Broadcast in D-VHS (digital) Format 1 VCR POWER Make sure that your VCR and the integrated HDTV or the IEEE 1394-equipped HDTV receiver is connected with an IEEE 1394 cable. 2 Turn on the IEEE 1394-equipped HDTV receiver. 3 Turn on your TV and switch the input of the TV to the correct input of the IEEE 1394-equipped HDTV receiver. 4 Press POWER on the VCR to turn the power on.
Playback 3 You are now watching the VCR’s picture. To go back to viewing the picture from the TV, press the TV’s INPUT button to go back to the previous ANTENNA input position. 4 Later, you should turn the RF converter OFF by following instructions on page 48. If your system includes a home theater receiver or an A/V receiver, refer to your home theater receiver’s owner’s guide.
Playback Loading a Tape Tapes can be loaded into your VCR as long as the VCR is plugged in. Even when the VCR POWER is off, loading a tape will automatically turn the VCR on. Use only tapes that have a , or label. 1 2 Hold the tape so that the long narrow edge with the contents label faces you. The other edge is hinged and should face the VCR. The plastic window that shows the videotape should face up. CORRECT Gently insert the tape evenly into the cassette slot until the VCR automatically takes it in.
Playback Using Basic Playback Controls Rewinding a Tape While the tape is stopped, press REW on the remote control or turn the shuttle ring on the front panel to the left. Fast Forwarding a Tape While the tape is stopped, press FF on the remote control or turn the shuttle ring on the front panel to the right.
Setting Up Your VCR Your VCR comes with Mitsubishi’s exclusive on-screen operating system. This system has been developed to simplify the operation of your VCR with clear, easy-to-understand language and design. 1 2 3 4 5 6 7 8 9 0 Before your VCR can receive television channels or you can program your VCR to record, you need to memorize all of the channels you can receive into your VCR and set the clock. Fortunately, your VCR makes this an easy process with our menu system.
Setting Up Your VCR Adding and Deleting Channels If necessary, you can manually add or delete channels after you have completed the automatic channel memorization. 1 Make sure that video mute is ON. See page 47. 2 Set the VCR’s input to Tuner. To do this, press INPUT on the remote control until a channel number appears on the screen or the front panel display. 3 Press MENU on the remote control. VCR Main Menu appears. 4 Press the ADJUST buttons on the remote control to select First Time Set-Up.
Setting Up Your VCR Setting the Clock You have to set the clock using either Setting the Auto Clock or Setting the Clock Manually. Setting the Auto Clock Your VCR can set the clock automatically by picking up a time signal which some TV and cable channels transmit with their broadcasts. Most PBS stations send this signal; however, this function works only if a channel in your area is broadcasting a time signal. If you don’t receive this signal, set the clock manually. 1 Press MENU on the remote control.
Setting Up Your VCR If the VCR displays the wrong time 1 Follow the procedure on the previous page to step 3. Press ENTER. 2 You will see the Set the clock menu. Channel will be highlighted. If you know the channel that carries a time signal, press the ADJUST buttons to enter the channel. Most PBS stations broadcast a time signal. For the quickest response, enter your local PBS station. If you don’t know it, leave the channel setting at AUTO. Press ENTER. 3 Time zone will be highlighted.
Setting Up Your VCR 5 Press the ADJUST buttons until the correct month appears on screen. Press ENTER. 6 Press the ADJUST buttons to set the current year. Press ENTER. 7 Press the ADJUST buttons to set the date. Press ENTER. 8 The hour numbers and the am/pm indicator will be blinking. Press the ADJUST buttons to set the hour and am/pm at the same time. Pressing ADJUST + moves the clock forward; pressing ADJUST – moves the clock backward. Press ENTER. 9 Press the ADJUST buttons to set the minutes.
Recording Your new VCR offers a wide variety of recording options that take full advantage of our advanced electronics. First, you can learn how to record a current broadcast. Then, in another section of this book called Timer Recording, you can learn how to program your VCR to record at a later time and day.
Recording recording copy protected digital programs Some programs have copy protect data to prohibit or restrict recording. • Programs without copy protection : D-VHS recording is available. • Programs with copy restriction : You can record in D-VHS format once, but cannot copy. • Programs prohibited from copying: D-VHS recording is not available. When you record the program prohibited from copying or copy the program with copy restriction, no COPY will appear on the front panel display.
Recording Recording a Current Broadcast in VHS (analog) Format 1 Load a tape with its erasure prevention tab intact into the VCR. 2 Select the speed at which you would like to record by pressing SP/EP on the remote control or on the front panel. 3 4 5 Set the VCR’s input to Tuner by pressing INPUT until a channel number is shown on-screen or on the front panel display. If L1 or L2 appears instead of a channel number, continue to press INPUT until a channel number appears.
Recording Using One-Touch Recording (OTR) One-Touch Recording (OTR) is a way to begin recording immediately and have your VCR stop recording and turn off automatically after your show is over. CHANNEL 1 When you record a digital broadcast in D-VHS (digital) format, follow the steps 1 to 4 on page 20. And then press IEEE 1394 INPUT on the VCR remote control to select the device you would like to record from. d1 to d5 will appear on the front panel display.
Recording Using Standby One-Touch Recording (OTR2) Standby One-Touch Recording (also called OTR2) is a programming method to begin recording within the next 24 hours and record in 30 minutes intervals. Before you use OTR2, make sure the clock has been set correctly. CHANNEL 1 Load a tape with its erasure prevention tab intact into the VCR. 2 Select the speed at which you would like to record by pressing SP/EP on the remote control or on the front panel.
Recording Notes about Available Tape and Recording Time Recording Format The available recording format is as follows: Recording format D-VHS VHS Tape VHS D-VHS Yes No Yes Yes When you use a D-VHS tape for D-VHS recording, the recording format is preset to D-VHS format.
Recording Using Audio and Video Functions The audio and video function menus allow you to set things such as listening to the stereo track of your recording, or setting the tape length to have the remaining time display function work properly. The VCR will display the functions and settings on your TV screen. The first section describes the functions, the next section tells you how to adjust the functions.
Recording Descriptions of Video Functions Tape (Tape) Adjust this function to ensure the accuracy of the Remaining Time display. The remaining time function does not work properly with a tape that is less than 30 minutes long. Length of tape Use setting 2 hours long or less (T-30 through T-120) T-120 160 minutes (T-160) T-160 180 minutes (T-180) T-180 200 minutes (T-200) T-200 210 minutes (T-210) T-210 D-VHS Tape (D-VHS Tape) Adjust this function to ensure the accuracy of the Remaining Time display.
Timer Recording Mitsubishi offers 5 ways to set your VCR to record upcoming broadcasts. Choose from: D-VHS (digital) Timer Recording VHS (analog) Timer Recording of Digital Broadcast VCR Plus+ system programming (easy) Conventional VCR timer recording Quick Program (easy) -- VCR does not need to be on to begin programming You can schedule up to 8 recording events within a one month period. Clock must be set before any timer recordings can be performed.
Timer Recording When you program both the D-VHS (digital) and VHS (analog) timer recording When you turn the VCR off, the programmed recording light will appear on the front panel display, showing that the VCR is in stand-by mode for the VHS timer recording. In this mode, the D-VHS timer recording you have set may not be recorded depending on the integrated HDTV or IEEE 1394-equipped HDTV receiver that you are using (Refer to your TV or receiver owner’s guide for the details.).
Timer Recording 6 Day will flash. Press the ADJUST buttons to choose the day on which you want to record; for example, Monday the 11th. Your choices are: • a single day up to one month away. • every day from Monday through Friday; for example, to tape a soap opera. To program, press the ADJUST buttons until Monday-Friday appears. • the same day every week; for example, to tape your favorite weekly sitcom. To program, press the ADJUST buttons until Every and the desired day of the week appears.
Timer Recording Conventional VCR Timer Recording 1 Load a tape with its erasure prevention tab intact into the VCR. 2 Press MENU. VCR Main Menu appears on your screen. Use the ADJUST buttons to select Program to record. Press ENTER. If there is at least one programmed recording already entered, you will see the Recap screen. Wait 4 seconds and the VCR Plus+ system menu will appear.
Timer Recording IMPORTANT If you press ENTER when you set the timer recording incompletely, Current Program is not completed will appear on your screen. If two programmed recording times overlap, VCR is already programmed for that time will display on your screen for about 3 seconds, and then the Recap screen will appear. The program you have just set will be highlighted in magenta color and flash for 3 seconds. The start and stop time of the overlapped program will be highlighted in cyan color.
Timer Recording VCR Plus+® System Programming The VCR Plus+ system allows you to program your VCR to record by simply entering a PlusCode programming number. You can find this number in TV Guide or possibly your local TV listings. 1 Load a tape with its erasure prevention tab intact into the VCR. 2 Press MENU. VCR Main Menu appears on your screen. Use the ADJUST buttons to select Program to record. Press ENTER.
Timer Recording 7 If you wish to change the record speed, press ENTER repeatedly until the record speed is flashing. Change the recording speed by pressing the ADJUST buttons. Press ENTER. 8 To program additional recording times, select an empty program line by pressing the ADJUST buttons. Press ENTER. You will return to the VCR Plus+ system menu. Continue the VCR Plus+ system programming procedure from step 3.
Timer Recording Timer Recording Hints To use the VCR before timer recording begins, press POWER on the remote once. This turns the programmed recording light off and the VCR on. If you use POWER on the front panel for this purpose, press it twice. Pressing it once turns off the programmed recording light; pressing it again turns the VCR on. VCR POWER When you are finished using the VCR, turn the VCR power off again. Make sure the programmed recording light is back on.
Timer Recording Program Caution If your VCR is set to record in VHS format, but the power is still ON within 3 minutes before timer recording starts, this screen will appear to remind you to turn off the VCR. program caution REC in 3 min Turn off VCR If the VCR is still turned on 12 seconds before the start time of the recording, that timer recording will be cancelled.
Timer Recording Cancelling a Timer Recording before the Recording Starts 1 2 Press MENU on the remote control. Your VCR will turn on and VCR Main Menu will appear on your screen. Press the ADJUST buttons on the remote control to select Program to record. Press ENTER. Recap screen will display for 4 seconds. While this screen is displayed, press the ADJUST buttons to place the cursor next to the program you wish to cancel. 3 Press CANCEL. The program is erased. 4 Press MENU twice to turn off the menus.
Editing Features Copying a Tape from D-VHS to D-VHS When you connect a D-VHS VCR equipped with IEEE 1394 INTERFACE terminal to the HS-HD1100U with an IEEE 1394 cable, you can copy a tape from D-VHS format to D-VHS. You cannot edit the tape while copying from D-VHS to D-VHS. 1 Connect an IEEE 1394 cable to IEEE 1394 INTERFACE on the playback VCR and to IEEE 1394 INTERFACE on the HS-HD1100U. You can use either of the two IEEE 1394 INTERFACE terminals.
Editing Features Copying a Tape from D-VHS to Analog To copy a tape from D-VHS to analog format, use the HS-HD1100U as a playback VCR and connect to an integrated HDTV or an IEEE 1394-equipped HDTV receiver with an IEEE 1394 cable. And then connect an integrated HDTV or an IEEE 1394-equipped HDTV receiver to the recording VCR with an S-video/video and audio cable.
Editing Features Copying a Tape from Analog to Analog There are two basic ways to make a copy of a tape from analog to analog. One way is to use the HS-HD1100U to record and another VCR for playback. The other way is to use another VCR to record and use the HS-HD1100U for playback. Regardless of which method you may choose, you will need one RCA audio cable and video cable to connect the two VCRs. If you do not have these cables, they are available at your local electronics dealer.
Editing Features Using the HS-HD1100U to Playback to Another VCR 1 Connect one stereo audio cable to AUDIO IN L and R on the recording VCR, and to AUDIO OUT L and R on the HS-HD1100U. 2 Connect a yellow video cable to VIDEO IN on the recording VCR and to VIDEO OUT on the HS-HD1100U. 3 Set the audio monitor on the HS-HD1100U to Stereo. If the other VCR is mono VCR, set the audio monitor on the HS-HD1100U to Mono. See Selecting and adjusting the audio and video functions on page 27.
Advanced Features Advanced Playback Controls (for analog playback only) 2 1 Special Effects 3 4 5 6 7 8 9 10 11 You can use the shuttle ring and the jog dial on the front panel, or ^I and I\ on the remote to control the playback speed of the tape.
Advanced Features Adjusting the Tracking automatic tracking Your VCR automatically adjusts the tape to give you the best quality picture. When you start playback of a newly inserted tape, the DIGITAL TRACKING light (D) will flash, showing that the VCR is adjusting the picture. When the VCR has finished adjusting the picture, the DIGITAL TRACKING light will shine steadily. D (digital tracking) light PWR.
Advanced Features Quick search (CM skip) Quick search lets you skip over the tape you are playing in about 30 second intervals. It is designed so that you can quickly speed through any commercials you may have recorded. To do this: 1 Make sure that you have set the VCR/TV slide switch on the remote control to the VCR position. 2 While playing a tape, choose the desired search time by pressing a number button. Number button Search time 1 2 30 sec. 1 min. 3 4 5 6 2 min. 1 min. 3 min. 2 min. 30 sec.
Advanced Features Counter zero stop Counter zero stop allows you to quickly access the beginning of a recorded or playback section of a tape. The counter zero stop will automatically fast forward or rewind the tape to “0H00M00S” and stop. 1 Press CANCEL on the remote control at the point you wish to locate later. The counter will reset to “0H00M00S.” 2 When you wish to return to the point specified in step 1, press AUDIO/VIDEO on the remote control.
Advanced Features repeat playback You can playback a section of tape over and over using repeat playback. The tape will play until the next index mark, rewind to the previous index mark and resume playing. If there is only one index mark on the tape, then the VCR will play or rewind to that mark and resume playback. If there is no index mark, the entire cassette will repeat. 1 Press AUDIO/VIDEO on the remote control to display the audio and video function menu.
Advanced Features IMPORTANT The time gauge and remaining time work by detecting control signals on recorded tapes. Therefore, they do not function while playing blank tapes. The remaining time display may not show the correct remaining time if the Tape or D-VHS Tape function is incorrectly set, if you are using speed search, if you are using a special length cassette (such as T-10 length), or if you are using a VHS-C tape with an adapter.
Advanced Features Auto power save (auto-off) When the Auto Power Save feature is turned on, the VCR will automatically turn off after remaining idle for 30 minutes. If a control, such as a menu function or channel selection is used or if there is a tape playing or being recorded, the VCR will remain on. 3 4 Complete steps 1 and 2 on the previous page. Customize choices menu appears. Use the ADJUST buttons to select Auto power save. Press ENTER to set to ON. Press MENU twice to exit the menus.
Advanced Features The VCR will display the testing status screen. When testing, the VCR records for one second, then evaluates the recording it made. The entire test takes about 8 seconds. During this time, the PT light on the front panel will flash. If you wish to cancel the test, press STOP on the remote while the PT light is still flashing. When the test is done, the VCR will display the rating of your tape for 8 seconds.
Advanced Features Advanced Options Using the remote control to operate your TV The HS-HD1100U remote control can operate many of the frequently-used functions of your TV. You only need one remote to operate both your VCR and TV. The HS-HD1100U remote control is pre-set to operate Mitsubishi televisions, but it can also operate TVs from other manufacturers. To set your remote control for your particular brand of television, follow these instructions.
Advanced Features To program the remote control operational setting The HS-HD1100U has two remote control operational settings, VCR-A and VCR-B. These are available so you may separately control two Mitsubishi VCRs that are placed close together. The VCR-A setting can be used to operate any other Mitsubishi VCR introduced since 1986. Setting the HS-HD1100U to VCR-B will allow the HS-HD1100U be operated without the VCR responding at the same time.
Location of Controls Remote Control VCR POWER Turns the VCR On or Off. If you have programmed the VCR to record, you need to turn the VCR off. VCR POWER CHANNEL VOLUME TV POWER EJECT MUTE EJECT 1 Ejects a tape. 2 3 CM SKIP CHANNEL Up and Down Selects next higher or lower channel in the VCR’s or TV’s channel memory. 4 5 7 8 6 9 QUICK PROGRAM INPUT 0 VCR Plus+ VOLUME Up and Down VCR TV PLAY Raises and lowers the sound of the TV (Operates the TV only).
Location of Controls Front Panel JOG/CHANNEL REW POWER EJECT SHUTTLE FF D-VHS IEEE 1394 INPUT cassette slot SP/EP VIDEO IN 2 L/MONO-AUDIO IN 2 -R front panel display PLAY STOP PAUSE REC OTR 2 START TIME REC LENGTH audio input 2 jacks video input 2 jack remote control sensor POWER JOG/CHANNEL Turns the VCR On or Off. If you have programmed your VCR to record, turn off your VCR. Changes channels when tape is stopped. Adjusts tracking and picture vibration. SHUTTLE ring Ejects a tape.
Location of Controls Front Panel Display play light digital tracking record light ST SAP VCR SP HS STD OTR2 EP D CH LOCK L R PWR. PT AM PM PLAYREC H PROG REC M S time counter/current time/remaining time display channel display PerfecTape® light : PT LR indicator : Flashes when PerfecTape test is in progress. Stays lit when test is complete. L indicates that you are listening to the left channel of a stereo track, R indicates that you are listening to the right channel of a stereo track.
Location of Controls Rear Panel Jacks R ANTENNA AUDIO OUT IN 1 R L L/MONO IN OUT VIDEO TIMER RESET OUT IEEE 1394 INTERFACE IN 1 VIDEO INput and OUTput jacks ANTENNA IN jack Yellow jacks are for receiving (IN) and sending (OUT) video signals to a monitor TV or from another VCR. Attach an external antenna or cable to bring in an outside signal. AUDIO INput and OUTput jacks ANTENNA OUT jack Red and white jacks are for receiving (IN) and sending (OUT) audio signals.
Important Information Special Information Concerning Stationary Images or Letterbox Images: For best performance and longest life, the normal use of a TV should include a mixture of TV picture types. The most frequently used picture types should fill the screen with constantly moving images rather than stationary images or patterns.
Trouble Checks If your VCR malfunctions, try the following steps prior to contacting your Mitsubishi Dealer: 1 Check the Trouble Checks below to see if there is a solution to the current problem that you are experiencing. 2 If the problem is not addressed on the Trouble Checks, the safety circuits in the VCR may be in operation, thus please try the following: (the clock setting and the timer recording will be deleted.) 3 1 If possible, press EJECT on the front panel and remove the tape.
Trouble Checks Problem Try This... Playback is noisy or “snowy.” • • • VCR remote does not function. • • • Try automatic head cleaning. Clean the video heads using a dry-type video head cleaning cassette. Do not use a wet-type head cleaning cassette, as it may damage your VCR. Excessive use of a cleaning cassette could shorten head life. Follow the cleaning instructions carefully. Have the VCR video heads cleaned by a qualified service technician.
Specifications FORMAT VIDEO SIGNAL SYSTEM RECORD/PLAYBACK SYSTEM ANTENNA TUNER DIGITAL INTERFACE INPUT/OUTPUT HORIZONTAL RESOLUTION SIGNAL-TO-NOISE RATIO TIMER PROGRAM CAPACITY MEMORY BACKUP TIME MAXIMUM RECORDING TIME ( D-VHS) (VHS) REWIND TIME POWER REQUIREMENT POWER CONSUMPTION DIMENSIONS WEIGHT SUPPLIED ACCESSORIES VHS NTSC standard with Hi-Fi audio and D-VHS standard EIA standard; NTSC color Video -- 4 heads Audio -- 2 Hi-Fi channels and 1 monaural audio control Digital -- HS 4 heads STD 2 heads 75-
Index D daylight savings time ................... digital tracking light...................... display button .............................. displaying current time ................ displaying time gauge ................. D-VHS button ....................................... indicator ................................... tape setting .............................. 18 54 52 47 46 53 54 27 E editing features ............................ 38 eject button ............................ 52, 53 enter button ........
Warranty MITSUBISHI VIDEO CASSETTE RECORDER LIMITED WARRANTY MITSUBISHI DIGITAL ELECTRONICS AMERICA, INC. (MDEA) warrants to the original purchaser of this video cassette recorder if purchased from an authorized MITSUBISHI Audio/Video Dealer that, should it prove defective by reason of improper workmanship and/or material: a. Parts. For one year from the date of original purchase at retail, we will repair or replace, at our option, any defective part including the video head without charge for the part.
For your nearest Mitsubishi Authorized Service Center call 1-800-332-2119 MITSUBISHI DIGITAL ELECTRONICS AMERICA, INC. 9351 Jeronimo Road Irvine, CA 92618-1904 www.mitsubishi-tv.com © 2002 Mitsubishi Digital Electronics America, Inc.