
MFZ-KJ Installation Manual


En-9
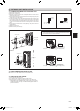
4-1.FLARECONNECTION
1)Cutthecopperpipeasstraightaspossiblewithapipecutter.(Fig.1,2)
2)Removeallburrsfromthecutsectionofthepipe,ensuringthatprecautions
aretakentoavoidgettingmetalshavingsintothepiping.(Fig.3)
3)Removearenutsattachedtoindoorandoutdoorunits,thenputthemon
pipe.
4)Flaringwork(Fig.4,5).Firmlyholdcopperpipeinthedimensionshowninthe
table.SelectAinch(mm)fromthetableaccordingtothetoolyouuse.
5)Check
• ComparethearedworkwithFig.6.
• Ifareisdefective,cutoffthesectionandrepeatprocedure.
Pipe
diameter
inch(mm)
Binch
(mm)
Ainch(mm) Tighteningtorque
Clutch
typetool
forR410A
Clutch
typetool
forR22
Wingnut
typetool
forR22
ft-lb
(kgf•cm)
N•m
ø1/4
(6.35)
21/32
(17)
0to0.02
(0to0.5)
0.04to
0.06
(1.0to1.5)
0.06to
0.08
(1.5to2.0)
10to13
(140to180)
13.7to
17.7
ø3/8
(9.52)
7/8(22)
25to30
(350to420)
34.3to
41.2
ø1/2
(12.7)
1-1/32
(26)
0.08to
0.10
(2.0to2.5)
36to42
(500to575)
49.0to
56.4
ø5/8
(15.88)
1-5/32
(29)
54to58
(750to800)
73.5to
78.4
4. FLARECONNECTION,PIPECONNECTION
Copper
pipe
Good
90°
Tilted
Nogood
Fig.1
Burr
Copperpipe
Sparereamer
Pipecutter
Fig.4
Smoothallaround
Evenlength
allaround
Insideis
shining
withoutany
scratches.
Fig.6
Clutchtype
Flaringtool
Wingnuttype
Uneven Burred
B
Flarenut
Die
Copperpipe
Fig.2
Fig.3
Fig.5
4-2.PIPECONNECTION
• Fastenarenutwithatorquewrenchasspeciedinthetable(referto3-2.).
• Whenfastenedtootight,arenutmayeventuallybreakandcauserefrigerant
leakage.
• Besuretowrapinsulationaroundthepiping.Directcontactwiththebare
pipingmayresultinburnsorfrostbite.
Indoor unit connection
Connectbothliquidandgaspipingstoindoorunit.
• Applyathincoatofrefrigerationoil(K)onthearedendsofthepipes.Do
notapplyrefrigerationoilonscrewthreads.Excessivetighteningtorquewill
resultindamageonthescrew.
• Toconnect,rstalignthecenter,thentightentherst3to4turnsofarenut.
• Usetighteningtorquetableaboveasaguidelineforindoorunitsidejoints,and
tightenusingtwowrenches.Excessivetighteningdamagesthearesection.
Outdoor unit connection
Connectpipestostopvalvepipejointoftheoutdoorunitfollowingthesame
proceduredetailedinindoorunitconnection.
• Fortightening,useatorquewrenchorspanner.
WARNING
When installing the unit, securely connect the refrigerant pipes before
starting the compressor.
JG79Y071H02_en.indd 9 2016/01/21 13:20:07