IRISKOFELECTIRICSHOCK DO NOTOPEN I • CAUTION: TO REDUCE THE RISK OF ELECTRIC NO USER SERVICEABLE REFER SERVICING PARTS SHOCK, DO NOT REMOVE COVER OR BACK. INSIDE. TO QUALIFIED SERVICE PERSONNEL. The lightning flash with arrowhead symbol within an equilateral triangle is intended to alert the user of the presence of uninsulated "dangerous voltage" within the product's enclosure that may be sufficient magnitude to constitute a risk of electric shock. The exclamation important appliance.
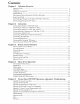
Contents Chapter 1 Television Important Thank Overview Notes ................................................................................................................................. you .......................................................................................................................................... Unpacking your New TV ................................................................................................................... Front Control 11 Panel ......
IMPORTANT Please read the following Always follow all warnings SAFEGUARDS safeguards for your and instructions TV and retain marked for future reference. on the television. 1. Read, Retain and FollowAll Instructions Read all safety and operating instructions before operating the TV. Retain the safety and operating instructions for future reference. Follow all operating and use instructions. 2. Heed Warnings Adhere to all warnings on the appliance and in the operating instructions. 3.
IMPORTANT SAFEGUARDS, continued 12. Power Lines An outside antenna system should not be located in the vicinity of overhead power lines or other electric light or power circuits, or where it can fall into such power lines or circuits. When installing an outside antenna system, extreme care should be taken to keep from touching such power lines or circuits as contact with them might be fatal. 13.
IMPORTANT Warning: NOTES Do not leave stationary PIP/POP, or letterbox images on the screen for extended periods of time. Mix the types of pictures shown. Uneven picture tube aging is NOT covered by your warranty. The normal use of a TV should include a mixture of TV picture types. The most frequently used picture types should fill the screen with constantly moving images rather than stationary images or patterns.
1 Front Control Back Panel Panel .................................................................................................. Input/Output Side Panel Input/Output WS-48413, for WT-42413 for WS-55413, WS-65413 11 .................... ................................................................
Thank You for Your Purchase Welcome to the wonderful and exciting world of digital television! We are honored that you chose Mitsubishi as your premier home entertainment partner. The development team at Mitsubishi Digital Electronics America (MDEA) understands that our customers demand and expect the very best. MDEA was founded on the core beliefs and philosophies that drive us to deliver products that implement the latest in advanced television technology.
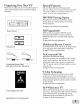
Unpacking Your New TV Please take a moment items to ensure to review the following that you have received including: Special Features list of everything Your new High Definition bigscreen addition that make to your home entertainment A few of these special features PIP/POP Using upgradeable television has many special features it the perfect system. (HD) are: Viewing Option Picture-in-Picture and Picture-outside- Picture gives you exciting favorite programs.
NetCommand ® IR for models WS-48413, WS-55413, WS-65413 Your new Mitsubishi television is equipped with NetCommand IR, the latest breakthrough in home theater control. NetCommand technology makes your television the brain of your home theater. By connecting compatible A/V devices and then using the menu to have the television "learn" which devices are connected, you will be able to view and control these devices.
Front Control Panel Many remote control buttons are duplicated on the front control panel. Duplicate buttons are shaded in the panels shown below. Please see Remote Control Functions, page 24, for an explanation of their usage. F F The ADJUST, ENTER, MENU, and CANCEL buttons may be used to accessor navigate through the screen menus Timer F D During normal operation, the timer light glows green when the TV is on. It does not glow when the TV is off.
Back Panel Input/Output for WS-48413, Side Panel Input/Output for WT-42413 WS-55413 & WS-65413 WT-42413 Side Panel WS-48413, 2 WS-55413, WS-65413 Back Panel 3 4 5 -7 L,J 1. ANT-A, LOOP OUT and ANT-B (Antenna) 6. MonitorLinkWDVI ANT-A and ANT-B receive signals from VHF/UHF antennas or a cable system. LOOP OUT sends the ANT-A signal out to another device, such as a cable box or VCR. Note: LOOP Low. 2.
2 Connecting a DVD Player or Other S-Video Device .................................................... 18 Connecting Connecting a DTV Receiver ......................................................................................... MonitorLink ........................................................................................... 19 21 TM Connecting NetCommand _ IR Emitter ........................................................................ How Connections Affect the PIP and POP ...........
Connecting VHF_tenna {Ohat_ne_s 2 13} an Antenna or Wall Outlet Cable O_F _a_t_r_a (Ghatv_s _4-69 Separate UHF and VHF Antennas (Figure 1) Flat T_ F_atTwin Lead Log £×t_at 1. Connect the UHF and VHF antenna leads to the UHF/VHF combiner. 2. Push the combiner onto ANT-A on the TV back panel. or Oab_e *IV back panel (section _* 8aek detail) UHF/VHF combiners are not provided with the TV. They are available at most electronic stores. 8_ [] Figure l.
Connecting an Antenna to a Cable Box or VCR Cable Box "IV back panel (section detail) (Figure Incoming Cable 1. 3) Connect the incoming cable to ANT-A TV back panel. Connect 2. c eBox o One from OUT on the cable box back panel to ANT-B on the TV back panel. NOTE: k panel sectioi If your cable box has separate audio!video outputs, please see Composite Video with Audio or S-Video with Audio, page 16 (Figure 6). I Figure 3. Connecting the cab# box that does not have audio or video outputs.
Connecting Connecting an Antenna to a Cable Box and VCR, Audio/Video to the Cable Box or VCR _ck _n#l _n#_ti_ TV back panel (section hown h_ are fo_ _#fe_ _ld_ _d va@ b_ detail) Cable Box Incoming Cable (Figure 1. [] [] 5) Connect the incoming cable to ANT-A on the TV back panel. Connect 2. three coaxial cables as follows: One from LOOP-OUT on the TV back panel to IN on the back of the cable box. 3. One from OUT ANTENNA 4. One IN on the VCR back panel.
Connecting an Audio Receiver Stereo Audio System (recommended "rv back panel for shelf units or A/V receivers without digital audio inputs) (Figure 7) . Connect the audio cables from AUDIO MONITOR OUTPUT on the TV back panel to TV IN or AUX IN terminals on the back of the audio system. [] • The red cable connects to the R (right) channel • The white cable connects to the L (left) channel 2. Turn offthe VIDEO 3. TV's speakers SETTINGS Menu, through the AUDIO/ page 58.
Connecting a DVD Player or Other S-Video Device DVD Player with Component Video (Figure 9) . Connect the Component (YCbCr or YPbPr) the DVD Video cables from VIDEO OUT player to COMPONENT the TV back panel. The correct A. YtoY E on the back of (1 or 2) on connections are: B. Cb or Pb to Pb C. Cr or Pr to Pr Figure 9. Connecting a DVD Player with Component Video. 2.
Connecting DTV a DTV Connectors Receiver and Adaptors (Figure 11) The TV back panel has five RCA-type connectors for the DTV connection. The back panel of your DTV receiver may use RCA-type connectors or BNC-type connectors. If your DTV receiver comes with BNC type connections, you will need to purchase BNC to RCA adaptors to connect the TV to the DTV receiver. These adaptors should be available at most electronic supplystores. or BNC to RCA Adaptor Figure ll.
DTV Receiver with RGB Video Connections (Figure 13) Connect the outside antenna, cable, or satellite to ANT or SATELLITE IN on the DTV receiver . (see your DTV receiver owner's guide for instructions and cable compatibility). . . If your DTV receiver has a built-in terrestrial tuner, connect the incoming terrestrial antenna to ANT on the DTV receiver.
MonitorLink/DVI (Figure 1. 14) Connect a MonitorLink/DVI cable from the TV back panel to the Mitsubishi Controller back panel. Connect the MonitorLink 2. HD Receiver/ Control/RS-232 from the TV back panel to the Mitsubishi Receiver/Controller . cable HD back panel. Connect the L (left) and R flight) audio cables from the HDTV receiver to AUDIO LEFT and AUDIO RIGHT on the MonitorLink section of the TV back panel.
How Connections Affect the PIP (Picture-in-Picture) and POP (Picture-Outside-Picture) To see a picture in the PIP or POP, you may need to select an input source. If the only input connected is ANT-A, then both the main picture and the PIP/POP will be from that input source. If other video equipment is connected, you may be able to view these input sources as the PIP/POP.
3 Operation of PIP and POP ........................................................................................... Important Notes ............................................................................................................
Remote Control Functions: Overview of the TV Layer Buttons Overview (Figure 1, following page,) Slide Switch: Select A/V product the remote control. POWER: connected to be controlled by Turns power on and off for TV and other A/V products. Numbers: Individually information into TV. select channels or input INFO: Displayon-screen summary of the current input used and any broadcast information available (including current V-Chip information, Signal Source and Format).
Remote Control Functions: Care and Operation Operation Installing the Batteries: (Figure 2) 1. Remove the remote control's back cover by gently pressing the ridged tab in the direction of the arrow and sliding off the cover. 2. Load the batteries, making sure the polarities (+) and (-) are correct. For ease of installation, install the negative (-) side first. For Best Results from the Remote Control: _. Be within 20 feet of the equipment. _.
Remote Control Functions: Channel Selection, Sleep Timer Channel Selection Enter three numbers ( ex. for channel 2, press 002). or Press the channel number and ENT (ex. for channel 2, press 2, then ENT). or Enter the channel number and wait four seconds (without pressing ENT). The TV will change automatically. Sleep Timer PIP CH PIP/POP EXCH SLEEP (Figures 3 &4) Setting PiP DEVICE FORMAT CONNECT (2) Figure 3. Sleep button on remote control Sleep: 30 min.
Use of the Remote Control with Other A/V Products Programming the Remote Control to Use with Other Brands of Audio and Video Products: CABLE/DBS/DTV_ VCR DVD TV-e J, $ _ _-AUDIO . Move the slide switch at the top of the remote to the product you want to control. 2. Press and hold the POWER control. 3. I I . ) ) [,_...
Use of the Remote Control with Other A/V Products F_ WS _8_3 WS _5_!3 _ WS 65_ th_ fo!!owi_g !_fo_ CABLE/DBS/DTV_ VCR DVD TV-= J, _ _ .-AUDIO I 1. ( ( II I I [,} i Codeto enter'. Mitsubishi JVC Panasonic Philips Pioneer DVD Samsung Sony Toshiba 003 257 250 258,253, 272 252 261 254 253 If your DVD code is aPP!_!# ffyo_ _ _ After entering the correct codes in each position of the remote control, use the dide switch to select which product will respond when an operational button is pressed.
Remote Control Functions: Special Functions When your remote control has been Programmed to operate another manufacturer's performed on each layer may vary.
IMPORTANT Warning: NOTES Do not leave stationary PIP/POP, or letterbox images on the screen for extended periods of time. Mix the types of pictures shown. Uneven picture tube aging is NOT covered by your warranty. The normal use of a TV should include a mixture of TV picture types. The most frequently used picture types should fill the screen with constantly moving images rather than stationary images or patterns.
4
ilPO_..ilA Menu The Your TV has Mitsubishi's information System exclusive _[" on-screen operating system, which provides on-screen for menu choices and changes. A picture (icon) will be highlighted and can be selected using the remote control's ADJUST arrows. When selected, the appropiate menu will appear or start an automatic function. You may then make changes within the menu or access available sub-menus. A highlighted square button indicates that you may make changes to the menu screen.
Main Menu Screens: Overview SETUP (Figure Basic 3) (initial) available Figure3. SETUP menu for WS-48413, WS-65413 WS-55413, Menu setup through instructions the SETUP and functions submenu are screens.
Main Menu Screens: Overview, V-CHIP continued LOCK Menu (Figure 6) Lock the TV by selecting times or choosing programs to block based on rating signals sent by your local broadcasting system. NOTE: For WS-48413, WS-55413 or WS-65413 the Front Button Lock at this screen. set See pages 48-52 for more detailed setup information. See page 48 for V-Chip rating information. Figure6.
SETUP Menu: Memorize Assignment (WT-42413) Channels, Memorize Memorize (Figure Menu, Input Channels 9) Select Memorize Channels for each antenna you use. The TV will find and remember strong channels and skip the unused or weaker channels. Figure 9. Memorize Channels Menu MEMORIZE (Figure Menu 10) Stop memorization Channels Now m_mor±zing all_e _tations you can recei_ on _t-A Ai_. Please _tand prior will stay in memory.
SETUP Menu: NetCommand Device Setup Menus ®IR Setup, Language, IR (WS-48413, WS-55413, WS-65413) NetCommand IR Setup Menu (Figure 12) For simple control with the Mitsubishi TV remote, select the NetCommand IR SETUP from the SETUP menu screen. There are 3 basic steps to the NetCommand IR Setup: 1. Select the devices that are connected to the TV (Net Command IR Device Setup Menu) 2. Have the _][_Vlearn the device's remote control keys (NetCommand IR [Device] Learn menu) 3.
SETUP Menu: NetCommand ® IR [Device] Learn Menus (WS-48413, WS-55413, WS-65413) NOTE: You will need both the television remote and the device's remote to perform 2. NetCommand the Learn Menu functions. IR [Device] Learn Menu NetCommand (Figure 15) NetCommand (Figure 16) NetCommand (Figure 17) NetCommand IR AVR Learn Menu IR Cable (DTV, DBS Learn Menu IR DVD Learn Menu IR VCR Learn Menu (Figure 18, page 38) Figure 15.
SETUP Menu: NetCommand Selection Menus (WS-48413, NOTE: You will need both the television 3. NetCommand remote ® IR Input Assignment WS-55413, WS-65413) and the device's remote to perform the Learn and Device Menu functions. IR Input Assignment Menu (Figure 19) After learning all the individual control buttons for each device, you can change the input that each device is connected to.
SETUP Menu: Manually Setting the Clock Clock Setting (Figure (Manual) 21) The Clock Setting menu default allows the clock time to be set manuallyo To set the clock automatically, please see page 40. To set the clock manually, including AM or PM. first select the current time, Press • or V to slowly adjust the time. Press and hold • or • to quickly adjust the time. Figure21. Clock Time Set Day (Figure 22) After manually current day. Figure 22.
SETUP Menu: Automatically Clock Setting (Figure Setting the Clock (Auto) 23) Set the Clock Setting to Auto to automatically set the day and time using Extended Data Service (XDS) time data. This data is automatically retrieved when tuned to a PBS channel or other channel in your area that provides this service. Time (Figure Zone 24) Select the correct time zone (Atlantic, Eastern, Central, Mountain, Pacific, Alaska, or Hawaii) for your area when Auto has been selected as the Clock Setting.
SETUP Menu: Language, Front Button Lock (WT-42413) Language (Figure 26) Display the on-screen menus in either English or Spanish (Espafiol). The first time you powered On your TV, you were requested to select an on-screen menu language. If you choose to change the selection, all menu text will immediately switch to the language of your choice. Figure 26.
SETUP Menu: Energy Mode WS-65413) (WS-48413, WS-55413, Energy Mode (Figure 28) This feature is only for models WS-48413, WS-55413 and WS-65413. Change the setting to Low (less than 1 watt) when you want the TV to operate in an energy saving mode when it is turned off. If the Energy Mode is set to Low, it will not be possible to record while the TV's power is off because there will be no signal from LOOP OUT (on the TV back panel) to the VCR and/or cable box.
CAPTIONS Menu: Overview CAPTIONS Menu (Figure 29) Turn On or Off the closed caption decoder, select the type of captions or text, and choose black or translucent gray as the background color for the closed caption area. Broadcasters can send either Standard or Text closed captioning. Standard closed captioning follows the dialogue of the characters on-screen and displays in a small section of the screen. Figure29.
CAPTIONS Menu: Closed Captions, Background Color Closed Captions (Figure 29) Display one of the following types of Closed Captions: CC1, CC2, CC3, or CC4: Standard closed captioning signals. _. Textl, Text2, Text3, or Text4: Text dosed captioning signals. _. On if mute: Closed captions when mute. When selected, the standard dosed captioning signal (CC1) will turn on/off by pressing the MUTE button on the TV remote control. _. Off: No dosed captions. Figure29.
CHANNEL EDIT Menu: Antenna, Channel Selection Antenna (Figure 32) Select Ant-A or Ant-B. For each antenna, you can add or delete channels in memory, name channels, and add channels to the SQV (Super Qgick View TM) list. Figure 32. Antenna Channel (Figure 33) Select to edit the channel selections. You can add or delete from memory, name, or add to the SQV (Super Qgick View TM) list.
CHANNEL EDIT Menu: Memory, Name Selection Memory (Figure 34) Add weaker channels viewed with Ant-A or Ant-B and delete unwanted channels, channels have been memorized after all available with Memorize Channels (page 35). Use the CH (channel) button the remote control to view memorized channels. on Figure 34. Memory Name (Figure 35) Name channels shown on Ant-A or Ant-B (up to four characters). After you enter a name, it will appear on the TV screen next to the channel number. 1.
CHANNEL EDIT Menu: Using SQ.V(SuperQuickView TM) Using The Menu Screen (Figure 36) Put together a list of your favorite channels from AntA and Ant-B using SQ_V (Super Qgick View). Store up to 6 channels in each of the 9 different memory banks. After adding a channel to the SQV memory, "SQ_V" will appear under the channel number on the TV screen. To change SQV choices using the menu: 1.
V-CHIP V-Chip LOCK Menu: Overview Signal Information When provided by the broadcaster, V-Chip ratings can be used to control which programs can be viewed or will be blocked. When V-Chip ratings are sent, you will see the ratings when you change the channel or when you press the INFO button on the remote control. Both TV and Movie ratings will display. TV ratings apply to programs and movies developed for TV and may have supplemental blocking by content categories.
V-CHIP Menu: Setting Up and Using V-Chip Lock Passcode Setting Up the V-CHIP LOCK Passcode (Figure 38) Select V-CHIP LOCK from the MAIN menu for first time setup or after you have canceled your passcode. You will see the screen shown in Figure 38. Use the number buttons on the remote control to input a new four-digit Figure38. First time entry to the V-CHIP models LOCK al! passcode, then press ENTER.
V-CHIP Menu (WT-42413): Locking by Hour or Time Allowing (Figure or Blocking Allowing or Blocking Ratings, by Ratings 40) Block or Allow programs based upon rating signals sent by the broadcasting station. The factory preset for TV Ratings is TV-PG (Parental Guidance) allowing only programs rated TV-PG or lower. The factory preset for Movies is PG, allowing only movies rated PG or lower. Please refer to page 48 for a detailed ratings description. V-CHIP (Figure HOURS / LOCK BY TIME Figure 40.
V-CHIP Menu (WS-48413, WS-55413, WS-65413): Locking by Time, Front Button Lock, Selecting V-Chip Rating Menu LOCK (Figure by Time 42) Select On at Lock by Time, then select the Lock Time and Unlock Time. This will lock the entire Figure42. V-CHIPLOCKMenu Your TV continues passcode, or when the locked to be locked Front Button Lock until you input TV. your time expires.
V-CHIP Menu (WS-48413, Allowing or Blocking Ratings, Allowing (Figure or Blocking WS-55413, WS-65413): Lock by Time by Ratings 45) Block or Allow programs based upon rating signals sent by the broadcasting station. The factory preset for TV Ratings is TV-PG (Parental Guidance) allowing only programs rated TV-PG or lower. The factory preset for Movies is PG, allowing only movies rated PG or lower. Please refer to page 48 for a detailed ratings description.
ADVANCED FEATURES Menu: Color Balance, Auto Color Correction, PerfectColor TM,Reset Color Color Balance Menu (Figure 47) Your Mitsubishi TV uses six colors (Magenta, Red, Yellow, Green, Cyan and Blue) to create Color Balance. You may adjust these colors automatically or manually or reset them to the default settings. Auto (Figure Color Correction 48) Set the Auto Color Correction option to On to optimize skin tone color automatically and continuously.
ADVANCED Set Time FEATURES Menu: TIMER, Timer Menu, and TIMER (Figure 50) The timer will automatically turn the TV on (if it is off) at the time you schedule and select. When Ant-A or Ant-B is the selected input, you may select any memorized channel. The TV will tune to this channel when the timer turns it on. Figure TIMER (Figure 50. ADVANCED FEATURES menu 51) The timer can be turned On or Off. When On, you need to select the time and the day to turn On and the input and channel to display.
ADVANCED Channel FEATURES Menu: Set Day, Input, and Set Day (Figure 53) Select the days that the TV will turn on automatically. You can select Everyday, Mon-Fri (Monday through Friday), or the individual days of the week. Figure 53. TIMER menu (Set Day) Input (Figure 54) Select the input to use when the timer turns on the TV. If the TV is already on, the timer will turn the TV to this selected input. Figure54.
ADVANCED FEATURES CONVERGENCE (Figure Menu: CONVERGENCE Menu 56) Your Mitsubishi TV has three picture tubes which are aligned to properly converge the projected light beams on the screen. Each picture tube projects a single color of red, blue or green. During production, your TV was carefully adjusted to properly align these colors. As a special feature, you have the ability to adjust the red and blue light beams in reference to the fixed green light beam. This process is called convergence.
ADVANCED FEATURES Mute, Black Enhancement Menu: Reset Convergence, Video RESET FACTORY DEFAULTS (Figure 59) If you do not want to reset the convergence, press the MENU key to return to the Convergence menu without performing a reset. Figure 59. RESET to Factory Defaults You may reset the red and blue convergence to factory default settings when you first use your TV or after making manual changes. Press the ENTER key to restore the convergence to the default settings.
AUDIO/VIDEO SETTINGS AUDIO/VIDEO Menu: Overview SETTINGS Menu (Figure Each 62) input has its own A/V memory. You can adjust each input's A/V memory in two ways, the menu or the remote control. A/V Memory A/V Memory input's an input's memory A/V the currently to the factory memory, select the input either Reset Reset will return A/V using select A/V you want selected settings. To reset Memory Reset, to reset, and press ENTER.
AUDIO/VIDEO Setting Descriptions: signal is broadcast, the letters "SAP" will be displayed when you tune to the channel. Audio Settings [] Bass Enhances or reduces low frequency • Mono: sound. signal. Enhances or reduces high frequency sound. [] the level of sound between Listen [] Surround simulated surround stereo program. effect when watching a Listen to (for Ant-A and Ant-B) Determines how your TV will receive a broadcast audio signal and play back the sound you hear.
AUDIO/VIDEO Setting Descriptions: Video Video Settings [] Video Noise Contrast Provides a slider to adjust the white-to-black level. Low contrast shows a variety of shades in darker images, while high contrast shows darker images more uniformly black and makes colors appear more vibrant. NOTE: Reduces minor noise (graininess) broadcast or input signal. [] [] Sharpness [] Color Provides a slider to adjust the color intensity. a slider to adjust the proportion of red to green.
5 Appendix B: HD Input Appen_ C: Remote Control Programming Codes ............................... 68 Appendix E: Diamond and Removal .................................... 71 Shield TM Installation Troubleshooting ...................................................................................................... Important Notes ...................................................................................................... Index ..........................................................
Available On-Screen Format (picture shape) Ant-A 000 Ant-B 000 DTV (480i/480p) DTV (10800 Input-1 Input-2 Input-3 Component-1 or 2 (480i/480p) Component-1 or 2 {10800 DVI (480i/480D} DVl il 080i) You can find aspect marked [] availability Standard YES YES YES YES YES YES YES YES YES YES YES INPUTS NOTE: Format Sizes based on Input/Signal Expand Expand YES YES YES NO NO NO NO YES YES YES YES YES NO NO NO NO NO YES NO YES YES NO or "Enhanced format displays for DTV a full-scree
Available Widescreen Standard On-Screen Picture Format (16:9 - HD 1080i only) (Recommended) Sizes, continued Example: A True HD Broadcast HD Expand (Recommended for 4:3 images with Black Side Bars) Widescreen ;tandard Picture (480i1480p) (Recommended) Zoom (For letterbox 2.
Operation Picture Inside of PIP and POP Picture You have the option show another and a sports input (PIP) vs. Picture Outside to view two TV shows event on another or three or inputs channel, as a picture-inside-picture. as a side-by-side Picture at the same time. or a DVD The POP or nine pictures-outside-picture (POP) movie option For example, and more. allows The you to view a main picture POP).
Appendix A: Bypassing the V-Chip Lock Bypassing the V-Chip Lock After you set the lock, you need your passcode to view a V-Chip locked program, view the locked TV, cancel the lock, or enter the V-Chip lock menus. If you forget your passcode, you can view the locked TV without entering your passcode. When your password is requested, press the number 9 and Q V buttons on the remote TV control at the same time. This process temporarily unlocks the TV.
This page intentionally blank
Appendix B: High Definition Component These All other with most standard signals wkh component Compatible DTV HDTV 1080i. DTV be converted compatible signals, before Y 480i, 480p, and = 1.0Vp-p (includes sync) 75ohms _- Pb = 700mVp-p, 75ohms (can also receive _- D signals from outputs labeled B-Y and Cb) = 700mVp-p, 75ohms (can also receive signals from outputs labeled R-Y and Cr) such as 720p, need to signal types. specifications DVD video outputs.
Appendix C: Remote Control Programming A/V Receivers Mitsubishi ...... 010, 011,012, 013, ............ 014, 360 Admiral ........ 220 Aiwa .......... 225, 226, 241 B&K ........ 352 Bose .......... 351 Denon ........ 234, 235,236, 245, ............ 246, 359,361 Fisher ........ 204 Gerrard ........ 213 Harman Kardon . . 215,223, 242, 362 Jensen ........ 223, 229 JVC .......... 232, 233 Kenwood ...... 200, 208, 289 KLH ........ 363 Koss .......... 357 Magnavox ...... Marantz ...... McIntosh ...... Nakamichi .
Appendix C: Remote Control Programming Satellite Receivers /DBS/DTV Mitsubishi HD/Satellite Receiver Echostar/Dishnetwork .... .... 006, 173 175, 82, 183, 188 Express Vu .......... GE .............. Gradient .......... 175 176 186 Hitachi ............ 173, 181, 184 Hughes ............ Maganavox .......... Panasonic .......... 173 171,172 174 Philips ............ RCA/Proscan ........ 171,172 176, 179, 180,185 Samsung .......... Sony .............. Star Choice ........ 192 177 173 Toshiba .....
Appendix D: Cleaning and Service Cleaning Cloth speaker grills: • Lightly brush with a soft brush cloth, or lint brush. Normally, light dusting with a dry, non-scratching duster will keep your TV clean. If cleaning beyond this is needed, please use the following guidelines: First, turn offthe TV and unplug the power cord from the power outlet. • If necessary, you can vacuum using the brush and hose attachments of your vacuum cleaner. Do not use the beater brush section on the grill cloth.
Appendix E: Diamond Shield Models WS-48413, WS-55413 Installation and Removal for and WS-65413 TM Follow the steps below to install and remove the Diamond Shield. INSTALLATION A. Begin by inserting the shield, sliding it into the channels, Diamond starting at the bottom. Gently bow the Shield toward you and insert the Diamond Shield into the top channel. B. Install the left and right molding clips by pressing them into the opening starting at a corner. Do not force the dip.
Cabinet Separation for Model WS-65413 Instructions for Separating the Upper and Lower Section of the Projection Television Cabinet ....F0r Mitsu_ishi Dealersand Service Personnel_ ONLy This Mitsubishi projection television cabinet has been assembled in two p,eces. These pieces may be separated to allow for easier delivery and setup. o This projection television weighs over 320 pounds and has many sensitive components.
Terminal Cover Ventilation for Model WT-42413 AIR CIRCULATION TIP -- Wall When considering the location or position of your TV, we recommend you place it at least 2" (inches) away from the wall. Like most electrical equipment and appliances, better air circulation allows your television to run cooler, assuring a long, trouble-free life.
Troubleshooting Problem The TV remote control does not work. Possible Solution Check that the batteries are installed correctly. Check that the selected switch is set to "TV". Be no further than 20 feet from the TV when using the remote control. The TV takes several seconds to respond to channel commands. You cannot access a channel Press ENTER after a channel number to avoid delays. Use the three digit number, i.e 002 for channel 2. Use number keys instead of CHANNEL up/down.
IMPORTANT Warning: Oo not leave stationary PIP/POP, or letterbox images on the screen for extended periods of time. Mix the types of pictures shown. Uneven picture tube aging is NOT The normal covered use of a TV should by your warranty. include a mixture of TV picture types. The most frequently used picture types should fill the screen with constantly moving images rather than stationary images or patterns.
Index Composite Video withAudio, Connecting 16 CONNECTING Antenna or Wall Outlet Cable 14 Antenna to a Cable Box and VCR 16 Antenna to a Cable Box or VCR 15 Audio Receiver 17 A A/V Memory Audio Components to the Cable Box or VCR 16 DTV Receiver 19 Reset 58 Receiver, Connecting 17 Activating the PlP and POP 29 Advanced Convergence Menu 56 Advanced Features Menu 34, 53-57 TM Antenna Channel Edit Menu 45 Connecting 14,15 Appendices A: Bypassing the V-Chip Lock 65 B: High Definition Input Connection Comp
L S Language Menu 36, 41 Lock by Time for WS-48413, WS-55413 and WS-65413 WT-42413 50 LockTime forWT-42413 50 S-Video 51 M Main Menu Screens: Overview 33 Memorize Channels Menu 35 Memorize Menu 35 Memory Menu 46 Menus (also see individual topic) Advanced Features 53 Audio/Video Settings 58 Captions 43 Channel Edit 45 Main 33 Setup 35 V-Chip Lock 48 MonitorLink, Connecting 2I Moving PIP Images 64 N Name Menu 46 NetCommand _'IR for models WS-48413, WS-55413, WS-65413 Device SetupMenu 36 Input Assignment
NOTES
MITSUBISHI PROJECTION TELEVISION LIMITED WARRANTY MITSUBISHIDIGITALELECTRONICSAMERICA,INC. C'MDEA")warrantsto the originalpurchaserof this televisionthat if purchased from an authorized MITSUBISHIAudioNideoDealer,shouldit provedefectivebyreasonof improperworkmanshipaed/ormaterial: a. Parts. The lenticular(i.e.front picture)screenand/orthe DiamondShield is warrantedagainstdefectsin materialsandworkmanship for a periodof 30 days.
To orderreplacement remotecontrols call our Parts Department or an Owner's Guide, please at (800) 553-7278 or contact us through our web site at: www.Mitsubishi-tv.com ©2003 Mitsubishi 871D377A20 Digital Electronics America, Inc. Printed in the U.S.A.