
Operation Manual

EN-12
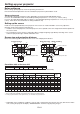
Setting up your projector (continued)
Setup adjustment
How to turn on the projector
When you have to turn on the projector for setup
adjustment, see the following pages:
t 1MVHHJOHUIFQPXFSDPSEQBHF
t 5VSOJOHPOUIFQPXFSQBHF
t 5VSOJOHPGGUIFQPXFSQBHF
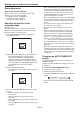
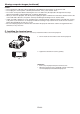
Adjusting the position of the
projected image
Adjust the focus.
If the projected image is out of the screen after the
adjustment, adjust the projector position or the lens
position using the lens shift function.
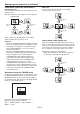
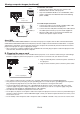
1. Press the ZOOM/FOCUS button to display the
ZOOM/FOCUS menu.
ZOOM
FOCUS
FAST
SELECT:ENTER
2. Adjust with the or button to get a fine picture.
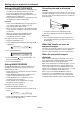
t 8IFOUIF&/5&3CVUUPOJTQSFTTFEXIJMF
the ZOOM/FOCUS menu is displayed, the
adjustment mode is switched between FAST
and STEP. When FAST is selected, the speed of
focus controlled by the or button becomes
fast, and it becomes slow when STEP is
selected.
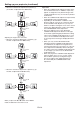
3. Press the LENS SHIFT button.
t 5IF-&/44)*'5NFOVBQQFBSTBUUIFDFOUFSPG
the screen.
LENS
SHIFT
FAST
SELECT:ENTER
4. Press the , , or button to move the image
position.
t 8IFOUIF button is pressed, the image
moves down.
t 8IFOUIF button is pressed, the image
moves up.
t 8IFOUIF button is pressed, the image moves
to the right.
t 8IFOUIF button is pressed, the image moves
to the left.
t 8IFOUIF&/5&3CVUUPOJTQSFTTFEXIJMFUIF-&/4
SHIFT menu is displayed, the shift mode can be
switched between FAST and STEP. When FAST
is selected, the lens shifts in a large amount with
the , , or button, and it shifts in a small
amount when STEP is selected.
t 8IFOUIF;00.'0$64NFOVPSUIF-&/44)*'5
menu is displayed while no video signal is input to
the projector, a crosshatch appears on the entire
screen.
t #FDBSFGVMOPUUPCFDBVHIUJOUIFPQFOJOHJOUIF
lens while the lens is moving.
t 8IJMFUIFMFOTTIJGUJTXPSLJOHUIFTDSFFONBZ
flicker.
t 8IFOUIF5&451"55&3/CVUUPOPOUIFSFNPUF
control is pressed, the test pattern is displayed.
Each time you press the TEST PATTERN button,
the display switches in the order of “cross hatch
(green)”
→
“cross hatch (red)”
→
“cross hatch
(blue)”
→
“vertical color bars”
→
“normal screen”
→
… When you press the ZOOM/FOCUS button
or LENS SHIFT button at this time, you can adjust
the zoom, focus, or lens shift with the test pattern
displayed.
t 8IFOZPVBEKVTUUIFJNBHFQPTJUJPOCFZPOEUIF
movable range of the lens shift, the triangle mark in
the dialog box blinks. You cannot adjust the image
position any further in the direction of the blinking
triangle mark.
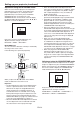
Changing the AUTO POWER OFF
setting
The AUTO POWER OFF function of this projector is
enabled by default.
Change the AUTO POWER OFF setting as necessary.
(See page 33.)
To change the AUTO POWER OFF setting:
(See page 31 for menu setting.)
1. Display the INSTALLATION menu.
2. Select AUTO POWER OFF by pressing the or
button.
AUTO POWER OFF 5min
3. Select your desired item by pressing the or
button.