
Operation Manual


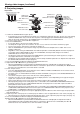


EN-23
Blanking the screen temporarily (BLANK)
The video and audio signals are temporarily muted when the BLANK button is pressed. You will hear an operating
sound inside the projector. To cancel muting, press the BLANK button again.
t :PVDBOBMUFSUIFTQMBTITDSFFOPQUJPOBMMZ4FFQBHF
t 5IFBVEJPGSPNUIF"6%*0065UFSNJOBMJTBMTPNVUFECZQSFTTJOHUIF#-"/,CVUUPO
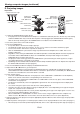
AUTO POSITION button
When the image supplied from the computer is displaced, carry out the following procedure.
1. Project a bright image containing as many texts and characters as possible.
2. When the screen saver has been enabled, disable it.
3. Press the AUTO POSITION button.
The projector automatically makes optimum positional settings for the input signal.
t *GUIFQSPKFDUFEJNBHFJTTUJMMEJTQMBDFEFWFOBGUFSQSFTTJOHUIF"650104*5*0/CVUUPOTFWFSBMUJNFTSFGFSUP
the procedure to adjust computer images. (See pages 42 and 43.)
t 8IFOZPVDBSSZPVUUIJTQSPDFEVSFXJUIBEBSLJNBHFUIFJNBHFNBZCFEJTQMBDFE
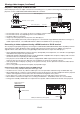
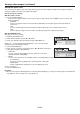
When connecting to a notebook computer:
When the projector is connected to a notebook computer, images may not be projected in some cases. In such
cases, set the computer so that it can output signals externally. The setting procedure varies depending on the type
of the computer. See the instruction manual of your computer.
Example of the setting procedure for external output
Press the [Fn] key and any of the keys [F1] to [F12] at the same time. (The key to be pressed depends on the type of
the computer you use.)
Setting of the resolution
If the resolution of the computer doesn’t match with that of the projector, projected images may be obscured. Ensure
that their resolutions are the same (see page 64). For the method to change the output resolution of the computer,
contact the manufacturer of the computer.
Viewing computer images (continued)