Camera Monitoring and Notification Software Owner’s Manual & Quick Start Guide
Contents Getting Started Welcome to ReCam Software o o o About Recam About the Registration Key Registration and Customer Support Installation & Quick Start o o o o o o Installation Notes Installing ReCam Software Quick Camera Setup ReCam Folder Structure About the ReCam Window Program Options User Guide Part 1. Setting Up a Session Part 2. Camera Settings o o o o o Part 3.
o o o o o o Recording Video Clips Customizing Recording Live Recording Archive Recording Archive of Snapshots Part 11. Managing Program from Command-line Part 12. Tools o o o o o o Change Settings Part 9. Schedule Events Part 10. Recording Video Creating a Web Page Dynamic IP Service Using a Dial-Up Connection Your Computer’s IP Address Testing Camera Accessibility from the Internet Editing Video Clips Part 13.
Welcome to ReCam Software Welcome to the ReCam® Camera Monitoring & Notification software by MOBI Technologies, Inc. ReCam is designed to help you easily monitor your home or business from anywhere in the world. You can maximize its use and benefit by reviewing the included Help files and ReCam’s web page at www.getmobi.com/recam.php to familiarize yourself with many of its features.
Installation & Quick Start Before you begin the installation process, exit other open programs, and save your work. For updated information about ReCam, visit www.getmobi.com/recam.php Installation notes Before you install ReCam, review the following notes: To install ReCam in Windows NT, XP, or 2000 Professional, you must log on with Administrator or Power User privileges.
4. Select your camera from the Video Devices list. (If the camera isn’t installed properly, it will not show up here) 5. Click OK USB Video Capture Device (Optional) If you purchased ReCam with the optional USB Video Capture adaptor, you must install the adaptor and its driver. Please follow the USB adaptor’s installation instructions for proper installation & configuration.
ReCam Folder Structure The ReCam folder contains all the files you need to use ReCam. Do not move or rename the ReCam folder or any folders within it. If you need to relocate the ReCam folder, you must uninstall and reinstall the program. ReCam performs best when the application and its parts remain in the folder recommended during installation. This is especially true with the \Gallery folder.
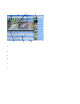
About the ReCam window The ReCam work area contains some panels that you can show or hide to get a more comfortable working place. Here are some of the most used components: Camera Thumbnail Main Window Information Panel Camera Windows Viewers Panel Gallery Panel Log Panel The Camera Window is used to control and preview camera. It has button bar to operate with Live Recording. Camera Thumbnails are used to select a camera and show or hide it.
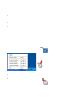
Program Options ReCam has options that control the general appearance of the user interface as well as options related to specific features. To change ReCam options Select Program Settings from the Settings menu. The Program Options dialog box appears. Set desired options. Press Ok. The Program Options dialog box fields: Click to select Open Session at Startup if you want the program to open a previously saved session at startup.
Click to select Log HTTP viewers to the "HTTP_Log.txt" file to cause the program to write the viewers' IP addresses to the log file. Click to select Log motion events to the "Motion_Log.txt" file to cause the program to save motion information to the log file.
Part 1 Setting Up a Session Information about cameras you have created can be stored to a file with an .AWSes extension so you can open and reuse the session at a later date. A session file contains information about video and audio devices, compression, broadcasting, and recording parameters of every camera. To save a session Click Save Session As from the File menu. In File name, enter a name and location for the file, and then click Save.
Part 2 Camera Settings The ReCam software works with many video sources simultaneously. Every video source is represented by a Camera Window. A Camera Window can be connected to a local camera (frame grabber or USB camera), network camera (Axis®, D-Link®, etc.), or a remote camera (another ReCam program launched on a remote computer with a video capture device). To create a new camera Click New Camera from the File menu. Camera Setting dialog box appears.
bit drivers for devices with a 32-bit architecture, such as USB and IEEE 1394 conferencing cameras and supports multiple streams. Video Device Choose a camera to work with from the Video Devices drop-down list. If you want to connect to a network camera, select Network Camera. The camera control buttons set depends on the type of camera. For USB cameras it is mostly the Source and Format buttons. The Source button helps change image characteristics, like brightness, contrast, sharpness, etc.
If the Remember Password check box is checked, the user name and password will be saved among the session parameters. Cycle through cameras If you have multiple cameras you can set up a cycler to have the program change cameras automatically. To configure the Camera Cycler (available only for local cameras): Click Camera Settings from the File menu. Select Cycle through cameras to activate cycler. Type cycler interval in seconds. Select cameras to cycle.
Part 3 Quality of Recording and Broadcasting The Compression tab of the Camera Setting dialog box allows you to set up image and sound quality by changing their compression levels. These settings are used to prepare content for broadcasting and recording. Image Quality Higher Image Quality provides more details in captured images but increases frame size. Thus, don't select maximum quality if you want broadcast live video. To change image quality Click Camera Settings from the File menu.
Part 4 Scale and Crop Image Scale Image shrinks or grows captured image. Set desired image size as a percentage of original image. Crop Image allows you to select part of a captured image and ignore the rest. To define cropping area, click to select the Crop Image check box. A resizable selection box appears over the image. Resize the selection as needed and then move it over the part of the image you want to keep. You can use Arrow keys to move the rectangle or Shift + Arrows to resize.
Part 5 Caption on Image The program can place an unlimited number of text, image, and rectangular captions onto captured images. Text captions provide information on captured image, and/or a dynamic date/time stamp. The image and rectangular captions allow you to decorate the captured image. The caption position can be specified in pixels or you can choose from the list of predefined positions like TopLeft, Top-Center, etc. In this case the caption will stay at this position regardless of the image size.
Time formatting macros You can use the following data/time placeholders to display current date and time in the Text Captions: Placeholder: d dd ddd dddd m mm mmm mmmm yy yyyy h hh n nn s ss am/pm Displays: Displays the day as a number without a leading zero (1-31). Displays the day as a number with a leading zero (01-31). Displays the day as an abbreviation (SunSat). Displays the day as a full name (SundaySaturday). Displays the month as a number without a leading zero (1-12).
Broadcasting Broadcasting allows you to share captured video and audio among Internet users or within local area network. You can broadcast in several ways: 1. Remote Access - allows other computers to access the camera using the ReCam program. The program uses UDP protocol to push captured images and sound to viewers' computers. 2. HTTP Server - the program runs HTTP server allowing users to view captured images through an Internet Browser. 3.
FTP Upload Select the FTP Upload method if you want the to your Web site using FTP protocol. To watch the point your Internet browser to your site. The benefits of FTP use are: you don't need to have connection (such as, Cable Modem, DSL, ISDN, make your computer accessible from the Internet FTP use is the lower frame-rate.
The valid protocols are http, https, ftp, and gopher. For example, to list an ftp proxy, a valid string would be: ftp=ftp://ftp_proxy_name:21 where ftp_proxy_name is the name of the ftp proxy and 21 is the port number that must be used to access the proxy. If the proxy uses the default port number for that protocol, the port number can be omitted. Click the Additional Settings button to change extra FTP parameters. Image Name The program uploads captured images to FTP server under this name.
bandwidth. Port Type the HTTP port number on which ReCam will listen for viewer requests. To connect to the HTTP Server, viewers enter the IP address of your computer and HTTP Port in the Internet browser. For example: http://192.168.1.1:8080. Use the Get Computer IP Address command from the Tools menu to define the IP address of your computer. Click the Additional Settings button to change extra parameters of HTTP server. Image Name Image Name is used on the viewer's side to show captured images.
Part 7 Watching Broadcast If the Remote Access broadcasting method is used, the ReCam program must be installed on the viewer's computer in order to watch the camera. See more info about how to set up Remote Access in the Camera Settings section. If the HTTP Server or FTP Upload broadcasting method is used, viewers open a web page in the Internet browser and watch the camera. This web page contains special code that is constantly refresh images from the camera and simulates a live picture.
Example: IMAGE Defines file name of captured image, which is defined in the Image Name box. See Image Name in the Broadcasting section for more info. Example: BORDER If value is "ON," applet draws frame around image. If value is "OFF," applet just displayes the captured image.
broadcasting frame rate and your viewers will see an updated image right away when it has been captured. Testing Camera Accessibility from the Internet This procedure helps you to determine the reason your camera is not visible to your viewers from the Internet. The testing procedure performs the following tasks: Testing that the computer is connected to a network and that an Internet connection is enabled. The program checks that the HTTP server for the selected camera is launched.
Customize Motion Detection Motion Sensitivity Motion Sensitivity defines a value in percent of the changes. It compares the last image and the current image and counts changes. A large value means more sensitivity. You can check your settings with the colored bar below the sensitivity track bar: green - no motion event, red - there is motion. Check Motion each Select the frequency of motion detection from the drop-down list. Motion Area You can specify an area of movement detection.
Do not send more than one email during Enter number of seconds, which specifies highest frequency of message sending. Attach Images to Email Click to select the Attach Images to Email check box if you want the e-mail message to contain images of the event. Message Priority Select the priority of e-mail message. Play Sound Click to select the Play Sound check box to make an alert sound when motion is detected.
Archived images can change size of snapshots in order to use them as thumbnails. Click to select the Resize Snapshots check box and enter the thumbnail width and height in appropriate boxes. Change Settings This feature helps to save disk space by recording good quality video only when there is motion and, as result, less disk space when there is no motion. Set the appropriate settings for video and sound quality when motion is detected. These settings take place only when motion is detected.
Part 9 Schedule Events ReCam has a scheduler, which performs tasks on specified day of week and time period. For example, this feature can be useful if you need to start broadcasting in the morning and stop it in the evening. To schedule a task, click Scheduler from the Tools menu. Click to select the Enable Scheduler check box to have ReCam to perform scheduled tasks. Click the Add button to add new schedule line. Click the Edit button to customize current schedule line.
Part 10 Recording Video You can use ReCam to record a stream of full-motion video and audio from your video and audio sources. The program has the following recording features: Live Recording, Archive Recording, and ability to create Archive of Snapshots. With Live Recording, the program records video and audio constantly in a temporary file that allows you pause, fast-forward, and rewind live video from the camera at any time. The Archive Recording is performed when user clicks the Record button.
Live Recording The Live Recording means that the program records video and audio constantly in a temporary file. This process takes some CPU usage, but at any moment you can rewind and playback recorded content. The maximum duration of live content is controlled by the Max. File Size value. Click to select the Enable Live Recording check box to switch on the live recording. Specify temporary file name in the Live File box. The file with live recording can be encrypted to prevent its misusing.
uploaded file on FTP server. This option can be useful if you want to place a link to the last recorded video file on your web page. How to add Recorded Video to Web Page Open your page in Notepad add the following code to HTML text:
Part 11 Managing Program from Command-line ReCam accepts commands from command-line. You can run the program with command-line parameters or send commands to the already launched program. Command-line Parameter: Description: /Q Terminates an already launched ReCam. Example: WebCam.exe /Q /REMOTE_ON Enables Remote Access. Example: WebCam.exe /REMOTE_ON /REMOTE_OFF Disables Remote Access. Example: WebCam.exe /REMOTE_OFF /HTTP_ON Starts HTTP Server. Example: WebCam.
For example if there is the following list of video devices on your computer: Logitech USB video camera 3Com PC Web Camera ATI TV Wonder To select "3Com PC Web Camera" the command line must be: WebCam.exe /DEVICE 2 /USE_VFW Causes program to use Video for Windows. Example: WebCam.exe /USE_VFW /USE_DS Causes program to use DirectShow. Example: WebCam.exe /USE_DS /CAM_NO Causes program to make active camera window, which index is defined in the next parameter. First camera window has index 1.
Part 12 Tools Creating a Web Page If the Remote Access broadcasting method is used, the ReCam program must be installed on the viewer's computer in order to watch the camera. See more info about how to set up Remote Access in the Camera Settings section. If the HTTP Server or FTP Upload broadcasting method is used, viewers open a web page in the Internet browser and watch the camera. This web page contains special code that is constantly refresh images from the camera and simulates a live picture.
range for each color value is 00 to FF inclusive. Modify the COLOR parameter according to the color of your web page. Example: IMAGE Defines file name of captured image, which is defined in the Image Name box. See Image Name in the Broadcasting section for more info. Example: BORDER If value is "ON," applet draws frame around image. If value is "OFF," applet just displayes the captured image.
This will cause the Internet browser to refresh page every 10 seconds. Specify this value to the same as your broadcasting frame rate and your viewers will see an updated image right away when it has been captured. Dynamic IP Service If you broadcast from your computer, you should provide your viewers with IP address of your computer.
To use Dial Up service Click Dial Up Connection from the Tools menu. Click to select the Use Dial Up Connection check box. Connection Select a dial-up connection from drop-down list. Click the Create New Dial-Up Connection button if you want to make a new dial-up connection. Disconnect after upload After having uploaded an image, ReCam is able to hang up the dial-up connection. This can be useful, if you have configured a large interval to upload images and don't want to stay connected all this time.
Editing Video Clips Video Conversion tool helps you edit video clips and convert them from AWLive format to AVI and MPEG files. To edit video clip with Video Conversion tool: Click Edit Video Clips from the Tools menu. Specify the Source File Name in the appropriate box. It can be an AWLive file only. Other file formats are not acceptable. If you don't want to convert whole file, click to unselect the Convert Whole File button and set the first and last frames of the part to be converted.
Part 13 Troubleshooting Camera freezes, times out, or stops showing live images Click Reconnect to Camera in the Device Settings window If problem persists: Reset camera by turning it off and back on Check compatibility of camera with ReCam software Number of allowed users trying to access the same camera at the same time may have been exceeded. Please refer to your camera’s manual or specifications. Problem may be with camera. Test ReCam software with another camera Check CPU usage.
Notes: - 42 -
Notes: - 43 -
©2004 MOBI Technologies Inc.