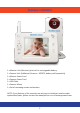
® Digital DXR Wireless Audio/Video Monitoring System compatible with...
monitoring
made easy
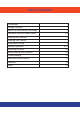
TABLE OF CONTENTS Introduction 1 Package Contents 2 About 2.
INTRODUCTION Congratulations on the purchase of the MobiCam® Digital DXR Monitoring System, which brings you the latest in wireless technology. We are sure that you will be pleased with the quality and features of this product but recommend that you read these instructions carefully before use in order to fully benefit from its many features.
PACKAGE CONTENTS 1 x Monitor Unit (Receiver) plus built-in rechargeable battery 1 x Camera Unit (Additional Cameras - #70205, battery sold separately) 1 x Montor Power Cord 1 x Camera Power Cord 1 x USB Cable 1 x Camera Mount 1 x Set of mounting screws and anchors NOTE: If you find any of the contents are missing or should you need to order replacement parts, please contact the manufacturer or visit www.getmobi.com.
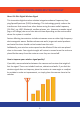
ABOUT DIGITAL WIRELESS TECHNOLOGY About 2.4 GHz Digital Wireless Signal This innovative digital wireless solution integrates advance Frequency Hopping Spread Spectrum (FHSS) technology. This technology greatly reduces the interference that comes from other devises using the same radio frequency (2.4 GHz), e.g. WIFI, Bluetooth, cordless phones, etc. However, a weaker signal (lag or still image) can occur from time to time depending on the environment where the system is installed.
CONSUMER GUIDE TO PRODUCT SAFETY Please read this instruction manual before using your MobiCam® Digital DXR System. When using electrical appliances, basic safety precautions should always be followed. Also please keep this manual for future reference. • This product is not intended to be used as a medical monitor and its use should not replace adult supervision. • Periodically examine this product for damage to the cord, housing or other parts that may result in the risk of fire, electric shock or injury.
CONSUMER GUIDE TO PRODUCT SAFETY • Always use transmitter and receiver where there is adequate ventilation. To prevent overheating, keep away from heat sources such as radiators, heat registers, stoves, or other appliances that produce heat. • Use only a dry or very lightly dampened cotton cloth to keep the Camera and Monitor units free of dust. Do no use a fully moisened cloth, water, or liquid cleaner of any kind. • Unplug the AC adaptors from the Monitor and Camera during periods of non-use.
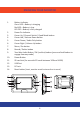
KNOWING YOUR MONITOR 1. 2. 3. 4. 5. 6. 7. 8. 9. 10. 11. 12. 13. 14.
KNOWING YOUR CAMERA 1. 2. 3. 4. 5. 6. 7. 8. 9. 10. 11.
INSTALLATION & SETUP Camera Start-Up 1. Connect power cable to Camera’s DC IN jack, then plug its power supply adapter into wall outlet. 2. Slide [Power Button] once to turn ON the camera. NOTE: Use only the 5V/1A power adaptor provided in the package. To operate without power cable visit www.getmobi.com to purchase the optional rechargeable battery. Monitor Start-Up 1. Connect power cable to Monitor’s DC IN jack, then plug its power supply adapter into wall outlet. 2.
MONITOR OPERATION Time Setting To set the time and date on your monitor, press the Menu button (no. 7, pg. 6), use the Cursor buttons to go to System Setup and press the OK button to enter the Time Setting, use the Cursor buttons to change the setting and press OK again to save. Power Saving By setting the Power Saving mode on your monitor, you can conserve battery power. The monitor will turn Off after 2 minutes of it being idle. To set this mode press the Menu button (no. 7, pg.
MONITOR OPERATION SD Card Format To format an SD memory card press the Menu button (no. 7, pg.6) go to SD Card, press OK and use the Cursor buttons to select No or Yes. Your MobiCam® DXR is formatted to be used with 2GB to 16GB SD memory cards (not included with the system). NOTE: Its strongly recommended that your SD card be formatted before use. Pairing Camera To pair additonal cameras press the Menu button (no. 7, pg. 6) go to Pairing press OK (no. 9, pg.
MONITOR OPERATION Brightness To adjust the brightness on your display press the Menu button (no. 7, pg. 6), use up/down Curser buttons to go to Brightness and press OK (no. 9, pg.6). Use the left and right Cursor buttons to adjust. Once the brightness has been adjusted press the Menu button again to exit this setting. Alarm The monitor has 3 convenient alarm settings that will warn you if your camera battery (sold separately) is low, you are out of range, or if VOX mode is engaged.
MONITOR OPERATION VOX Sensitivity During Voice Activation (VOX) your monitor will go on standby mode and stop transmitting picture and sound. Once the camera senses sound the monitor will automatically turn on and begin producing picture and sound. You can activate VOX by pressing the Menu button (no. 7, pg. 6), going to VOX Setting, and selecting the Sensitivity Level. It is recommended you select level 2 or 3 as level 1 is highly sensitive. You must have power-saving mode ON during VOX mode.
MONITOR OPERATION Camera ON/OFF Once you have paired extra cameras to your monitor, you can turn off any camera you do not wish to scan. Press the Menu button (no.7, pg. 6), go to Camera Setup, and use the Cursor buttons to select a camera you wish to turn off and press OK. Factory Default To reset your monitor to factory settings press the Menu button (no.7, pg. 6), go to System Setup and select No or Yes.
RECORDING FUNCTION You can record live video directly within your monitor by inserting an SD card into the SD card slot (no. 11, pg. 6). You can begin recording manually or by setting up VOX to begin recordings through sound activation. To record manually simply press the Record button (no. 8, pg. 6). A recording icon will appear on the screen. To stop the recording press the Record button again. VOX Recordings To set the monitor to record when the camera senses sound, press the Menu button (no. 7, pg.
USB OPERATION USB Output Your monitor is equipped with a USB output so you can connect your monitor to your computer allowing you to capture video and sound from the camera transmission. NOTE: The monitor screen turns off automatically when USB cable is used. The screen will turn back on when the cable is removed. USB Connection NOTE: You will need to install a USB devise driver before using the USB connection to your PC. Visit our website at www.getmobi.
TROUBLESHOOTING Problem Solution System shows “ No Signal” • • • • Low or unstable signal • • • Check the power cord connection and the battery power. Pair your camera Place the camera close to the monitor If possible remove major obstacles between camera and monitor. Adjust camera and monitor position Keep WIFI router away from camera or monitor Keep working motors (hair dryer, air conditioner, water pump) or microwave away from the camera and/or monitor.
RADIO INTERFERENCE ADVICE FCC Compliance Statement: This device complies with Part 15 of the FCC rules. Operation is subjected to the following two conditions: (1) this device may cause harmful interference, and (2) this device must accept any interference received, including interference that may cause undesired operation. FCC Warning This equipment has been tested and found to comply with imits for a Class B digital device, pursuant to Part 15 of the FCC rules and ETSI (EN) 300 328.
WARRANTY Mobi Technologies, Inc. warrants this product to be free from defects in material and workmanship for a period of ninety (90) days from the date of purchase. Should this product prove to be defective at any time during the warranty period, Mobi Technologies, Inc. will, at its option, either replace or repair it without charge. After the warranty period, a service charge will be applied for replacement of parts or labor for repair.
NOTES 19
Mobi Technologies, Inc. 5913 Blackwelder St Culver City CA 90232 Toll Free Number (877) 662-4462 www.getmobi.com Mobi® and MobiCam® are registered trademarks of Mobi Technologies, Inc. © 2011 Mobi Technologies, Inc.