Touch Board Plus User Guide
Touch Board Plus 1 © 2014 Turning Technologies, LLC. All rights reserved. Portions Responsive Innovations, LLC, Microsoft Corporation No part of this document may be reproduced or transmitted in any form or by any means, electronic or mechanical, for any purpose, without the express written permission of Turning Technologies, LLC. All rights reserved. Turning Technologies, LLC, 255 West Federal Street, Youngstown, OH 44503 USA. TurningPoint® is a registered trademark of Turning Technologies, LLC.
Touch Board Plus 2 TABLE OF CONTENTS OVERVIEW What's in the Box? 3 3 TECHNICAL REQUIREMENTS Hardware Software Installing Ubuntu GNOME 4 4 4 5 SET UP Installing WorkSpace Mounting the Touch Board Plus Connecting the Video Projector Connecting the Touch Board Plus via USB Calibrating the Touch Board Plus via Device Manager Calibrating the Touch Board Plus (Windows 7 and Windows 8) 6 6 7 8 8 8 9 USING THE TOUCH BOARD PLUS Mouse Actions Touch Gestures Care and Maintenance Additional Solutions 10 10 10
Touch Board Plus 3 OVERVIEW Built on the popular functionality of the DualBoard™, Touch Board Plus features touch technology, allowing instructors and participants to interact with the whiteboard using the Touch Board Plus Wand or their fingers. Six points of contact can be used on the Touch Board Plus at the same time (Windows 7 and 8 Only). Touch Board Plus comes with Turning Technologies' WorkSpace® software, which allows for seamless creation of interactive content.
Touch Board Plus 4 TECHNICAL REQUIREMENTS Touch Board Plus is designed to function with most computers; however, there are some basic hardware and software requirements.
Touch Board Plus Installing Ubuntu GNOME TouchBoard Plus must be used with the Ubuntu GNOME environment. Follow the steps below to install GNOME. 1 Ubuntu 12.04 users: open Terminal and run one the following commands: l sudo apt-get install gnome -session -fallback l sudo apt-get install gnome -session -panel 2 Ubuntu 14.04 users: open Terminal and run the following command: l sudo apt-get install gnome -session -flashback 3 Ubuntu 12.04 users must log in with GNOME Classic (No effects). Ubuntu 14.
Touch Board Plus 6 SET UP This chapter covers: Installing WorkSpace Mounting the Touch Board Plus Connecting the Video Projector Connecting the Touch Board Plus via USB Calibrating the Touch Board Plus via Device Manager Calibrating the Touch Board Plus (Windows 7 and Windows 8) Installing WorkSpace You must have administrative privileges to install WorkSpace. If you do not have administrative privileges on your computer, contact your IT department.
Touch Board Plus Mounting the Touch Board Plus WARNING It is recommended that a skilled professional assess the strength of the wall and determine the appropriate hardware required to securely attach the Touch Board Plus to the wall. A minimum of two people are required to safely lift and mount the board to the wall. 1 Attach the wall hanger to the wall. 2 Using the provided bracket screws, attach the two anchor clips to the bottom of the Touch Board Plus.
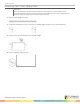
Touch Board Plus 8 Connecting the Video Projector TIP For optimal usage and viewing, the minimum required screen resolution should be set at 1024 x 768. 1 With the computer turned on, connect the projector video cable from the computer to the video projector. 2 Turn on the video projector. 3 With the video projector aimed at the Touch Board Plus, align the projected image onto the Touch Board Plus so that it is within the board's active area.
Touch Board Plus 9 2 Select eInstruction Device Manager. The Device Manager window opens. 3 Select the Touch Board Plus device from the Device Manager window. 4 Select the Calibrate icon from the toolbar. The Calibration window opens. 5 Touch each target as it appears on the board. TIP For optimal accuracy, use a Touch Board Plus pen during the calibration process.
Touch Board Plus 10 USING THE TOUCH BOARD PLUS This chapter covers how to properly use the Touch Board Plus.
Touch Board Plus 11 Gesture Use Gesture Action Rotate Rotate content Use two fingers in a clockwise or counterclockwise motion Flicks Flick or throw objects across the screen Make a quick flick motion in desired direction Pan Scroll through content or web page Drag finger up or down on content or scrollable window Action Care and Maintenance Touch Board Plus may be used as a standard whiteboard. Expo® dry erase whiteboard pens and cleaner are recommended.
Touch Board Plus 12 WORKSPACE WorkSpace provides the tools to create and deliver presentations, enhance material with special effects, annotate to highlight key points, add notes incorporating additional information or participant comments and much more. Refer to the complete WorkSpace for Java User Guide or WorkSpace for PC User Guide for detailed instructions on using the WorkSpace software. Visit http://www.einstruction.com/support/downloads to download the full WorkSpace user guides.
Touch Board Plus 13 WorkSpace Window Mac The Toolbar displays when WorkSpace is opened in Lesson Mode. The default toolbar scheme is set to Intermediate. The Page Navigation Toolbar displays the tools used to navigate through the presentation file, including the MultiUser Mode tools. The Properties Bar provides options to change the properties of the selected annotation tool (pen, highlighter, shape). For example, the pen tool Properties Bar includes color, width, transparency, line ends and line styles.
Touch Board Plus 14 WorkSpace Modes By default, WorkSpace opens in Lesson Mode with the WorkSpace toolbar floating on the desktop. The WorkSpace toolbar will become transparent if not in use. To reactivate it, click anywhere on the toolbar. WorkSpace allows you to capture text, graphics, or virtually any image from any application that you can project from your computer. The software is categorized into "modes," each consisting of different capabilities: By default, WorkSpace opens in Lesson Mode.
Touch Board Plus l l 15 Toggle Multi-User Mode on and off using the Multi-User option. Add, remove and move Mobi tablets to different areas using Edit Devices. Each multi-user page will remember specific device placement when moving between pages or returning from Mouse Mode. Setting Up Multi-User Mode 1 Connect up to nine devices in Device Manager. IMPORTANT Do not add the device that will be used to control the main toolbar or the other devices unless it is set to "presenter" within Device Manager.
Touch Board Plus 16 Selecting the Presenter The presenter in Multi-User Mode controls when multi-user mode begins and ends. 1 Open Device Manager. Images of each available device appear in the main window. 2 Select the icon for the desired presenter device. 3 From the menu bar, click Options and select Set Presenter. The selected device is now the presenter device.
Touch Board Plus 17 Distributing Files as IWB Content saved as a Common File Format (IWB) can be shared with any interactive whiteboard and software if the whiteboard and software accept the IWB formatting. It is important to note that some formatting and interactive content may be lost due to the inability to exchange information between the software applications. 1 Click the WorkSpace Main Menu icon. 2 Mouse over File and select Save As. The Save GWB File window is displayed. 3 Name the file.
Touch Board Plus 18 DECLARATION OF CONFORMITY Regulatory Statements Declaration of Conformity FCC Statement Manufacturer's Name: This device complies with part 15 of the FCC Rules. Operation is subject to Turning Technologies, LLC/DBA eInstruction the following two conditions: (1) This device may not cause harmful Manufacturer's HQ Address: interference, and (2) this device must accept any interference received, including interference that may cause undesired operation.
Touch Board Plus 19 CONTACT US For additional help, contact Turning Technologies Technical Support. Technical Support is available from 7 a.m. - 9 p.m. EST. From within the contiguous United States, you can reach Technical Support toll-free by calling 866.746.3015. If you are calling from outside of the United States, please call +1 330.746.3015. Technical Support may also be reached via e-mail at support@turningtechnologies.com or support@einstruction.com, a brand of Turning Technologies.