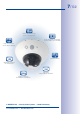
EN D14D Camera Manual The HiRes Video Company One camera, two lenses. Seeing more is just not possible. www.mobotix.com 60.170_EN_V3_01/2013 Two lenses, two HiRes image sensors, up to 64 GB internal storage and a dual image of a maximum of 6 megapixels make the D14D DualDome an efficient security solution: It is possible to secure two different areas using just one camera.
/132 D14D Camera Manual: Contents MOBOTIX Seminars MOBOTIX offers inexpensive seminars that include workshops and practical exercises. For more information, visit www.mobotix.com > Seminars. Notes and Copyright Information Additional information: www.mobotix.com The enclosed Camera Software Manual contains detailed information on the camera software. Download the latest version of this manual and the MxEasy and MxControlCenter manuals as PDF files from www.mobotix.com (Support > Manuals).
/132 Contents Foreword 6 The MOBOTIX Concept 8 Superior Storage Solution 10 Added Security Value 12 Cost Benefits And Technical Advantages 14 1 Product Overview 16 1.1 An Overview Of The D14D DualDome 16 1.2 The Most Important Benefits 22 1.3 New Features Compared To The D12D 23 1.4 General Camera Functions 24 1.5 Lenses, Equipment and Technical Data 30 1.6 Standard delivery 36 1.6.1 1.6.2 1.6.3 1.6.4 1.6.
/132 D14D Camera Manual: Contents 2.2 Overview Of Network Connection 50 2.2.1 2.2.2 2.2.3 2.2.4 Power over Ethernet (PoE Conforming to IEEE 802.3af) Uninterruptible Power Supplies (UPS) Providing The Camera Connections, Wall Outlets Wiring, Fire Prevention, Lightning And Surge Protection 50 51 51 52 2.3 First Installation Steps 54 2.3.1 2.3.2 2.3.3 2.3.4 2.3.5 2.3.
/132 3.2.4 First Images And Network Parameter Configuration In MxEasy 3.2.5 Starting the Camera With The Factory IP Address 3.2.6 Starting The Camera With An Automatic IP Address (DHCP) 93 96 97 3.3 98 Virtual PTZ And Full Image Recording 3.3.1 Virtual PTZ 3.3.2 Full Image Storage 98 100 3.4 102 Image Optimization 3.4.1 Correction Of Lens Distortion (L22 Only) 3.4.2 Adjusting The Panorama Image (D14D 180° Only) 3.4.3 Dual Image Exposure 102 104 109 3.5 MicroSD Card Recording 110 3.5.1 3.
/132 D14D Camera Manual: Foreword Foreword Dear MOBOTIX customer, Congratulations on your decision to purchase an exceptionally efficient premium network camera 'Made in Germany.' Thanks to its double lens and sensor assembly, the D14D can monitor two different areas at once, for example, making it the most powerful MOBOTIX Fixdome camera yet. The integrated 4-GB long-term memory can now be expanded up to 64 GB.
/132 HiRes double image up to 6 megapixels 4 GB MicroSD integrated (expandable up to 64 GB) High frame rates up to 30 fps (Mega) Shock detector MiniUSB interface for extensions PoE class adjustable & variable MxBus interface for additional modules © MOBOTIX AG • Security-Vision-Systems • Made in Germany www.mobotix.com • sales@mobotix.
/132 D14D Camera Manual: The MOBOTIX Concept The MOBOTIX Concept HiRes Video Innovations And Technology Leader 3 Mega The German company MOBOTIX AG is known as the leading pioneer in network camera technology since its founding in 1999, and its decentralized concept has made high-resolution video systems cost efficient. 1536 lines MOBOTIX has been producing megapixel cameras exclusively for many years now and is regarded as the global market leader for high-resolution video systems.
/132 The Decentralized MOBOTIX Concept Unlike other systems, with the decentralized MOBOTIX concept, a high-speed computer and if necessary, digital long-term memory (MicroSD Card) is built into every camera, providing several days of recording time. The PC and the video control center now serve only for viewing and controlling the cameras (PTZ), not for analysis or recording.
/132 D14D Camera Manual: Superior Storage Solution Superior Storage Solution MOBOTIX Storage Concept Without Bottlenecks These days, video data is normally pre-processed and stored centrally on a PC or digital video recorder (DVR) using video management software. Video and audio streams from all installed cameras are directed to this central device. In this case, using high-resolution cameras often results in data jam.
/132 SD Card Memory Reduces Storage Costs MOBOTIX cameras are also able to store up to 64 GB of video in their integrated memory. Thanks to this high storage capacity and the option of recording only the sequences in which an event occurs, external storage devices such as hard drives are rarely required. This saves on storage devices and network infrastructure and reduces the maintenance cost of mechanical components such as hard drives or fans.
/132 D14D Camera Manual: Added Security Value Added Security Value Robust, Low-Maintenance Technology The real added value of MOBOTIX products is reflected in characteristics such as enhanced functionality, long life, and robustness. MOBOTIX cameras have no moving parts. This makes the cameras very resistant to wear and tear, and reduces both maintenance costs and power consumption. Alarm Management And Forwarding Integrated sensors enable MOBOTIX cameras to recognize when an event has occurred.
13/132 above a door in the post image search dialog. This will only filter sequences triggered when that door opens/closes. Floor plan and camera view in MxControlCenter (free control center software from MOBOTIX) Sound Increases The Chance Of Detection In the event of an alarm, MOBOTIX cameras can turn on their built-in microphones and record lip-synchronous sound. They are therefore an even greater help in analyzing a situation and easing clarification.
/132 D14D Camera Manual: Cost Benefits And Technical Advantages The Most Important MOBOTIX Cost Benefits 1 2 Increased Resolution Reduces Amount Of Cameras Needed 1536 lines, high-resolution sensors give a better overview and allow monitoring an entire room with just one camera. Reduced Installation Costs At Any Distance Standard Ethernet connection enables the use of common network components such as fiber, copper and wireless (WLAN).
/132 The Most Important MOBOTIX Technical Advantages High-Resolution Digital Image Instead Of TV Quality Megapixel sensor and image processing inside the camera generate sharp images with a higher resolution than HDTV, allowing them to be recognized as evidence in a court of law. Hemispheric Technology For An Overview With No Blind Spots 360° allround view or 180° widescreen image, corrected for perspective; only one camera is needed to view the entire room or train platform without any blind spots.
/132 D14D Camera Manual: Product Overview 1 Product Overview 1.1 An Overview Of The D14D DualDome HiRes DualDome Camera With Two Independent Image Sensors And Lenses With its compact and elegant dome-shaped housing, the MOBOTIX DualDome camera system has become an indispensable feature of the now global market of high-resolution network security cameras.
An Overview Of The D14D DualDome The First MOBOTIX Camera With Images Up To 6 Megapixels As always, MOBOTIX focused on the most sophisticated customer requirements during the development phase. Compared to the previous D12D model, the D14D features numerous innovations and significantly improved performance. The system architecture was adjusted to suit the new microprocessor, which allowed MOBOTIX to double the image rates of the previous model in terms of megapixel resolution.
/132 D14D Camera Manual: Product Overview The absence of mechanically moving parts, heating and ventilation means that D14D cameras requires less than 5 watts of power, which can therefore be easily supplied via a standard PoE cable. Cleaning the D14D is simple enough – wipe the dome using a lint-free cotton cloth and a mild household detergent without abrasive particles.
An Overview Of The D14D DualDome 19/132 D14D-180°: High-Resolution 180° Panoramic Image The D14D 180° is equipped with two fixed 90° Super Wide Angle lenses, which together ensure a high-resolution 180° panorama image that is up to 6 megapixels in size and is corrected by means of the camera software. Using only one camera, it is possible, for example, to cover one side of a building and the adjacent areas (parking lots, lawns, etc.).
D14D Camera Manual: Product Overview Outdoor Wall Mount: Weatherproof And Room For Extensions Combined with the Outdoor Wall Mount, which is available as an accessory, the D14D is compliant with the higher protection class IP65 (fully dustproof and resistant to water jets) and can then be easily used in any unprotected outdoor areas. MOBOTIX offers an additional Corner and Pole Mount that allows the Outdoor Wall Mount to be attached to the corners of buildings and to masts.
/132 An Overview Of The D14D DualDome D14D-Standard You can freely combine the two image sensors and lenses and focus them on different areas independently of one another. D14D-180° Two fixed 90° Super Wide Angle lenses, which together ensure a high-resolution 180° panorama image that is up to 6 megapixels in size and is corrected by means of the camera software.
/132 D14D Camera Manual: Product Overview 1.2 The Most Important Benefits The high-resolution DualDome D14D camera is the even more powerful successor to the D12D and has a new microprocessor and a modified system platform. The result is more than twice the processing power, which enables smooth video frame rates, even during the simultaneous transfer of two sensor images.
New Features Compared To The D12D 1.
/132 D14D Camera Manual: Product Overview 1.4 General Camera Functions Like all MOBOTIX cameras, the D14D line has a variety of software functions: from motion detection and long-term storage right through to alarm notification via video IP telephony. Unlike camera systems from other manufacturers, buying and installing additional software on the computer is thus unnecessary.
/132 General Camera Functions Voice over IP Moreover, MxPEG provides for lip-synchronous live audio and two-way communication between the camera and a computer. Room surveillance is possible using a browser (Internet Explorer), MxControlCenter, or MxEasy. Customized alarm notification on your mobile or via Internet telephony is just as easy as event-controlled voice messages directly from the camera.
/132 D14D Camera Manual: Product Overview Event and Time-Controlled Just like triggering event-controlled recording upon detecting movements in the image, the camera can also record when the volume detected by the microphone exceeds a certain trigger value. Using scheduled daily recording, time tasks can start or stop video recording, upload images to a web site or send e-mails with video/audio clips. Vacation times and holidays can be programmed.
General Camera Functions 27/132 MxControlCenter – Professional Video Management, Free Of Charge Instead of using a web browser, you can download and install the free-of-charge MxControlCenter from the MOBOTIX website. This program allows live images from highresolution MOBOTIX cameras to be displayed on one monitor with sound. In addition, MxControlCenter can activate alarms with lip-synchronous sound and also enables convenient event search.
/132 D14D Camera Manual: Product Overview All settings selected in MxEasy (for example, virtual camera position, zoom, brightness, volume, microphone sensitivity, image storage, signal outputs) are usable immediately and are stored instantly in the configuration of the corresponding camera. The calendar function integrated in the Alarm Planner provides access to innovative features for scheduled settings of one or more cameras.
General Camera Functions 29/132 • Time Tables that handle customized holidays and vacations are used to control the camera's arming, image recording messaging, logos, the obscure image function as well as other features. • Remote signaling for master/slave cameras, where the master camera controls the arming status of the slave cameras allows all slave cameras to be armed using a key switch connected to the master camera for example.
/132 D14D Camera Manual: Product Overview 1.5 Lenses, Equipment and Technical Data MOBOTIX currently offers five standard lenses with M14 thread for the D14D that can all be combined with a day or night sensor (color or black and white). Since MOBOTIX cameras are backlight-proof, none of these lenses requires a mechanical auto iris, thus making the camera extremely robust and maintenance-free.
/132 Lenses, Equipment and Technical Data Lenses L22 L32 L43 L65 L135 35 mm equivalent 22 mm 32 mm 43 mm 65 mm 135 mm Nominal focal length 4 mm 6 mm 8 mm 12 mm 25 mm Obturador 2.0 2.0 2.0 2.0 2.5 Image angle horizontally 90° 60° 45° 31° 15° Image angle vertically 67° 45° 34° 23° 11° Dist. 1 m m m m m m Image width 2.0 1.1 0.8 0.5 0.3 Image height 1.3 0.8 0.6 0.4 0.2 Dist. 5 m m m m m m Image width 10.0 5.7 4.1 2.7 1.3 Image height 6.
/132 D14D Camera Manual: Product Overview MX-D14Di-SEC-NIGHT-180 MX-D14Di-SEC-180 MX-D14Di-IT MX-D14Di-SECDNIGHT-FIX: Day/night versions with special DNight lens bridge and fixed mounted lenses MX-D14Di-SEC MX-D14Di-SEC-DNIGHT-FIX Hardware and Software Features D14D Hardware Features IP65 only with Outdoor Wall Mount 1 Outdoor – weatherproof 4-GB MicroSD card pre-installed 3 Estimated number of images in single image mode; in the case of dual images (right and left lens), the number of images
/132 Lenses, Equipment and Technical Data M12 Secure Model IT Model Q24M Web Model D24M M24M Basic Model D14 Software Features All Models Digital zoom (smooth) with panning only Q24 X X X X/X X/X X/X X/X Custom exposure windows X X X X Video Motion Detection X X X X Time and event control (FTP, email, logos) X X X X Weekly schedules/holidays – X X X Web functionality (FTP, email) X X X X Quad/MultiView in browser X X X X Recording/Player in browser X X X
/132 D14D Camera Manual: Product Overview Technical Specifications D14D Technical Data Model Versions (fitted with day or night sensors) MX-D14Di-IT, MX-D14Di-SEC (day or night), MX-D14Di-SEC-DNIGHT FIX (day or night), MX-D14Di-SEC-180° (day) MX-D14Di-SEC-NIGHT-180° (night) Lens Options 22 to 135 mm format, horizontal angle 90° to 15° Sensitivity Color sensor: 1 lux (t =1/60 s), 0.05 lux (t = 1/1 s) Black and white sensor 0.1 lux at 1/60 s, 0.
Lenses, Equipment and Technical Data Certificates EMC (EN55022, EN55024, EN61000-6-2, FCC part 15B, AS/NZS3548) Power supply Year-round Power-over-Ethernet (IEEE 802.3af); PoE class variable, approx. 4.5 W Operating conditions IP54/IP65 (without/with wall mount) -30°C to +60°C/-22°F to +140°F Dimensions Ø x H: 205 x 108 mm (D14D), 205 x 125 mm (D14D-180°); Weight: approx.
/132 D14D Camera Manual: Product Overview 1.6 Standard delivery 1.6.1 Standard delivery – D14D Camera housing (item 1.1) 3 mm Allen wrench (item 1.10) TX20 Torx wrench (item 1.11) 2 lenses (item 1.2) 2 lens mounts (item 1.3) 2 lock rings (item 1.4) Domes (item 1.7), 1x transparent, 1x tinted Outer shell (item 1.8) Cable cover (item 1.6) Custom tool with magnet (item 1.12) Ethernet cable (item 1.9) Item Count 1.1 1 Camera housing Part Name 1.2 2 Lens (installed) 1.3 2 Lens mount 1.
/132 Standard delivery D14D Camera Housing And Connectors The MOBOTIX D14D consists of three main components (camera housing, body shell and dome). The D14D is also delivered with PIR sensor, microphone and speaker.
/132 D14D Camera Manual: Product Overview 1.6.2 Standard delivery – D14D 180° Camera housing (item 2.1) 3 mm Allen wrench (item 2.10) TX20 Torx wrench (item 2.11) 2 lenses (item 2.2) 2 lens mounts (item 2.3) 1 lens bridge (item 2.14) 2 lock rings (item 2.4) XL dome (item 2.7), 1x transparent, 1x tinted Outer shell (item 2.8) Custom tool with magnet (item 2.12) Cable cover (item 2.6) Ethernet cable (item 2.9) Item Count 2.1 1 Camera housing Part Name 2.2 2 Lens (installed) 2.
/132 Standard delivery D14D-180° – Camera Housing And Connectors The MOBOTIX D14D-180° consists of three main components (camera housing, body shell and dome). The D14D is also delivered with PIR sensor, microphone and speaker.
/132 D14D Camera Manual: Product Overview 1.6.3 Delivered With The D14D-Sec-DNight-Fix Camera housing (item 2.1) 3 mm Allen wrench (item 2.10) TX20 Torx wrench (item 2.11) 2 lenses (item 2.2) 2 lens mounts (item 2.3) 1 lens bridge (item 2.14) 2 lock rings (item 2.4) XL dome (item 2.7), one transparent, one tinted Outer shell (item 2.8) Custom tool with magnet (item 2.12) Cable cover (item 2.6) Ethernet cable (item 2.9) Item Number 2.1 1 Camera housing Part name 2.2 2 Lens (installed) 2.
/132 Standard delivery D14D-Sec-DNight-Fix – Camera Housing and Connectors The MOBOTIX D14D-Sec-DNight-Fix consists of three main components (camera housing, body shell and dome). The D14D is also delivered with PIR sensor, microphone and speaker.
/132 D14D Camera Manual: Product Overview 1.6.4 Delivered Parts Of The Outdoor Wall Mount (Accessories) Bottom plate (item 3.2) 4 Allen screws, M4x25 mm (item 3.10) 4 washers, dia. 4.3 mm (item 3.11) 4 dowels, 10 mm (item 3.3) 4 washers, dia. 9 mm (item 3.4) Make sure to check the delivered parts When using the wall mount, please exchange the original Ethernet cable of the D14D against the 1 m (3 ft 3 in) Ethernet cable 4 hex nuts, M4 (item 3.9) 4 wood screws, 8x70 mm (item 3.
/132 Standard delivery 1.6.5 Delivered Parts Of The Corner And Pole Mount (Accessories) 4 Allen screws, M8x30 mm (item 4.2) 2 steel straps (item 4.5) 4 washers, dia. 9 mm (item 4.3) 4 hex nuts, M8 (item 4.4) Item Count 4.1 1 Part Name Corner and Pole Mount 4.2 4 Stainless steel Allen screws M8x30 mm 4.3 4 Stainless steel washers Ø 9 mm 4 Stainless steel lock nuts M8 2 Stainless steel straps Height: 160 mm 4.4 4.
/132 D14D Camera Manual: Product Overview 1.7 Available Accessories 1.7.1 NPA-PoE Set Order No.: MX-NPA-PoE-EU and MX-NPA-PoE-INT (Version EU and Version INT) Order No.: MX-CBL-NPA-BAT-2 (battery cable for mobile signal inputs) A multifunctional PoE injector according to the IEEE 802.3af standard – with three connectors (for network, camera/PoE device, PC), universal power supply with interchangeable adapter plugs and crossover function.
Available Accessories 1.7.4 Ethernet Patch Cable With Bayonet Catch Order No.: MX-OPT-CBL-LAN-1/2/5/10 (length 1 m/2 m/5 m/10 m) The MOBOTIX-developed special cable can be installed in a waterproof manner and has an integrated sealing gasket. Every D14D camera is delivered with a 0.5-m-long cable as standard, which can be exchanged for a patch cable up to 10 m in length. 1.7.5 Outdoor Wall Mount Order No.
/132 D14D Camera Manual: Product Overview 1.7.8 Mx2wire+ Media Converter Order No.: MX-2wirePlus-Set-PW The Mx2wire system allows an Ethernet network with PoE to be set up via two-wire cables, which saves users from having to lay several hundred meters of Ethernet cable. For example, an existing two-wire cable of an analog video camera can be reused to connect a high-resolution and modern IP network camera.
Available Accessories 1.7.10 MX-NPA-Box Order No.: MX-OPT-NPA-EXT The MX-NPA-Box is a weatherproof PoE injector conforming to the IEEE 802-3af standard and is designed to connect to a MOBOTIX camera external power supply (12 to 57 V DC). The MX-NPA-Box is equipped with the PatchBox’s weatherproof and extremely compact outer housing (protection class IP65, -30°C to +60°C/-22°F to +140°F), which means it can also be installed in the space of the Outdoor Wall Mount.
Mounting 2.1 Overview Of Mounting Options 2.1.1 Mounting Indoor Cameras To A Ceiling Or Wall (Without Accessories) 120° In order to mount the MOBOTIX D14D to a ceiling or wall, you need to drill the holes for the fixtures. Use the supplied drilling template (fold-out at the end of this manual) to mark the position for drilling the dowel holes and the holes through which the cables will be led later on. Remember to position the drilling template according to the direction of the camera’s PIR sensor.
Overview Of Mounting Options 49/132 The Outdoor Wall Mount may have to be used, as the PIR sensor can be turned in any direction when installed horizontally (PIR is tilted diagonally downwards). Special Case: Mounting The D14D-180° To A Wall Without The Wall Mount The lens mount unit has to be rotated by 180° so that you do not get an upside down panorama image. For additional information on this topic, see the end of Section 2.3.1 (Mount The Lens Units).
/132 D14D Camera Manual: Mounting 2.2 Overview Of Network Connection 2.2.1 Power over Ethernet (PoE Conforming to IEEE 802.3af) The D14D supports the Power over Ethernet standard IEEE 802.3af (PoE) All D14D models are supplied with power using the PoE standard. The PoE Adapter Set (MX-NPA-PoE Set) may be used for smaller installations. For larger installations, it is worth investing in a PoE-capable supply device available on the market.
Overview Of Network Connection 2.2.2 Uninterruptible Power Supplies (UPS) In order to maintain a continuous power supply even when utility power fails, you should install an uninterruptible power supply (UPS). These devices also provide full protection against electrical surges and voltage fluctuations and thus enhance the reliability of the system as a whole. When using a more powerful 19" rack-mounted UPS, you can also protect all other network components (e.g. switches, routers, PoE switches, etc.).
/132 D14D Camera Manual: Mounting 2.2.4 Wiring, Fire Prevention, Lightning And Surge Protection When installing the wiring inside or outside of buildings, make sure you always adhere to the relevant regulations on wiring, fire prevention, and protection against lightning. MOBOTIX cameras are protected against the effects of small electrical surges by numerous measures. These measures, however, cannot prevent the camera from being damaged when stronger electrical surges occur.
Overview Of Network Connection Lightning And Surge Protection More information on preventing lightning or surge damage is available from organizations such as the International Electrotechnical Commission (www.iec.ch) or from the manufacturers of lightning and surge protectors. © MOBOTIX AG • Security-Vision-Systems • Made in Germany www.mobotix.com • sales@mobotix.
/132 D14D Camera Manual: Mounting 2.3 First Installation Steps 2.3.1 Mounting Lens Units The standard models in the MOBOTIX D14D family are supplied with a pre-installed dome. Lens units (lens mount, image sensor and lens) are usually delivered separately. Lens units are installed as described below if this is the case. The sensor cables to connect the image sensors are marked with R (right) and L (left).
/132 First Installation Steps 1. Remove the outer shell: Remove the outer shell using the supplied custom tool. Insert the tip of the custom tool into the three small holes of the shell, one by one. Lift the outer shell to loosen it from the fixtures. Use the supplied custom tool 2. Remove the dome: Pick up the dome using the supplied plastic foil or a cotton cloth and remove it by turning it counterclockwise. 3.
/132 RGB SW D14D Camera Manual: Mounting 5. Connect the sensor cable to the lens mount: Connect the R and L sensor cables with the image sensors in accordance with the table. Example: In the case of a D14D-DNight (color/black and white), the R sensor cable must always be connected to the lens mount marked with RGB, while the L sensor cable must always be connected to the lens mount marked SW.
/132 First Installation Steps 9. Mount the dome: Pick up the dome using the supplied plastic foil or a cotton cloth and screw the transparent dome in a clockwise direction onto the housing until the dome sits securely (but not too tightly) in the seal. Make sure that the dome is not tilted and that it is securely fitted to the seal on all sides. 10. Attach the outer shell: Hold the outer shell so that the round hole of the shell is positioned over the PIR sensor of the camera.
/132 D14D Camera Manual: Mounting 2.3.2 Overview Of Cable Connections The following cables can be used with the D14: • MOBOTIX Ethernet cable: This MOBOTIX cable is pre-installed at delivery and is intended for direct connection to a network outlet. If the D14D is to be installed outdoors, the MOBOTIX MX-Patch-Box should be used (optional accessory).
First Installation Steps 59/132 2.3.3 Connecting Ethernet Cable With The MX-Patch-Box The MX-Patch-Box enables you to connect a MOBOTIX camera with a patch cable or with an Ethernet installation cable simply and water-resistant for the following cases: • Outdoor installation (preferably using the Outdoor Wall Mount) • Indoor installation with Ethernet installation cable You will find additional information on the MX-PatchBox at www.mobotix.com under the section Products > Accessories > Functional Boxes.
/132 D14D Camera Manual: Mounting 5. Insert USB cable: Insert the MOBOTIX USB cable from below through the cable outlet (see figure) and wrap it around the camera within the cable guides. 6. Plug in the USB connector: Insert the Mini USB connector in the relevant socket. Make sure that the cable is correctly fitted into the cable guides and that there is no excess cable in front of the connections. 7.
/132 First Installation Steps 10. Secure the cable: Properly lead the cable through the cable guides at the outer rim of the housing and make sure that the outer shell can be properly mounted later on. 11. Attach the outer shell: Hold the outer shell so that the round hole of the shell is positioned over the PIR sensor of the camera. Gently press the shell into the shell’s seats in the camera housing. Old outer shells (D10D, D12D) may no longer be used! 2.3.
/132 D14D Camera Manual: Mounting 2.3.6 Replacing The MicroSD Card If the supplied 4-GB MicroSD card is to be replaced (for example, with a 64-GB MicroSD card), it is best to do so before the camera is installed. The cards should only be replaced when the camera is disconnected from the power supply. Use the supplied custom tool 1. Remove the outer shell: Remove the outer shell using the supplied custom tool. Insert the tip of the custom tool into the three small holes of the shell, one by one.
First Installation Steps 63/132 5. Insert the MicroSD card: Push the MicroSD card as shown (electrical contacts pointing toward the dome) into the card slot using a tweezers. Make sure that you hear a click when the card is inserted. The card is now locked and can be used. If a new MicroSD card is used, it must be formatted before use (see Chapter 3). 6. Install cable cover: Push the cable cover back into its seat and fasten the two M4x25 Allen screws.
/132 D14D Camera Manual: Mounting 2.4 Mounting The Camera With Outdoor Wall Mount 2.4.1 Aiming The Passive Infrared Sensor (PIR) When mounting the camera, make sure that the PIR sensor points into the direction where it is most useful. The PIR sensor has a range of approximately 10 m and a detection angle of approximately ±15 degrees. PIR data: Range of approximately 10 m, detection angle of approximately +/-15 degrees 2.
/132 Mounting The Camera With Outdoor Wall Mount 2.4.2 Mounting The Outdoor Wall Mount Ideally, the Outdoor Wall Mount is mounted over the tested wall outlet that provides the connections (network, Power over Ethernet) to the camera. In-wall socket MX-Patch-Box or wall outlet MOBOTIX Ethernet patch cable (1 m) D14D Outdoor Wall Mount Mounting the Outdoor Wall Mount over the MX-Patch-Box or a socket D14D 160 293 © MOBOTIX AG • Security-Vision-Systems • Made in Germany www.mobotix.com • sales@mobotix.
/132 D14D Camera Manual: Mounting The folded drilling templates can be found at the end of the manual Use the supplied drilling template (fold-out at the end of this manual) to mark the position for drilling the dowel holes and the holes through which the cables will be led later on. When printing or copying the drilling template, make sure that it is not scaled down. Make sure that the drilling template is not scaled down when printing Silicon for rough plaster 1.
Mounting The Camera With Outdoor Wall Mount 67/132 2.4.3 Aiming The Camera The camera can be installed once the Outdoor Wall Mount has been mounted to the wall or pole. The bottom plate closes off the outdoor wall mount from below and also holds the camera. The upper side of the bottom plate has 24 holes for the M4 stainless steel hex nuts. It is thus possible to mount the camera in increments of 15 degrees. All holes have been numbered from 1 to 8 in order to facilitate the mounting process.
/132 D14D Camera Manual: Mounting 2.4.4 Connecting The Camera With Bottom Plate In order to mount the camera to the bottom plate, use three of the supplied M4x25 Allen screws , three washers (dia. 4.3 mm) and the corresponding hex nuts. Caution When fastening the Allen screws using the 3 mm Allen wrench, make sure that you do not scratch the camera dome! 1.
Mounting The Camera With Outdoor Wall Mount 69/132 Mounting the camera on the bottom plate 5. Make sure that you have properly fastened the three M4x25 Allen screws. 2.4.5 Connecting And Securing The Camera 1. Plug the camera connection cables into the appropriate wall outlets or adapters. 2. Insert the (straight) wall side of the bottom plate into the back of the wall mount as shown in the figure. Pushing the bottom plate into the Outdoor Wall Mount Push into slots! 3.
/132 D14D Camera Manual: Mounting 2.5 Mounting The Corner And Pole Mount 2.5.1 Overview If you would like to mount the MOBOTIX D14D to the corner of a building or a pole, you should consider using the MOBOTIX Corner and Pole Mount. This mount is designed as an additional mounting option for the Outdoor Wall Mount. The supplied stainless steel straps allow the mount to be attached to poles with diameters between 60 and 180 mm.
Mounting The Corner And Pole Mount 71/132 2.5.2 Mounting To The Corner Of A Building Use the supplied screw anchors, screws and washers to affix the Corner and Pole Mount to a building corner. 1. Mark the four screw anchor holes on the corner of the building. Make sure that the arrows on the mount are pointing upwards. Drill the holes with a 10-mm drill bit. Make sure that the arrows are pointing upwards when mounting 2.
/132 D14D Camera Manual: Mounting 2.5.3 Mounting To A Pole Use the stainless steel straps supplied to affix the Corner and Pole Mount to a pole. Pole diameter: 60 to 180 mm Available soon: Corner and Pole Mount with predrilled holes for the MX-Patch-Box 1. Guide the stainless steel straps through the holes in the pole mount (see figure). Make sure that you are using the slots of the mount which are fitting best for the thickness of the pole.
Mounting The Corner And Pole Mount 2.5.4 Mounting The Outdoor Wall Mount Use the stainless steel screws, washers and hex nuts supplied with the Corner and Pole Mount to affix the Outdoor Wall Mount to the installed Corner and Pole Mount. 1. Lead the cables through the appropriate hole at the back of the Outdoor Wall Mount. 2. Use the M8x30 Allen screws, washers (dia. 9 mm) and M8 hex nuts supplied with the Corner and Pole Mount to attach the Outdoor Wall Mount to the Corner and Pole Mount.
/132 D14D Camera Manual: Mounting 2.6 Adjusting The Lens Make sure that you see the live image of the camera on the monitor of your computer or laptop. Now adjust the lenses one by one until you see the desired image area on your monitor: • Remove the camera dome using a lint-free cotton cloth. Lock ring secures lenses against vibrations • Release the lock ring of the lens, adjust the image sharpness and tighten the lock ring again.
Adjusting The Lens © MOBOTIX AG • Security-Vision-Systems • Made in Germany www.mobotix.com • sales@mobotix.
/132 D14D Camera Manual: Mounting 2.7 Network And Power Connection 2.7.1 Notes On Cable Lengths And Power Supply • Power may only be supplied to the camera via its Ethernet connector. We recommend using a MOBOTIX PoE adapter or another similar high-quality PoE product to loop-in the power supply: • one camera: with the PoE adapter (MX-NPA-PoE) • multiple cameras: with PoE products conforming to IEEE 802.
/132 Network And Power Connection The MOBOTIX factory default is PoE class 2. This default is usually fine and nothing needs to be changed. However, the PoE power class must be changed in the browser if the higher power class 3 is required for your application: Variable PoE: multiple cameras can be operated simultaneously from the same switch 1. Select Admin Menu > Network Setup > Ethernet interface (for experts). 2. Under Power Supply, click on Change. 3.
/132 D14D Camera Manual: Mounting 2.7.4 Power Supply When Connected Directly To A Computer The IP addresses in the diagram are shown only as an example 1. Connect the factory pre-installed cable of the camera to the Camera connector of the PoE adapter. 2. Connect the PC/Power connector of the PoE adapter to the Ethernet port of the computer. 3. Plug the RJ45 connector of the power supply unit into the LAN/Power connector of the PoE adapter.
/132 Network And Power Connection 2.7.6 Camera Startup Sequence As soon as the power supply has been established, LEDs 2 and 4 will show the progress of the startup sequence: 4 1 3 2 L • Hardware test: After the power has been connected, LEDs 2 and 4 will light up for about two seconds. The camera’s computer checks the camera hardware. • Backup system test: The camera checks the operating system.
/132 Download the free-of-charge MxEasy and MxControlCenter software at www.mobotix.com D14D Camera Manual: Operating The Camera 3 Operating The Camera 3.1 Manual And Automatic Operation – Overview MOBOTIX cameras do not require any extra software. Thus, you can set up and operate the MOBOTIX camera using a JavaScript-enabled browser on all common operating systems (such as Windows, Linux, Macintosh, etc.). As an alternative, you can also use the MOBOTIX applications MxControlCenter and MxEasy.
Manual And Automatic Operation – Overview 3.1.1 81/132 Manually Using A Computer In The 10.x.x.x IP Address Range You can set up the camera’s network parameters using a browser and the embedded camera software. To do this, connect the camera to a computer or a network that is using a 10.x.x.x IP address range (see Section 3.2.1, Manually Setting Up The Network Interface). Once this has been completed, you can enter the camera’s default IP address in the browser address bar of the computer (see Section 3.
/132 D14D Camera Manual: Operating The Camera 3.1.2 Automatically Using MxControlCenter Or MxEasy You can set up the camera's network parameters using the free-of-charge video management software MxControlCenter or MxEasy (see Sections 3.2.3 and 3.2.4). You can also use one of these applications to automatically configure the network parameters of MOBOTIX cameras that are not operating on the same IP address range as the computer. MxControlCenter software (free download from www.mobotix.
Manual And Automatic Operation – Overview 3.1.3 Automatically Using DHCP The camera can automatically obtain its network parameters using DHCP (Dynamic Host Configuration Protocol). This requires the network to have a functioning DHCP server (for example, a DSL router with activated DHCP server) and the camera must be booted using DHCP (see Section 3.2.6, Starting The Camera With An Automatic IP Address (DHCP)).
/132 D14D Camera Manual: Operating The Camera 3.2 First Images And The Most Important Settings Once the camera has been connected to the network, you need to set up the camera's network interface accordingly. This step involves setting up and checking the network parameters of the camera. If your network is already using an IP address in the 10.x.x.x range with a 255.0.0.0 network mask, you do not need to change the camera's network parameters. You can access the camera directly (see Section 3.2.2).
First Images And The Most Important Settings 85/132 Linux/Unix: 1. Open a terminal as root user. 2. Enter the following command: ifconfig eth0:1 10.8.0.11 3. The computer is now also using the IP address 10.8.0.11 Mac OS X: 1. Open System Properties > Network. 2. Select Ethernet. In the Configuration field, select Manual and enter a 10.x.x.x IP address (for example, 10.8.0.11). 3. Click Apply on the bottom right-hand side of the dialog to assign the computer the IP address 10.8.0.11. 2.
/132 D14D Camera Manual: Operating The Camera 3.2.2 First Images And The Most Important Settings In The Browser Once the MOBOTIX camera has been connected to the power supply and to the network, you can access the user interface with the live camera image in the web browser. Internet Explorer, Firefox, Safari or any other graphical browser with activated JavaScript is suitable. It does not matter which operating system is used.
First Images And The Most Important Settings 87/132 Camera Views: Live, Player, MultiView The MOBOTIX camera automatically displays the live screen when it starts up (factory default setting). You can set a different start page in Admin Menu > Language and Start Page (for example, the Guest screen) to allow a restricted access to the live image.
/132 D14D Camera Manual: Operating The Camera 3.2.3 First Images And Network Parameter Configuration In MxControlCenter Download MxControlCenter for free from www.mobotix.com Installation If you want to install the current version of the software, you can download the current Windows installer from the MOBOTIX website as an MSI file, which you can install manually. The latest versions are available at www.mobotix.com in the Support > Software Downloads > MxControlCenter.
/132 First Images And The Most Important Settings MOBOTIX- Searching And Displaying MOBOTIX Cameras Launch MxControlCenter after successful installation by double-clicking the shortcut that was created by the installer or the executable file MxCC.exe in the installation directory on your computer. When you launch the program for the first time, the Add Video Sources dialog box appears and the application automatically searches for MOBOTIX cameras in the local network.
/132 D14D Camera Manual: Operating The Camera Cameras Are Found But Are Located In A Different Subnet The symbols in the first column and the legend in the dialog indicate whether you can access a particular camera directly from the MxControlCenter, which is the case for all (OK) . Cameras designated with (different subnet) are cameras designated with located in a different subnet. This usually applies to new cameras or cameras that have been reset to their factory settings.
First Images And The Most Important Settings Activate the option Use this IP address/this range if the IP address of a particular camera must be assigned manually (for networks with permanent IP addresses). Obtain the assigned IP address, subnet mask and standard gateway from your network administrator and enter the data. To reconfigure multiple cameras at the same time, all you have to do is enter the range of IP addresses that includes the addresses of all of these cameras.
/132 D14D Camera Manual: Operating The Camera Editing the Video Source List This list provides a context menu (right mouse key), allowing you to select/deselect all video sources at once. You can also use this method to remove from the list some or all of the video sources that you would not like to display or manage in MxControlCenter.
First Images And The Most Important Settings 93/132 3.2.4 First Images And Network Parameter Configuration In MxEasy Installing And Starting MxEasy Download the current version of MxEasy from the MOBOTIX website (www.mobotix.com > Support > Software Downloads in the MxEasy area). Double-click on the shortcut for the program or load the program file.
/132 D14D Camera Manual: Operating The Camera Reconfiguring Network Addresses Of Cameras * Bonjour: automatic recognition of network services in IP networks Using Bonjour*, MxEasy finds not only cameras on the same network as your computer, but also MOBOTIX cameras located in other subnets (Status Invalid Network).
First Images And The Most Important Settings 95/132 Integrating And Displaying Cameras After a camera has been reconfigured, it has the status Accessible and can be integrated into MxEasy. The MxEasy Assistant then displays the dialog box Define integration mode in MxEasy. Here, you can jump directly to the main window of MxEasy with the current live camera image by activating the option Quick Start.
/132 D14D Camera Manual: Operating The Camera 3.2.5 Starting the Camera With The Factory IP Address Passwords and camera settings will not be changed Under certain circumstances, you may have to reset the camera to its factory IP address. This could be the case, for example, if the IP address has been lost or the camera does not respond to the last known IP address. 1. If the camera is powered on, disconnect the power supply by unplugging the corresponding cables and then reconnect the power supply. 2.
/132 First Images And The Most Important Settings 3.2.6 Starting The Camera With An Automatic IP Address (DHCP) If your network has a DHCP server, you can start the MOBOTIX camera with DHCP support. The camera automatically obtains an IP address from the DHCP server and announces the new network data. Note that if the speaker has been previously deactivated the announcement will not be audible (Admin Menu > Microphone and Speaker). 1.
/132 D14D Camera Manual: Operating The Camera 3.3 Virtual PTZ And Full Image Recording 3.3.1 Virtual PTZ The virtual PTZ function allows you to use a mouse or joystick to continuously zoom in on images from the selected video source and “virtually” move the enlarged image section within the entire image sensor area.
Virtual PTZ And Full Image Recording 99/132 Operation Using USB Joystick A standard USB joystick can drastically improve vPTZ operation for the user – in the browser, in MxEasy, and in the MxControlCenter (however, MxCC is also equipped with a virtual joystick that can be operated using the mouse). Please first install the joystick on the PC according to the manufacturer's instructions.
/132 D14D Camera Manual: Operating The Camera 3.3.2 Full Image Storage It is possible to store a full image, regardless of the live image stream that is being displayed. This ensures that the recording always contains the full image of the lens used, even though the operator may have used the vPTZ features to zoom into the image in order to examine a specific detail.
Virtual PTZ And Full Image Recording Activate/Deactivate Full Image Storage In The Browser To configure this feature, open the Setup Menu > Event Control > Recording dialog box and activate or deactivate the Full Image Recording option. © MOBOTIX AG • Security-Vision-Systems • Made in Germany www.mobotix.com • sales@mobotix.
/132 D14D Camera Manual: Operating The Camera 3.4 Image Optimization 3.4.1 Correction Of Lens Distortion (L22 Only) If you are using a camera with the L22 90° Wide Angle lens, the image, particularly around the edges, may be slightly distorted due to the extreme angle of the lens. You can suppress this effect using software (for example, in the browser) so that a new and appropriately corrected image can be displayed live.
/132 Image Optimization Since activated lens distortion correction requires additional processing power, you should consider disabling it in situations where it is not really necessary. You will only notice a minimal distortion of the image, especially if you use the zoom. However, the maximum frame rate for high resolution may be reduced (by 10 to 25 percent), which means you have to choose between maximum distortion correction or maximum frame rate.
/132 D14D Camera Manual: Operating The Camera 3.4.2 Adjusting The Panorama Image (D14D 180° Only) The D14D 180° with integrated panorama function has two 90° wide-angle lenses that are mounted on a lens bridge in such a way that they produce a 180° dual image. The two individual images do not always fit together completely and seamlessly because of the mounting position of the individual cameras and the lens adjustment.
/132 Image Optimization Using OnScreen Controls: Image sensor selection Horizontal image panning Clicking on the central point of the dial resets the image to the corresponding factory default settings Vertical image panning Zoom Rotate Camera Selection: The two rectangular checkboxes in the top right corner display which sensor image is currently selected and can be configured.
/132 D14D Camera Manual: Operating The Camera Step 3: Save the settings and exit the function When you are finished adjusting the image, set the value field to the right of the Quick Control to deactivated. This opens a dialog box. Confirm by clicking on Yes to save the current settings and then switch back to the live image of the camera.
Image Optimization Adjusting The Panorama Image In MxEasy Configuration for the panorama view of a D14D-180° is also possible with MxEasy. Select the Image menu item from the Image Formats And Views option in the menu bar at the top of the screen. Then click on Compass in the toolbar. An OnScreen Control then appears in the image. This can be operated the same way as the one in the web browser.
/132 D14D Camera Manual: Operating The Camera Adjusting The Panorama Image In MxControlCenter You can also use MxControlCenter (MxCC) to configure the panorama view of a D14D-180°. Select the D14D-180° you would like to configure and open the PTZ Control control on the left-hand sidebar of MxControlCenter. Click on the Activate button under configuration of the panorama view. The OnScreen Control of the web browser now appears in the live image of the camera on the right.
Image Optimization 109/132 3.4.3 Dual Image Exposure Generally, the exposure settings for the D14D are carried out automatically. Alternately, settings can be made manually or separately for each camera image using custom configurable exposure windows. You can either select a factory default exposure window (via the Exposure control Quick Control) or define a custom exposure window (via Setup Menu > Exposure Settings) using the web browser.
/132 D14D Camera Manual: Operating The Camera 3.5 MicroSD Card Recording 3.5.1 Introduction Flash memory devices: more robust than hard drives Flash-based storage devices (MicroSD cards, USB sticks and solid-state drives) do not contain any moving parts as compared to the commonly used hard drives. Flash-based storage devices are compact and highly resistant to moisture and vibrations.
/132 MicroSD Card Recording 32 GB MicroSD Card: Storage Requirements 6 fps CIF 6 fps VGA M-JPEG M-JPEG 1 fps MEGA 1 fps QXGA MxPEG M-JPEG M-JPEG File size single image 15 kB 45 kB – 120 kB 240 kB Storage required per second 90 kB 270 kB 75 kB 120 kB 240 kB Storage required per 24 hrs 7.8 GB 23.5 GB 6.5 GB 10.4 GB 20.8 GB Time for one full cycle 4 days 1.3 days 4.8 days 3 days 1.
/132 D14D Camera Manual: Operating The Camera 3.5.2 Formatting The Card Formatting the card: Admin Menu > Storage on External File Server / Flash Device Before a MOBOTIX camera can store image and video sequences on a MicroSD card, it needs to be formatted as MxFFS (MicroSD cards delivered with MOBOTIX cameras are already MxFFS-formatted). The following steps are necessary to format a storage device (Admin Menu > Storage on External File Server / Flash Device): 1.
MicroSD Card Recording 113/132 3.5.3 Activate Recording Follow these steps to activate the recording to a MicroSD card that has already been MxFFS-formatted (Admin Menu > Storage on External File Server / Flash Device): 1. Make sure that there is a MicroSD card in the card slot of the MOBOTIX camera. Activating the storage device: Admin Menu > Storage on External File Server / Flash Device 2. Make sure that the MicroSD card is formatted in MxFFS format. 3. Activate the SD Flash Card option. 4.
/132 D14D Camera Manual: Operating The Camera 3.5.4 Accessing Camera Data The following options facilitate access to the stored image and video sequences on a MicroSD card: • In the web browser: Play back the recorded event images without sound directly from the MicroSD card using the Playback view of the camera software. • In MxEasy: Play back the recorded video sequences with audio by accessing the MicroSD card in the MOBOTIX camera via the camera.
/132 MicroSD Card Recording Caution A MicroSD card may only be removed from the camera after you have deactivated the recording to MicroSD card and rebooted the camera. Failing to do so may lead to loss of data! Removing connected flash storage devices from the camera without properly deactivating them may lead to data loss and/or destroy certain areas of the storage device. Due to MxFFS formatting, this is limited to 4 MB of lost data per incident. 3.5.
/132 D14D Camera Manual: Operating The Camera 3.6 Configuration In The Browser 3.6.1 Overview A MOBOTIX camera can be completely configured using a JavaScript-enabled browser on all common operating systems (such as Windows, Linux, Macintosh, etc.). The camera provides an HTML-based user interface for this purpose. The camera executes the changes you make to the camera configuration via HTTP commands using programs and scripts of the embedded software.
Configuration In The Browser • Disable public access: Guest users are only allowed to access the Guest screen of the camera without entering a password. If this is not desired, you should deactivate public access (Quick Installation or Admin Menu > Users and Passwords). => (Software Camera Manual Part 2, Section 5.4.
/132 D14D Camera Manual: Operating The Camera • Activate event control and recording: By factory default, the MOBOTIX camera's event control is disabled. Click on the Arm & Record button to activate event control. This will activate video motion detection and recording. Cameras with integrated flash memory (MOBOTIX R models and models with SD card) will use the flash memory by default to store the image and video data (recording target).
Configuration In The Browser 119/132 3.6.3 Additional Configuration Options • Administering the camera: You can modify the camera configuration in the Administration Menu or the Setup Menu. User Name: admin password: meinsm • Admin Menu: This menu contains the basic configuration dialogs of the camera (for example, passwords, interfaces, software updates). • Setup Menu: This menu contains the dialogs for configuring the image, event, and recording parameters.
/132 D14D Camera Manual: Operating The Camera 3.7 Additional Notes 3.7.1 Password For The Administration Menu Accessing the Administration menu of the camera (Admin Menu soft key) is only possible after entering a user name and password. • Factory default user name is admin. • Factory default password is meinsm. The Quick Installation assistant automatically appears when the Administration menu is accessed for the first time.
/132 Additional Notes 3.7.4 Reset The Camera To Factory Settings All settings of the MOBOTIX camera can be reset permanently to the factory default settings. This makes sense if you have, for example, obtained a camera without any information or you would like to reset all settings after testing the camera. In order to perform this procedure, you need to have access to the Administration Menu of the camera (admins group). Open Admin Menu > Reset to reset the camera to factory defaults.
/132 D14D Camera Manual: Operating The Camera 3.7.8 Browser Current Internet browsers (Internet Explorer, Netscape, Mozilla Firefox, Safari, etc.) with enabled JavaScript can display the camera's live images with their standard settings. Text-based browsers cannot display the user interface and are not suitable for operating the camera. Section 4.1.3 Browser Settings in the Camera Software Manual contains more detailed information on possible browser problems. 3.7.
Additional Notes All users of MOBOTIX products are therefore required to familiarize themselves will all valid regulations and comply with these laws. MOBOTIX AG is not liable for any illegal use of MOBOTIX products. Network security: MOBOTIX products include all of the necessary configuration options for operation in Ethernet networks in compliance with data protection laws. The operator is responsible for the data protection concept across the entire system.
/132 D14D Camera Manual: MOBOTIX Glossary MOBOTIX Glossary ActiveX A control element on Windows computers that may also be used in other programs (including Internet Explorer) to run special tasks. The MxPEG ActiveX control element allows video and audio data from MOBOTIX cameras to be displayed in other applications (including Internet Explorer). Arming This refers to the process of activating an alarm system so that events trigger the appropriate alarms.
/132 DevKit Camera installation kit with independent image sensors based on MOBOTIX M12D or M24M, intended for concealed installation in other devices. DHCP Abbreviation for Dynamic Host Configuration Protocol. Allows a server to automatically assign devices in the network with the appropriate configuration (including the IP address, DNS server and gateway), as opposed to fixed IP addresses on the individual network devices. DNS Abbreviation for Domain Name Service.
/132 D14D Camera Manual: MOBOTIX Glossary ExtIO MOBOTIX signal module that the camera uses to directly operate lamps, sirens and door openers, as well as external audio components (speakers and microphones). Fixdome Camera without moving parts in a dome-shaped housing. Flash Memory See CF Card. fps Abbreviation for frames per second. See Frame Rate. Frame rate The frame rate specifies how many frames per second (fps) are generated and sent by the camera.
/132 Layout Describes the layout of video sources on a screen in MxControlCenter. The layout determines the positions and resolutions of the images displayed on the monitor when displaying images from network cameras. In addition to the actual video images, you can also incorporate graphic elements such as the location of the cameras, etc. LED Abbreviation for Light Emitting Diode.
/132 D14D Camera Manual: MOBOTIX Glossary video and audio data from MOBOTIX cameras to be displayed in other applications (including Internet Explorer). NAS Abbreviation for Network Attached Storage. A storage system connected via an Ethernet cable. All network devices (cameras) have access to this storage system. Network A group of computers that are connected via various cables and share access to data and devices such as printers and IP cameras. PIR Passive Infrared Sensor for motion detection.
/132 Sequencer Feature that automatically switches the camera displayed in the main window after a specific time delay. Signal Input/Signal Output Coupling a system that triggers an alarm (for example, a fire alarm system or a network camera) to a control center or another type of transmitter (for example, a telephone or IP network). A typical signal input/output scenario in video surveillance progresses as follows: an event triggers an alarm.
/132 D14D Camera Manual: Notes © MOBOTIX AG • Security-Vision-Systems • Made in Germany www.mobotix.com • sales@mobotix.
© MOBOTIX AG • Security-Vision-Systems • Made in Germany www.mobotix.com • sales@mobotix.
/132 D14D Camera Manual: Declaration Of Conformity D14D DualDome Camera Or igi na lD ec lar a tio n Of Co nfo rm ity ww w. m ob oti x.c om Declaration Of Conformity www.mobotix.com > Support > Media Library > Certificates © MOBOTIX AG • Security-Vision-Systems • Made in Germany www.mobotix.com • sales@mobotix.
MOBOTIX - The HiRes Video Company To demonstrate our confidence in the quality of our products, MOBOTIX cameras were used to capture all the images that appear in this manual. Manufacturer Executive Board MOBOTIX AG Dr. Ralf Hinkel Kaiserstrasse D-67722 Langmeil Registration Office: Kaiserslautern Local Court Germany Registration Number: HRB 3724 Tel.: +49 6302 9816-103 Tax Code: 44/676/0700/4 Fax: +49 6302 9816-190 Tax Office: Worms-Kirchheimbolanden, Germany http://www.mobotix.
EN D14D Camera Manual The HiRes Video Company One camera, two lenses. Seeing more is just not possible. www.mobotix.com 60.170_EN_V3_01/2013 Two lenses, two HiRes image sensors, up to 64 GB internal storage and a dual image of a maximum of 6 megapixels make the D14D DualDome an efficient security solution: It is possible to secure two different areas using just one camera.