
User manual
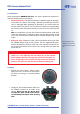


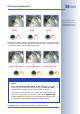


• Insert the internal part of the camera with the
lens unit into the mounted base of the hous-
ing and secure it by turning the two blue
clamps in clockwise direction using the sup-
plied toothed wrench or a screwdriver. This
will prevent the internal part of the camera to
accidentally fall out of the base before it has
been secured. Now secure the internal part
of the camera by turning the toothed ring by
hand in clockwise direction, as long as you
can still easily turn the internal part of the
camera.
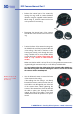
• Connect the network cable to the network
connector of the camera. Make sure that the
cable loop is running properly as shown in
the figure.
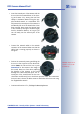
• Position the camera by turning and tilting the
lens unit so that it points into the desired di-
rection (Note: the SD card slot has to point
downwards for the camera's live image to
be correct). Never use force when adjusting
the direction of the camera, as this could
damage the camera beyond repair. The in-
ternal part of the camera with the lens unit
should turn and tilt easily, but it should not reposition itself. This could mean
that you have to loosen the Allen screws at both sides of the lens unit using
the supplied Allen wrench.
• Continue with section 2.5.3,
Finishing the Mounting Process
.
© MOBOTIX AG • Security-Vision-Systems • Made in Germany
www.mobotix.com • sales@mobotix.com
51/100
D22 Camera Manual Part 1
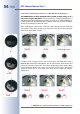
Maximum torque for all
screws is 1 to 1.2Nm
(0.74lbf ft)