Specifications

71/1�61�6
Mounting The Camera With The On-Wall Set
© MOBOTIX AG • Security-Vision-Systems • Made in Germany
www.mobotix.com • sales@mobotix.com
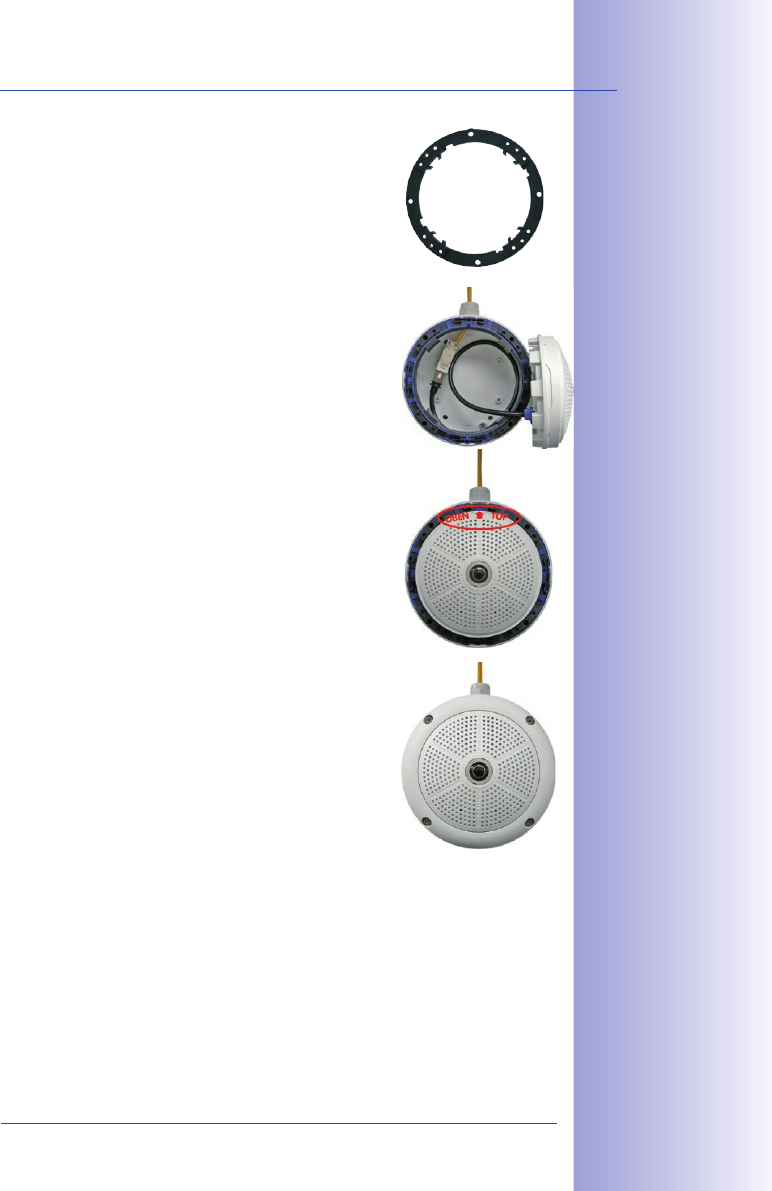
Remove the mounting ring
6.
: S ep a rate the b la ck m ou nt-
ing ring from the camera housing (lift the spring clip).
This ring is not required when mounting the camera
to the On-Wall set.
Connect the cable
7.
: Connect the on-site network cable
to the network cable passing through the On-Wall Set
using a standard connector. Excess cable can be stored
easily within the On-Wall mount.
Attach the camera to the mount8. : The camera must
be seated firmly within the On-Wall mount. The tapered
guides at the back of the camera housing fit exactly
into the openings of the On-Wall mount. Once, again,
ensure that OBEN / TOP arrow points in the correct
direction.
Attach the outer shell9. : Position the outer shell without
the rubber seal and tighten all four Allen screws using
the included Allen wrench.
Clean the lens10. : If necessary, gently clean the front of
the lens with a soft cotton cloth. Do not apply excessive
pressure to the surface of the glass when cleaning
the lens.
Establish a connection to the camera, check the image11. : Establish a connection
to the camera as described in sections 3.1 and above. The live image from the
camera should be visible on the computer monitor. Check image sections on the
computer monitor as well.


