
Technical data


24/148
S14 Camera Manual: An Overview Of The S14 FlexMount
© MOBOTIX AG • Security Vision Systems • Made in Germany
www.mobotix.com • sales@mobotix.com
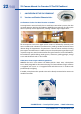
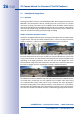
Separate Housing And Lens Installation– Weatherproof According To IP65
The S14 FlexMount’s flat housing, including long-term flash memory (MicroSD card up to
64GB) and all internal and external connectors (Ethernet, MiniUSB, MxBus, microphone,
speaker), can be installed discreetly and with optimal protection behind a wall or ceiling
panel so that only the lens units in their protective housings are visible in the room.
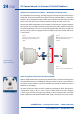
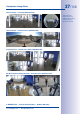
Mounting the S14D’s independent sensor modules is easier that ever. Plug the connection
cable into the sensor module and secure it with the bayonet catch, attach the ferrite, drill
a circular hole (diameter: 45mm/1.77in), feed through the cable and sensor module from
the front, secure it with a nut, plug the connection cable into the base module and secure
it. You’re done!
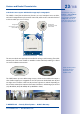
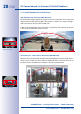
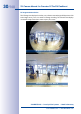
S14M: Hemispheric Camera For Concealed Installation
With the S14M, which features a permanently-attached lens, the camera housing can be
concealed behind a cover or cladding (for example, stainless steel) up to 6.4mm/0.25in
in thickness. Thicker surfaces may also be suitable for mounting the S14M if they can be
hollowed out accordingly.
The entire camera plus cables and lens modules are weatherproof (IP65) and operate in
a temperature range of –30°C to +60°C (–22°F to +140°F). Because the S14 is designed
to never fog up and does not require any heating, it can be operated all year round with
power supplied via a standard PoE network cable. Power consumption is less than 5 watts.
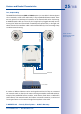
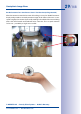
Lens units can be
replaced at any time
Step 1:
Plug in connection cable, secure
with bayonet catch and attach
ferrite
Step 2:
Drill hole (45mm/1.77in), feed
through cable with sensor
module
Step 3:
Secure sensor module with nut
1
2
3
Diam. 45mm/1.77in