Manual No.: ALPM21EN-G113-A1 Venice Fire Table OFG113-LP Owner's Manual ! ! IMPORTANT SAVE THESE INSTRUCTIONS ! WARNING For outdoor use only. DO NOT use for cooking. DO NOT use under any overhead enclosure. ! WARNING If the information in this manual is not followed exactly, a fire or explosion may result causing property damage personal injury or loss of life. Installation and service must be performed by a qualified installer, service agency or gas supplier.
TABLE OF CONTENTS Important Safety Information -------------------------------------------------------------------- 3 Propane (LP) Dangers and Warnings ----------------------------------------------------------- 5 Hose & Regulator Assembly and Replacement -------------------------------------------- 7 Parts List --------------------------------------------------------------------------------------------- 8 Assembly Instructions ----------------------------------------------------------------------------- 9
IMPORTANT SAFETY INFORMATION ! WARNING FIRE TABLE IS FOR OUTDOOR USE ONLY IF YOU SMELL GAS • Shut off gas supply to the fire table. • Extinguish any open fame. • Do not try lighting any appliance. • Do not touch any electrical switch; do not use any phone in your building. • Immediately call your gas supplier from a neighbor’s phone. • Follow the gas supplier’s instructions. • If you cannot reach your gas supplier, call the fire department.
IMPORTANT SAFETY INFORMATION • DO NOT use in an explosive atmosphere. Keep gas fire table area clear and free from combustible materials, gasoline and other flammable vapors and liquids. • This outdoor fire table is NOT to be operated by children. Young children should be closely supervised when in the vicinity of this outdoor fire table. • This outdoor fire table is not to be installed or used in or on recreation vehicles and/or boats.
IMPORTANT SAFETY INFORMATION • Before each use, remove the lava rocks. Examine the burner and its components. If dirty, clean with a soft brush and soapy water solution. Examine the area around the burner; any dirt or foreign material, such as spider webs or nests in this area should be removed. If it is evident that the burner is damaged, thefire table must not be used. The burner assembly cannot be replaced. Please contact Ocean Rock USA at 800-678-7294 for technical support.
PROPANE (LP) DANGERS AND WARNINGS • The LP gas tank must have a tank collar to protect the tank valve. • LP gas cylinder must contain a shut-o valve as specified in the Standard for Compressed Gas Cylinder Valve Outlet and Inlet Connection, ANSI/CGA-V-1-1977, CSA B96. • The LP gas tank should not be dropped or handled roughly. • Tanks must be stored outdoors out of the reach of children. Do NOT store in a building, garage, or any other enclosed area.
HOSE & REGULATOR ASSEMBLY AND REPLACEMENT 1. This fireplace comes equipped with a standard LP gas hose and regulator including the appliance side connection for a CGA No 791 Cylinder Connection Device. The LP gas hose and regulator supplied with this fire table must be used. Only a hose and regulator specified by manufacturer can be used for replacement. a.
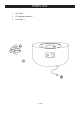
PARTS LIST 1 Fire Table 1 2 LP Regulator and Hose 3 Lava Rock 1 1 8 / 20
ASSEMBLY INSTRUCTIONS Make sure the gas supply system is turned to “OFF”. Install a AAA battery as shown in the diagram below. Battery is not included. 1 _ + 1. Place the tank seat (Sold Separately) on the ground and place a 20 lb. propane tank into the tank seat. 2. Tighten down the screw on the side of the tank seat to secure the propane tank.
ASSEMBLY INSTRUCTIONS 3 60 " Connecting the LP Gas Tank Check to make sure there is no debris in the head of the LP gas tank or in the head of the regulator valve. Make sure you check the burner and burner ports as well. Connect gas line to tank by turning knob clockwise. Hand tighten only. Disconnecting the LP Gas Tank Make sure the valve on the LP gas tank is OFF. Disconnect by turning the knob counter clockwise until it is detached from the valve.
ASSEMBLY INSTRUCTIONS Place lava rock by hand. DO NOT dump bag out into tray to avoid clogging the burner with dust. Position the lava rock ( 13.2 lbs / 6 kgs) to a level about 1” above the top of the burner. Make sure that you do not block the igniter box with lava rock to ensure proper ignition. 4 Adjustable feet has pre-installed on the bottom of fire pit already. Please adjust the hight of feet to make sure all fire pit was on level always, or increase the height of fire table as your preference.
PRE-USE INSTRUCTIONS ! WARNING Before using this outdoor fire table, make sure you have read, understand and are following all information provided in the Important Safety Information section of this manual. Failure to follow those instructions can cause death, serious injury or property damage. Prior to each gas fireplace operation, check the hose and valve for evidence of excessive abrasion or wear though the visual check hole on the side of the base.
LIGHTING INSTRUCTIONS 1. Read instructions before lighting. 2. Control knob must be in the “OFF”position. 3. Connect propane cylinder (See Manual). 4. Push and turn control knob counter clockwise to “Low”. 5. Press the igniter button repeatedly to light burner. 6. Release control knob after 45 seconds. 7. If ignition does not occur in 45 seconds, push and turn burner control knob to “OFF”,wait 5 minutes fan with newspaper or magazine, and repeat lighting procedure. 8.
CARE AND CLEANING Inspecting This outdoor fire table must be inspected regularly to insure that the product is safe to use and to extend product life. ! WARNING DO NOT inspect this outdoor fireplace until the fire is COMPLETELY out. 1. Check the burner to make sure it is securely in place. 2. Check the air mixer to make sure it is clear and free of insects, spider nests and other debris(see picture). 3. Check all gas connections for leaks. 4. Check ignition system to insure proper sparking. 5.
GAS COMPONENT CONNECTION CHECKS If the burner will not light or stay lit, please perform the following checks. 1. Make sure the electrode wire is correctly connected. Both electrode wires must be fully inserted into the igniter box. the inner side Valve Thermocouple Wire Igniter Box Igniter Box 2. Make sure that the pilot housing is unobstructed. Clear any debris on top of the pilot housing and make sure there is no debris between the igniter pin, thermocouple and the burner tube.
GAS COMPONENT CONNECTION CHECKS 5mm / 0.196” Thermocouple Igniter Pin 3. Make sure that the igniter pin and thermocouple are correctly positioned. - The igniter pin should be pointed straight to the thermocouple. - The thermocouple should be positioned 5mm / 0.196” away from the burner tube. Valve Thermocouple Wire Thermocouple Wire Wire should be in line with valve Valve Igniter Box 4. Make sure that the thermocouple wire is correctly positioned.
TROUBLESHOOTING Problem: Burner will not light using igniter Possible Cause 1: Electrode and burners are wet. -Wipe dry with cloth. Possible Cause 2: Igniter battery is dead or backwards. -Check that the AAA battery is inserted correctly in the igniter (see page 9) or replace the battery. Possible Cause 3: Igniter Pin cracked or broken - sparks at crack. -Call Ocean Rock USA at 800-678-7294 for technical support. Possible Cause 4: Wire loose or disconnected. -Reference page 16, step 1, reconnect wire.
Orifice is located in this connection TROUBLESHOOTING Ports 18 / 20
TROUBLESHOOTING Problem: Sudden drop in gas flow, or a reduced flame height Possible Cause 1: Out of gas. -Refill your LP tank. Possible Cause 2: Excess flow safety device may have been activated. -Turn control knob to “OFF”, wait 30 seconds and light outdoor fireplace. If flames are still too low reset the excessive flow safety device by turning off the control knob and LP gas tank valve. Disconnect regulator. Turn burner control knob to “HIGH”. Wait 1 minute. Turn burner control knob off .
Warranty Ocean Rock USA LLC warrants fire features and accessories to be free from defects in parts and workmanship under normal use and service for a period of 1 year from the date of purchase. In the event of such defects Ocean Rock will, at its option, repair or replace the defective product. The foregoing is at the discretion of Ocean Rock.
Ocean Rock USA LLC 1300 W. 9th St., Upland, CA 91786 www.oceanrockusa.com info@oceanrockusa.