Pergola Installation Guide
TOOLS LIST • Drill(s) • / " Magnetic Driver (s) 38 • 12" Drill Extension • #2 Square Drive bit for Drill or Driver • Level • Tape Measure • Hammer Drill if necessary for concrete or footing mounts • Wrench for Anchors on post • Composite shims • Quick Clamp(s) • ¾" Step Drill Bit (Vari –Bit®) – For reaming holes in aluminum • Pencil • Speed Square • String line If Cutting to Size is Required: • Miter or Circular Saw with carbide blade (cut slowly) • Sawhorses Additional Tools for digging and setting pi
Pergola Installation Guide STEP 1 – LAYOUT Figure 1. Depth Rafters Width Purlins All pergola kits are fabricated to fit the size ordered. They CAN be trimmed to fit a smaller space if necessary. (See Step 1e. below) a) Determine necessary height and post locations based upon site – Make note of the following measurements as you will want these later: a. Desired outside to outside dimensions of your posts b.
Step 2 – Install Post Mounts screws (5" or greater) a) Mount to Deck (Figure 2a) e. Use composite shims as necessary to plumb mount. Tighten fasteners. a. Add blocking below deck flooring under each post mount. Minimum blocking thickness of 3" (this is two 2x10’s thick) b. Inset mount as necessary to ensure the base of post does not overhang edge of decking. i. For standard kits (no post skirt), inset a minimum 1" from deck edge to edge of post mounting plate. ii.
Pergola Installation Guide c) Mount to Footing – For Paver Patios or Applications without a solid surface to fasten to (Figure 2c) a. The main goal in this method is to discretely isolate the pergola posts from the patio area. This allows the patio to move up and down over the seasons while the pergola posts stay plumb and level. To do this properly, we recommend that the footing height be at least one paver thickness below the finished grade of the patio. i.
Step 3 – Install Posts over Post Mount a) Double check desired height of pergola roof and mark each aluminum post mount at the top of the beam – simplest way (short of using a laser level) is to quick clamp your beams to your post mounts and mark the mount at the desired height. b) Cut aluminum post mount 8 ½" below this mark - Use any circular saw with a non-ferrous blade. It is important that the cut be as square as possible. This will help the Post Top Plate to sit level.
Pergola Installation Guide Step 5 – Install Perimeter Box Beams (Freestanding Pergola) a) If you trimmed the width or depth of your pergola follow items 1-3 below. If not proceed to letter b) below. 1. Plan out the length of each box beam (2x8) according to figure 5a. Note that freestanding and attached pergolas have different methods of lapping the beam. 2. Start by measuring at the post base, the outside to outside of each post on your pergola (Figure 5a). Write these down on the top of each box beam. 3.
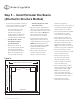
Step 5 – Install Perimeter Box Beams (Attached to Structure Method) a) If you trimmed the width or depth of your pergola follow items 1-4 below. If not proceed to letter b) below. 1. Start by measuring, at the post base, the outside to outside of the posts as shown in figure 5c. Write this measurement on top of the corresponding box beam (2x8). 2. Cut this beam ½" under the outside to outside post measurement. 3.
Pergola Installation Guide Step 6 – Install Rafters a) Measure from the outside of one box beam to the other. This measurement will be divided evenly depending on the number of rafters in your kit. Example (Figure 6): If you have a 16’ wide kit you will have six rafters and seven spaces. The measurement from the outside of your box beams should be around 191". Subtracting 2" will give us the center to center measurement. 191"2" =189". We will then divide 189" by seven spaces to get 27".
Step 7 – Install Purlin Holders a) First, install one of the outside purlin holders (2" x 3 ½") to your box beam. Measure the correct length of these according to figure 7a. – IMPORTANT - Make sure to consider which direction you would like to purlins to angle to provide your desired amount of shade. b) If necessary, cut outside purlin holders to fit tightly between the posts as in Figure 7a. IMPORTANT - cut each holder from the side marked CUT END.
Pergola Installation Guide Step 8 – Install Purlins a) NOTE: There are two purlins with your kit that are cut shorter than the rest. These fit in the purlin holes between your posts and are the first and last purlins on the pergola. b) If you trimmed the width of your pergola, follow items 1 & 2 below. If not proceed to letter c) below. 1. To determine proper purlin length, insert a tape measure into the outside purlin holder and measure to the inside of the last box beam.