
Service manual


SSppeecciiffiiccaattiioonnss —— PPVV--112244
BBlloowweerr --
Wheel type, forward curved, statically balanced.
MMoottoorr
Motor type — permanent split capacitor with T.O.L.
HP — 1/9
Voltage — 115/208-230/60/1
Amps — 1.6/.8 (Fasco) - 1.7/.87 (Universal)
RPM — 3000
Sealed ball bearings
1. Built-in automatic reset, thermal overload protection.
2. Ball bearings permanently lubricated for long life.
3. Centrifugal safety switch having normally open contacts
which, when connected in series with the heater controls,
prevents burner gas flow when the power exhaust fan is not
operating.
CCoonnttrrooll SSyysstteemm
A built-in centrifugal motor switch prevents gas flow to burner
before sufficient draft is established. The PV-124 includes a 24-
volt, factory-mounted, relay for operation on gas-fired units
utilizing 25V low voltage control systems.
FFaann HHoouussiinngg AAsssseemmbbllyy
The housing and discharge flange are fabricated of steel
having baked-on electrostatically applied polyester resin
powder paint finish.
AAddaapptteerr
Required to connect the power exhaust to the heater flue
outlet. Built-in restrictors are used to obtain optimum
combustion and efficiency for all size heaters.
MMaaiinntteennaannccee
The exhaust motor does not require periodic lubrication. The
bearings are permanently lubricated with a special high
temperature lubricant. A periodic cleaning of blower wheel
blades, motor, and centrifugal switch is recommended.
EElleeccttrriiccaall CCoonnnneeccttiioonnss
Installation of wiring must conform with local building codes, or
in the absence of local codes, with the National Electric Code
ANSI/NFPA 70 - Latest Edition. Unit must be electrically
grounded in conformance to this code. In Canada, wiring must
comply with CSA C22.1, Part 1, Electrical Code.
TTyyppiiccaall PPoowweerr EExxhhaauusstt WWiirriinngg —— PPDD//BBDD
1. Remove the factory installed buss bar (jumper) from
between terminals “C” and “V” of terminal board.
2. Connect one red lead from centrifugal switch (CS) of power
exhaust to terminal “C” on terminal board. Connect the
other red lead from centrifugal switch (CS) to terminal “V”
of terminal board.
3. Connect terminal (3) of power exhaust relay to terminal
“T2” of terminal board.
4. Connect terminal (1) of power exhaust relay to terminal “G”
of terminal board.
5. Connect terminal (2) of power exhaust relay to L1 of power
supply in unit junction box.
6. Connect L2 lead from power exhaust motor to L2 lead of
power supply in unit junction box.
7. Connect thermostat between terminals “T1” and “T2” of
terminal board.
CChheecckk--OOuutt PPrroocceedduurree
With the power and gas supply turned off, set the thermostat to
its lowest setting.
1. If the unit has a standing pilot, turn on the gas supply only
and light the pilot according to the instructions on the unit’s
serial plate, then proceed with Step 2. If the unit is
equipped with an intermittent pilot ignition system, turn on
the gas supply to unit and proceed with Step 2.
2. Turn on power supply to unit. Nothing should happen.
3. Turn up the thermostat to call for heat. The power exhaust
motor should start, the centrifugal switch of the power
exhaust should close, and the main burner should light.
After a delay of approximately 30 seconds, the fan motor
should start.
4. Turn the thermostat down again. The main burner and
power exhaust motor should shut off. The fan motor
should continue to run for approximately 1 to 1 1/2
minutes. Modine units are equipped with a time delay
relay, and the fan motor is delayed for approximately 30
seconds on start-up, and 1 to 1 1/2 minutes on shut-
down.
5. Check the power exhaust centrifugal switch for proper
function. To do this, remove the centrifugal switch lead
from terminal “V” of the terminal board. Turn up the
thermostat to call for heat. The power exhaust motor
should run, but the main burner should not light. After a
30 second delay, the fan motor should operate. The main
burner should still not light.
6. Turn down the thermostat and allow the power exhaust
motor and fan motor to stop running. Reconnect the
centrifugal switch lead to terminal “V” of the terminal
board. Recycle the unit as described in Steps 3 and 4.
If the unit does not operate in the sequence described above,
recheck all wiring until the necessary correction to the wiring
is found and corrected. Set the thermostat to the desired set
point. The unit is now ready for use.
FFiigguurree 66..11
TTyyppiiccaall WWiirriinngg –– PPoowweerr EExxhhaauusstt AAcccceessssoorryy
((MMooddiinnee ##7799885588 oorr ##7799886611))
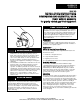
WARNING
1. Disconnect power supply before making wiring
connections to prevent electrical shock and equipment
damage.
2. All appliances must be wired strictly in accordance with
wiring diagram furnished with the appliance. Any wiring
different from the wiring diagram could result in a
hazard to persons and property.
3. Any original factory wiring that requires replacement must
be replaced with wiring material having a temperature
rating of at least 105°C.
T1
C
V
F
G
To Thermostat
Terminal board
on Junction Box
R
To L1
To L2
R
CS
To Combination
Gas Control or
Ignition Control
T2
Power
Exhaust
Motor
13
BLBL
42
66