
Installation Instructions


3.4 Solid Rev 031814 Page 2
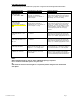
10D Nails Mechanical Fastener
15# Felt Paper or Rosin Paper
Miter Saw
Broom
Moisture Meter
Chalk Line & String
Pencil
Cleats or Staples (see schedule)
Pry Bar or trim puller
Coordinating stain, filler/putty
Straight Edge
Coordinating trims or moldings
Table Saw
Drill and drill bits
Tape Measure
Hand or Electric Jam Saw
Utility Knife
Construction Adhesive & Caulk Gun
Wood Spacers
Mohawk FloorCare Essential Hardwood Floor Cleaner or
Columbia Flooring Hardwood
purposes. Owner should retain carton end labels and original
sales invoice with product style name and style number for their
records. Owner should retain excess flooring and store in a
climate controlled area for future repairs in the event flooring is
damaged.
The use of stain, filler or putty for correction is considered a normal
practice and a routine part of installation.
TOOLS:
BASIC TOOLS AND ACCESSORIES:
STORAGE AND HANDLING:
Flooring material should be delivered to the job site and stored
in the room(s), prior to installation for a minimum of 72 hours to
allow flooring material to acclimate. Additional time may be
required to allow flooring to recover from prior storage and
transportation conditions. Open carton ends but do not remove
the product from the cartons. Make sure the room temperature
is set at a normal living temperature as described above. The
flooring is acclimated and ready for installation when it has
reached a moisture level consistent with the job site and normal
living conditions.
The subfloor and flooring should be tested with an appropriate
moisture meter. The subfloor moisture level must not exceed
12%. The difference between the moisture content of the wood
subfloor and the hardwood flooring must not exceed 4%. For
hardwood products greater than 3” wide, the moisture content
of the wood subfloor and hardwood floor should not differ more
than 2%.
PRE-INSTALLATION & JOB SITE CONDITIONS
SUBFLOOR REQUIREMENTS:
The following subfloor recommendations are intended to
complement the installation of hardwood flooring as an interior
finish. Hardwood flooring is not a structural component. These
recommendations are not intended to supersede federal, state or
local building codes, but as with many other interior finish
products, may require modifying existing structural components
for a successful installation.
Building codes establish requirements for structural support
components of flooring systems which may not provide adequate
rigidity and support for proper installation and performance of a
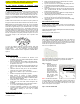
hardwood floor. Whenever possible, install flooring perpendicular to
the floor joists for maximum stability.
NOTE: Avoid subfloors with excessive vertical movement or
deflection. If the subfloor has excessive vertical movement
(deflection) before installation of the flooring, it is likely it will do so
after installation of the flooring is complete. Indications of excessive
deflection are uneven finish wear, fastener release, squeaking,
compromised or damaged locking systems, sectional contours such
as bowing or dipping in floors and uneven flooring material. Nail or
screw subfloor panels to secure boards with excessive vertical
movement or deflection.
Our warranties DO NOT cover any problems created by failure to
modify substructure for installation of a solid wood floor.
Mohawk Solid Hardwood Flooring
Is not recommended to be installed below grade installations
Is not to be installed over radiant heat.
Is not to be glued directly to any subfloor surface.
SUBFLOOR PREPARATION RECOMMENDATIONS FOR ON
OR ABOVE GRADE ONLY:
We recommend 3 types of sub-floors: plywood/OSB, solid wood
planks (1 x 6 or larger), or sleepers (2 x 4 inch). Each subfloor has
separate installation guidelines.
Solid hardwood flooring may be installed on or above grade provided
the subfloor is:
• CLEAN – all construction debris, soil, mud and any other
objects on or adhering to the floor are scraped and swept
away before installation.
• FLAT – within ¼” in a 10’ radius.
• DRY – always test the subfloor with the appropriate
moisture meter. Installation cannot continue until the sub-
floor moisture does not exceed 12% and the subfloor and
flooring moisture differ no more than 4%. On 3” or wider,
the subfloor and the flooring being installed should not differ
more than 2%.
• SOUND – all damaged or swollen subflooring should be
replaced. Check the floor for squeaks / loose components,
repair areas by adding fasteners or adhesive.
WOOD SUBFLOOR-
NOTE: As with many other interior finish products, modification
of existing structural components may be required for a
successful installation.
Wood subfloors should be well nailed or secured with screws. Nails
should be ring shank and screws need to be counter sunk. The wood
subfloor needs to be structurally sound (meaning subfloors without
loose boards, vinyl or tile). If sub-floor panels are a single layer, less
than ¾” thick, add another single cross layer for strength and stability
(minimum ½” thick). Underlayment floor panels must be installed
sealed side down. When used as a subfloor, allow 1/8” (3mm)
expansion space between each panel. If spacing is inadequate, cut
in with a circular saw. Do not cut in expansion space on tongue and
groov
e panels.
When installing parallel to the floor joists it may be necessary to
increase rigidity of the structural subfloor system by installing
an additional minimum of 1/2” (13mm) approved underlayment
floor panel.
Approved underlayment floor panels should meet or exceed the
following:
Plywood: Must be a minimum CDX grade (exposure1) and meet US
Voluntary Product Standard PS1 performance standard or Canadian
performance standard CAN/CSA 0325-0-92. The preferred thickness
is ¾” (19mm) as a subfloor (minimum 5/8” (16 mm) or 1/2” (13mm) as
a floor panel underlayment.
Oriented Strand Board (OSB): conforming to US Voluntary Product
Standard PS2 or Canadian performance standard CAN/CSA 0325-0-
92 construction sheathing. Check the underside of panel for codes.
When used as a subfloor, the panels must be tongue and groove and
installed sealed side down. Minimum thickness to be 23/32” (18 mm)
thick when used as a subfloor or 1/2” (13mm) as floor panel
underlayment.
Wafer board and Chipboard: Conforming to US Voluntary Product
Standard PS2 or Canadian performance standard CAN/CSA 0325-0-
092. It must be ¾” (19mm) thick when used as a subfloor and 1/2”
(12.7mm) thick when used as a floor panel underlayment.
Wood Subfloor Moisture Check:
NOTE: To increase reliability, moisture testing should be
performed after the HVAC system has been in operation for a
minimum of 14 days. Excess moisture on any flooring
substrate if not identified and corrected prior to installation will
cause floor covering failure. Warranties DO NOT cover