
Installation Guide


© 2015 Advanced Environmental Recycling Technologies, Inc. All trademarks are property of Advanced Environmental Recycling Technologies, Inc., unless otherwise noted. All rights reserved. April 2015.
866.729.2378 | WWW.MOISTURESHIELD.COM
12. Slide the top rail caps (E) over each end of the top rail (A) so the angle of the rail cap matches the
angle of the top rail. A small piece of tape may be used to hold the top rail caps (E) in place.
13. Slide bottom brackets (F&G) with the counter bore holes facing down and toward
the balusters, over each end of the bottom rail (B). A small piece of tape may be
required to hold lower bottom brackets in place. Next, set the rail assembly into the
saddle brackets (C&D) letting the bottom rail hang freely between the posts.
14. At the point(s) where you installed support block connectors (step 8), carefully
measure the distance from the underside of the bottom rail (B) to the floor. Cut support block material
(H) to fit. Slip support blocks over support block connectors (I). Slide the rail back into place and make
certain the rail is plumb.
15. Slide and hold the upper bottom bracket (F) firmly against the top post. Secure the bracket with
1” self-drilling screws (J). Repeat the process securing lower bottom bracket (G) to the bottom post
using 1” self-drilling screws (J).
Note: Screw holes in brackets (F&G) are angled to make mounting the brackets
easier.
16. Apply adhesive tab (L) to flat, top surface of top rail (A), near the post. Slide top rail cap (E) towards
the post and press down to secure it with the adhesive tab (L) and press down to secure with the
adhesive tab.
17. Screw 1” self-drilling screws (J) into the top rail (A) from the underside of saddle brackets (C&D)
through the provided locating hole.
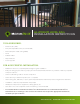
FULLY ASSEMBLED
STAIR RAIL SECTION