Monarch ® 9406™ Thermal Printer Operator’s Handbook TC9406OH Rev. B 8/94 ©1994 Monarch Marking Systems, Inc. All rights reserved.
Each product and program carries a respective written warranty, the only warranty on which the customer can rely. Monarch reserves the right to make changes in the product and the programs and their availability at any time and without notice. Although Monarch has made every effort to provide complete and accurate information in this manual, Monarch shall not be liable for any omissions or inaccuracies. Any update will be incorporated in a later edition of this manual.
Table of Contents Table of Contents 1. Introduction.......................................................................1-1 About This Manual.......................................................1-1 Menu Charts ....................................................1-1 Other Documentation ..................................................1-2 Menu Structure ............................................................1-2 New 9406 Features .....................................................
9406 Operator’s Handbook 4. Setting Communication Values ......................................4-1 Finding Communication Value Options....................... 4-1 Baud Rate ...................................................................4-2 Word Length................................................................4-3 Stop Bits ......................................................................4-4 Parity ...........................................................................4-5 Flow Control ......
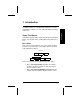
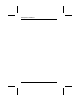
1. Introduction The 9406™ printer lets you print letters, numbers, bar codes, and graphics on labels. You can create and download formats from a host. This manual explains how to begin using the printer and print a batch. You can print online, sending data to the printer from a host. Menu Charts Each section of the manual has one or more charts showing the printer’s menu structure. The example below is the chart from "Setting the Contrast." MAIN MENU PRINT MODE SUPPLY CONTRAST SETUP DEFAULTS DIAG.
9406 Operator’s Handbook Other Documentation Following are other manuals you might need: Equipment Manual Contains general set-up and maintenance procedures. System Administrator’s Guide Explains communications and message structures for sending format and batch data streams online. Messages Manual Lists offline and online messages and what action you should take (if any). Graphics Manual Tells how to create and print graphics on your 9406 printer.
1.
9406 Operator’s Handbook New 9406 Features With the latest release of the software, the 9406 printer: • bases the dispense mechanism on the supply type and dispense mode (instead of only dispense mode). For example, an indexed supply in on-demand mode moves the label over the peel bar. A non-indexed supply in on-demand mode delivers the label under the tear bar. The printer memorizes the last dispense distance so that it can find the top of form position if you change the dispense mode between labels.
1. Introduction Terms You Should Know A group of labels that contain the same data. batch separator An extra label between batches that shows where one batch ends and the next one begins. character A letter, number, or symbol. continuous Dispense mode in which the printer prints all the labels in a batch without stopping. cursor The underline symbol that shows where you are on the screen. digits Numbers only. field An area on the supply where data prints.
9406 Operator’s Handbook 1-6
2. Getting Started Before you use the 9406 printer: • Install the printer (refer to your Equipment Manual). • Load supplies (refer to your Equipment Manual). • Set the supply options (see Chapter 3, "Setting Supply Options"). • Set the communication values (see Chapter 4, "Setting Communication Values"). • Set the printer options (Monetary Sign, Secondary Sign, Ribbon, and Dispense Mode).
9406 Operator’s Handbook Turning the Printer On Refer to your Equipment Manual for information about installing the printer and loading supplies. The power switch is on the back of the printer (see the figure below). To turn the printer on, press the top of the power switch. Back of 9406 Printer Using the Keypad The printer keypad consists of four control keys for the printer functions. Control Keys Q R L E 2-2 Returns the display to the next higher menu (when you press once).
2. Getting Started Start Up When you turn the printer on, the printer displays copyright and format loading messages. Then you will see Calibrating... as the printer checks the supply. If the supply type is set to Indexed and indexed supplies are installed, the printer calibrates to determine the length of each label so the printed image is positioned correctly. If the supply type is set to Non-Indexed and non-indexed supplies are installed, the printer feeds out three inches of supply.
9406 Operator’s Handbook To display the menu options, press the arrow keys, as follows: • When the screen displays a right arrow, MAIN MENU Print Mode press R > to display more options. • When the screen displays a left arrow, MAIN MENU Diagnostics < press L to display more options. • When the screen displays a left arrow and a right arrow MAIN MENU Setup < press either R or L > to display more options. E When you see the menu option you want, press to select it.
3. Setting Supply Options MAIN MENU PRINT MODE RIBBON SETUP DIAG. SUPPLY CONTRAST DEFAULTS PORT SETTINGS SUPPLY TYPE DISPENSE MODE PRINT POS SUPPLY POS MARGIN POS You may need to set supply options often to adjust for different supplies. The options are shown below with the default settings in bold.
9406 Operator’s Handbook 2. Press E . You will see SETUP Supply 3. Press > E . You will see the first supply option. SUPPLY Ribbon > To change one of these options, follow the instructions under the correct heading. To exit an option without changing the setting, press . Q Ribbon You can print with or without a ribbon, but you have to tell the printer which option you want. The default setting for ribbon is Yes. To change the setting, follow the steps under "Finding the Supply Options.
3. Setting Supply Options 3. Press Q to exit to the Setup menu. NOTE: If you set the Ribbon option to Yes, be sure you install a ribbon before printing. 4. Press Q to exit to the Main Menu. NOTE: After changing settings in the Setup Menu, always return to the Main Menu before turning your printer off. The printer will not save changes to these menus if you turn it off before returning to the Main Menu. Supply Type You can use indexed or non-indexed supplies with the 9406 printer.
9406 Operator’s Handbook 3. Press press R or L until you see the option you want. Then E . The printer calibrates to check the supply. You will see < 4. 5. SUPPLY Supply Type > Q to exit to the Setup menu. Press Q to exit to the Main Menu. Press NOTE: After changing settings in the Setup Menu, always return to the Main Menu before turning your printer off. The printer will not save changes to these menus if you turn it off before returning to the Main Menu.
3. Setting Supply Options The default setting for Dispense Mode is On-demand. To change the setting, follow steps listed under "Finding the Supply Options." Then follow the steps below. 1. Press R until you see < 2. Press Press press 5. DISPENSE MODE On-Demand R or L until you see the option you want. Then E . You will see < 4. > E . You will see the previous setting, for example < 3. SUPPLY Dispense Mode SUPPLY Dispense Mode > Q to exit to the Setup menu. Press Q to exit to the Main Menu.
9406 Operator’s Handbook The printer does not stop between labels in continuous mode, but you can interrupt the batch. Press in the middle of the batch to suspend printing and bring the printer to the Pause menu. Then, you can change the supply, printer values, etc. and resume printing (or cancel the batch). If you enter new values and resume printing, the printer finishes the current batch.
3. Setting Supply Options The default setting for Print Position is 0. To change the setting, follow the steps listed under "Finding the Supply Options." Then follow the steps below. 1. Press rR until you see < 2. Press SUPPLY Print Pos > E . You will see the previous setting, for example Enter print pos [+/-999]: +0 R L 3. Use the arrow keys to change the print position. Pressing increases the value (moves the image up); decreases it (moves the image down). 4.
9406 Operator’s Handbook Supply Position This function adjusts how much supply feeds out of the exit chute. You may need to adjust the supply in or out to allow: • Labels to be torn off • Die cut labels to be removed easily, or to prevent them from falling off. The range is -99 to +99, and the default is 0. The larger the number is, the more supply feeds out of the chute. The adjustments are in dots (0.0052 inch). NOTE: If you change this value in the middle of a batch, the change is immediate.
3. Setting Supply Options 5. 6. Q to exit to the Setup menu. Press Q to exit to the Main Menu. Press NOTE: After changing settings in the Setup Menu, always return to the Main Menu before turning your printer off. The printer will not save changes to these menus if you turn it off before returning to the Main Menu. Margin Position This function adjusts where the format prints horizontally on the supply. The adjustments are in dots (0.0052 inch), which is the smallest measurement the printer recognizes.
9406 Operator’s Handbook The width of the print area is always four inches. When you move the image to the right or left on the supply, avoid moving the image outside the four inch print area. As you move the format to the right, the fields that would move past the four inch location of the supply "wrap around" and appear on the left side. Other fields move the full length you specify. If your supply is less than 4 inches, fields might move off the supply and not print.
3. Setting Supply Options 5. 6. Q to exit to the Setup menu. Press Q to exit to the Main Menu. Press NOTE: After changing settings in the Setup Menu, always return to the Main Menu before turning your printer off. The printer will not save changes to these menus if you turn it off before returning to the Main Menu.
9406 Operator’s Handbook 3-12
4. Setting Communication Values You need to set the printer communication values to match your host’s online communications. Before entering the communication values, see your System Administrator. MAIN MENU PRINT MODE SUPPLY SETUP CONTRAST DIAG. PORT SETTINGS DEFAULTS The communication values are shown below. The default values are in bold.
9406 Operator’s Handbook 2. Press E . You will see SETUP Supply 3. Press R until you see < 4. Press > SETUP Port Settings E . You will see the first communications option. PORT SETTINGS Baud Rate > To change one of these options, follow the instructions under the correct heading. To exit an option without changing the setting, press . Q Baud Rate The default setting for Baud Rate is 9600. To change the setting, follow the steps listed under "Finding Communication Value Options.
Setting the Communication Values 2. Press press R or L to display the baud rate you need, then E . You will see PORT SETTINGS Baud rate 3. 4. > Q to exit to the Setup menu. Press Q to exit to the Main Menu. Press NOTE: After changing settings in the Setup Menu, always return to the Main Menu before turning your printer off. The printer will not save changes to these menus if you turn it off before returning to the Main Menu. Word Length The default setting for Word Length is 8.
9406 Operator’s Handbook 3. Press press L or rR to display the word length you need, then E . You will see < 4. 5. PORT SETTINGS Word Length > Q to exit to the Setup menu. Press Q to exit to the Main Menu. Press NOTE: After changing settings in the Setup Menu, always return to the Main Menu before turning your printer off. The printer will not save changes to these menus if you turn it off before returning to the Main Menu. Stop Bits The default setting for Stop Bits is 1.
Setting the Communication Values 3. R L < 4. 5. E Press or to display the number of stop bits you need, then press . You will see PORT SETTINGS Stopbits > Q to exit to the Setup menu. Press Q to exit to the Main Menu. Press NOTE: After changing settings in the Setup Menu, always return to the Main Menu before turning your printer off. The printer will not save changes to these menus if you turn it off before returning to the Main Menu. Parity The default setting for Parity is None.
9406 Operator’s Handbook 3. Press press R or L to display the parity you need, then E . You will see < 4. 5. PORT SETTINGS Parity > Q to exit to the Setup menu. Press Q to exit to the Main Menu. Press NOTE: After changing settings in the Setup Menu, always return to the Main Menu before turning your printer off. The printer will not save changes to these menus if you turn it off before returning to the Main Menu. Flow Control The default setting for Flow Control is DTR.
Setting the Communication Values 3. Press press L or R to display the flow control you need, then E. NOTE: The XON character is 17. The XOFF character is 19. If you have an IBM personal computer, set flow control to DTR (unless you have XON/XOFF software). You will see < 4. 5. PORT SETTINGS Flow Control Q to exit to the Setup menu. Press Q to exit to the Main Menu. Press NOTE: After changing settings in the Setup Menu, always return to the Main Menu before turning your printer off.
9406 Operator’s Handbook 2. Press E . You will see Are you sure? No 3. > You can: Q press R and then E to set the values to the defaults. • press to exit without changing the values. You will return to the Port Setting menu. • You will see < 4. 5. PORT SETTINGS Reset Q to exit to the Setup menu. Press Q to exit to the Main Menu. Press NOTE: After changing settings in the Setup Menu, always return to the Main Menu before turning your printer off.
Setting the Contrast 5. Setting the Contrast MAIN MENU PRINT MODE SUPPLY SETUP CONTRAST DIAG. DEFAULTS PORT SETTINGS Contrast controls the darkness of the printing on your supply. The range is -50 to +50, and the default is 0. Use the following rules of thumb as you set the contrast: • Darken the printing by increasing the number. • Lighten the printing by decreasing the number. Correct contrast setting is important because it affects how well your bar codes scan and how long your printhead lasts.
9406 Operator’s Handbook 3. Press R until you see SETUP Contrast < 4. Press > E . You will see the previous setting, for example Enter contrast [+/-50]: +0 L 5. Use the arrow keys to change the contrast. Pressing darkens the print; lightens the print. 6. Press E to select the displayed value. You will see < 7. 5-2 Press SETUP Contrast Q to exit to the Main Menu.
6. Setting Defaults MAIN MENU SUPPLY SETUP CONTRAST MONETARY SIGN DIAG. DEFAULTS SECONDARY SIGN Setting Defaults PRINT MODE PORT SETTINGS DECIMAL PLACES Some printer options can be set to fit your daily operation. The options are shown below. The factory setting is in bold. Monetary Sign Secondary Sign Decimal Places None, USA, UK, Japan, Germany, France, Spain, Italy, Sweden, Finland, Austria, India Yes, No 0, 1, 2, 3 Finding Default Options Follow these steps to set the defaults. 1.
9406 Operator’s Handbook 2. Press 3. Press E . You will see Press > SETUP Defaults > R until you see < 4. SETUP Supply E . You will see < DEFAULTS Monetary Sign > To change one of these defaults, follow the instructions under the correct heading. To exit an option without changing the setting, press .
6. Setting Defaults The default setting for Monetary Sign is USA. To change the setting, follow the steps listed under "Finding Default Options." Then follow the steps below. 1. Press E . You will see the previous setting, for example R MONETARY SIGN USA L until you see the country for the monetary 2. Press or sign you want. 3. Press E . You will see DEFAULTS Monetary Sign 4. 5. > > Q to exit to the Setup menu. Press Q to exit to the Main Menu.
9406 Operator’s Handbook The default setting for Secondary Sign is No. To change the setting, follow the steps listed under "Finding Default Options." Then follow the steps below. 1. Press R until you see < 2. Press DEFAULTS Secondary Sign > E . You will see the previous setting, for example SECONDARY SIGN No > 3. Press press R or L until you see the option you want. Then E . You will see < 4. 5. DEFAULTS Secondary Sign > Q to exit to the Setup menu. Press Q to exit to the Main Menu.
6. Setting Defaults Decimal Places You can set the printer for 0, 1, 2, or 3 places after the decimal in a price field. In U.S. currency, you might print prices like this $24.00 (2 decimal places) $24 (0 decimal places) The default setting for Decimal Places is 2. To change the setting, follow the steps listed under "Finding Default Options." Then follow the steps below. 1. Press R until you see < 2. Press E . You will see the previous setting, for example, < 3. Press press 5.
9406 Operator’s Handbook 6-6
7. Printing Online MAIN MENU PRINT MODE SETUP DIAG. PRINT MODE READY You can send format, batch, and graphic data streams to the printer from a host. When the printer receives the data, batches begin printing automatically. The System Administrator’s Guide tells how to create, store, and download the data necessary to print batches.
9406 Operator’s Handbook If you have been using other printer functions, press you see the Main Menu. Then, 1. Press R or L until you see MAIN MENU Print Mode 2. Press Q until > E . You will see PRINT MODE Ready Printing begins as soon as you download data from the host.
Index A Adjusting margin position 3-9 Adjusting print position 3-6 Adjusting supply position 3-8 B Baud rate 4-1 C Communication parameters Baud rate 4-1 Parity 4-1 Start (Xon) character 4-1 Stop (Xoff) character 4-1 Stop bits 4-1 Word length 4-1 Communications Host port configuration 4-2 Resetting parameters 4-7 Resetting to defaults 4-7 Continuous 3-4 Contrast, setting 5-1 Control keys 2-2 D E Exiting an option 2-4 F Host port configuration 4-2 K Keypad 2-2 Keys control 2-2 M Margin, adjusting 3-9
9406 Operator’s Handbook R Resetting communications parameters 4-7 Ribbon 3-2 - 3-3 S Secondary sign, using 6-3 Selecting a function 2-4 Setting communication parameters 4-1 Setting supply options 3-1, 3-3, 3-5, 3-7, 3-9, 3-11 Setting the contrast 5-1 Setting the print contrast 5-1 Start (XON) character 4-1 Start Up 2-3 Stop (XOFF) character 4-1 Stop bits 4-1 Supply Position, adjusting 3-8 Supply options Adjust margin position 3-9 Adjust print position 3-6, 3-8 Setting 3-1, 3-3, 3-5, 3-7, 3-9, 3-11 Supply
For supplies, service, or assistance call: TOLL FREE: 1-800-543-6650 (In the U.S.A.) 1-800-263-4650 (In Canada) Printed by the Technical Communications Department Printed in the U.S.A.