+ INSTALLATION CONDITION 1.Refer to the {Standard Part List) when unpacking , check all parts available 2. Da not disassemble mixer body by yourself. 3.Connect inlet hoses to supply valves. 4. Make sure inlet pipes and supply valves have been installed and cleaned, also ensure no impurities in pipeline. 5.After installation , check all joints for visages. 6.Suggest don't fit the faucet in the several corrosive environments.
© Modernize PRODUCT LIST Dr Ceiling Shower arm ~ Model: 5310 Fart name Ng, Qty Mo.
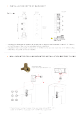
# INSTALLATION SHOWER SET SIZE & WATER PIPE LINE REFERENCE over Hud ver Unit: mm san Herr over JEN Sgt nt Finish surface SEES EY t fe Pleas refer to above for height dimensions of shower installation, # INSTALLATION DEPTH DF SHOWER ARM SHOWER HOLDER & BODY JET mr. Face of plaster guard souls ba flush with finish wall LBA: 12714 NPT {7 Comets.
# INSTALLATION DEPTH OF MAIN BODY Unit: mm Amen Ste. J, Tress ran busy nous fo krone 1000s oF wl lie in {ess tan or sous the thickness of valve 3.74" 88mm), 1 Including the thickness of overran | sie bh thickness of Ble rust be collated before titillation, & Installation Main body depth not less then 3.48" (Minimize and nutmeat than 3.
© MAIN BODY CONNECTING PIPE SCHEMATIC DIAGRAM A \ Warning: must install hat water and cold water infer strictly as instructions. rap enough tof taps Manna A244 NPT Europe GH soi tot water pipe 1.
¢ CARE AND MAINTENANCE in order to keep the mixer surface bright, please clean the mixer regularly. Rinse faucet with clean water and wipe with sol cotton cloth, Avoid suing cleaning powder, harsh cleaning chemicals, brushes,and cloth with coarse surface to prevent scratching and corrosion. Do not use acid cleaner to clean the faucet as may cause surface corrosion of the faucet H the faucet comes into contact with harmful acid substances, please rinse it with water immediately.