
User guide


I. General Information
1-1
I. General Information
1.
Overview
Welcome to the world of tablet and digital pen! You are able to discover how easy to control your
personal computer by using a wireless digital pen to instead of a mouse:
The function of the digital pen is able to draw a line very thin, thick, light or dark (the pressure sensitivity).
You also can write, sign, annotate documents, and draw, sketch or paint as easily as you would on
normal paper and simulate the functions like pencil, mark pen, brush, or watercolor pen by using the
commercial software packages such as Adobe® PhotoShop™, Corel® Painter™ and Paint Shop™. If
MSN Messenger 8.5 or newer is installed, the user can freely create and send digital handwritings and
hand drawn pictures, making communication much more fun and entertaining.
If you cannot enable handwriting mode in MSN Messenger, please download the relevant handwriting
component from Microsoft's website.
2.
Pen Tablet Functions
After installing the device driver, your pen tablet features have got the following functions:
1. Direct pointing – You can move the cursor to any location on the screen by hovering the digital
pen tip over the tablet’s surface.
2. Three-buttons mouse commands - Your pen tablet provides all functions of a three- buttons’
mouse by using its pen tip and two buttons.
3. Pen scrolling – You can scroll documents and Web pages by pressing the middle button of the
digital pen over the tablet’s working area.
4. Pressure sensitivity – This feature allows you to emulate various brushes and pencils and you can
press down the pen tip harder, lighter, stronger or thicker, and subtle pencil lines you will receive.
3.
System Requirements
Windows 7/Vista/XP; USB port; DVD-ROM drive。
4.
Installing the Driver Software on Windows
Please follow the installation instructions below for Microsoft Windows 7, Vista and XP operating systems:
1. Place the DVD into the optical disc drive and wait for the main installation screen to appear.
2. The main installation screen should appear automatically, or you can manually start the installation by
opening My Computer ► DVD Rom ► then click on the Setup program.
3. When installing the driver, please follow the installation instructions on screen and press the “Enter” key.
After the installation has completed, please reboot the computer.
5.
Hardware Installation
5.1
Wired Tablet (Media Wired Tablet) installation
:
Connecting a tablet with USB interface into the PC after
finished the driver installation and restarted the Windows
system:
To connect a pen tablet into the PC, you will see a small tablet
icon
appears in the system tray, which is normally at the
lower right corner of the screen.
Please install the driver first before plug the tablet into
your PC.
5.2
Wireless
Tablet
(Media Wireless Tablet)
installation:
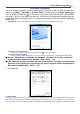
1.After installing the driver, please restart your computer.
Then connectthe dongle to your USB port (as left picture)
2.Put the battery into the back of Wireless Tablet
3.Open Wireless Tablet Power
4.Press Resume button around 4 seconds then your setting
will be finished
5.After restart your computer, on bottom right of the screen,
you can find the tablet icon (
) within there.
Please install your drive then connect your dongle to
the USB port. It will avoid
driver installation error or
delay while the system is detecting new hardware.