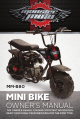
MM-B80 MINI BIKE OWNER’S MANUAL THIS OWNER’S MANUAL CONTAINS IMPORTANT INFORMATION. READ THOROUGHLY BEFORE RIDING FOR THE FIRST TIME.
MINI BIKE MM-B80 OWNER’S MANUAL Monster Moto 1001 South Jupiter Road Garland, TX 75042 855-833-6483 info@monstermoto.com www.monstermoto.com IF YOU HAVE PROBLEMS, DO NOT RETURN TO STORE! CONTACT MONSTER MOTO AT 855-833-6483 OR INFO@MONSTERMOTO.COM! Failure to follow the instructions in this manual could result in serious injury or death. Failure to follow the instructions in this manual could also prevent the mini bike from operating properly. This owner’s manual contains important information.
PROBLEMS? DO NOT RETURN TO STORE! CALL US AT TABLE OF CONTENTS Introduction ............................................................................................................... 3 Laws & Regulations ............................................................................................... 4 Maintenance Requirements................................................................................. 4 Safety..........................................................................................
855-833-6483 OR EMAIL US AT INFO@MONSTERMOTO.COM! INTRODUCTION Congratulations on the purchase of your new Monster Moto MM-B80! We hope that your new mini bike provides years of fun experiences and epic moments. Monster Moto is dedicated to providing you with an exceptional experience. If you are not happy with your mini bike, don’t return it! Instead, contact Monster Moto at 855-833-6483 or info@monstermoto.com, and we will do our best to provide you with outstanding customer support.
PROBLEMS? DO NOT RETURN TO STORE! CALL US AT LAWS & REGULATIONS It is the responsibility of any rider of this vehicle to be familiar with and fully comply with all laws, rules, and regulations governing the operation of this vehicle. Laws vary by jurisdiction. Monster Moto has no responsibility or liability for the costs to comply with all applicable laws and regulations or for mini bike damage or human injury resulting from an owner or operator’s failure to follow all relevant laws and regulations.
855-833-6483 OR EMAIL US AT INFO@MONSTERMOTO.COM! SAFETY The MM-B80 mini bike has the potential to cause serious injury or death. Although the risks associated with riding a mini bike can never be eliminated completely, following all of the instructions contained in this manual will reduce the risk of harm to the operator and others. Any rider of the mini bike must always review and follow the instructions outlined in this manual.
PROBLEMS? DO NOT RETURN TO STORE! CALL US AT WARNING: Never ride the mini bike if it is not in proper riding condition. Always inspect your mini bike before you ride to ensure that it is in proper riding condition. If you have any indication that your mini bike is not running correctly, stop riding immediately. Do not ride your mini bike back to your base. Find another method of transportation.
55-833-6483 OR EMAIL US AT INFO@MONSTERMOTO.COM! GETTING STARTED: ASSEMBLING & BREAKING IN THE MINI BIKE After the mini bike has been removed from the cardboard shipping box, a protective metal frame will be exposed. REMOVING THE PROTECTIVE METAL FRAME 1. Unscrew the two handlebar bolts holding the mini bike to the metal frame. 2. Unscrew the metal frame’s four corner bolts. Removal of the corner bolts will allow the top of the metal frame to be removed. 3.
PROBLEMS? DO NOT RETURN TO STORE! CALL US AT ATTACHING THE HANDLEBARS 1. Park your mini bike on a firm, level surface. 2. Locate the handlebar assembly hardware, which was included in the mini bike parts bag. TWO TOP RISERS FOUR BOLTS (SLIGHTLY RAISED ON TOP) TWO BOTTOM RISERS FOUR NUTS (FLAT ON TOP) 2. The diagram below illustrates how to attach the mini bike’s handlebars to the mini bike.
855-833-6483 OR EMAIL US AT INFO@MONSTERMOTO.
PROBLEMS? DO NOT RETURN TO STORE! CALL US AT INSPECTING YOUR MINI BIKE Before turning on and riding your mini bike, inspect the vehicle to ensure it is in proper operating condition: »» Examine the tires for proper inflation and to detect excessive wear. »» Visually inspect the entire mini bike for damage. »» Check the engine oil level and the fuel level, and ensure that the fuel cap and the oil filler cap are securely tightened. »» Test to ensure that the brakes and the throttle are working properly.
855-833-6483 OR EMAIL US AT INFO@MONSTERMOTO.COM! RIDING YOUR MINI BIKE »» To Go: The speed of the mini bike is controlled by the throttle. Twisting the throttle towards the rider increases the speed of the mini bike and releasing pressure from the throttle causes the mini bike to gradually slow down until it comes to a stop. When the throttle is twisted towards the rider and the mini bike is moving, the throttle is “open.” When the throttle is in its resting position, it is “closed.
PROBLEMS? DO NOT RETURN TO STORE! CALL US AT MAINTENANCE PROCEDURES FUEL 1 1 2 3 1. FUEL FILTER 2. FUEL FILTER CLAMP 3. FUEL LINE 2 1. CARBURETOR SEDIMENT CUP 2. CARBURETOR DRAIN SCREW (THE SCREW ON THE SIDE OF THE CUP, NOT DIRECTLY ON THE BOTTOM OF THE CUP) ADDING FUEL 1 FUEL TANK 2. FUEL CAP VENT (SMALL HOLE ON TOP OF FUEL CAP) 3. FUEL FILLER NECK 1. Park the mini bike on a firm, level surface and turn the engine stop switch to the “off” position. 2.
855-833-6483 OR EMAIL US AT INFO@MONSTERMOTO.COM! REMOVING SEDIMENT FROM THE FUEL SYSTEM Avoid getting dust, dirt, water, and/or debris in the fuel tank. If the fuel tank has become contaminated, it will need to be drained and new fuel will need to be added. Certain fuel system components will also need to be cleaned. Follow the steps below to remove contamination from the fuel system: 1. Park the mini bike on a firm, level surface and turn the engine stop switch to the “off” position. 2.
PROBLEMS? DO NOT RETURN TO STORE! CALL US AT CLEARING A FLOODED ENGINE If the engine fails to start after repeated attempts, it may be flooded with excess fuel. Follow the steps below to clear a flooded engine: 1. Park the mini bike on a firm, level surface and turn the engine stop switch to the “off” position. 2. Turn the fuel valve lever into the “off” position. 3. Push the choke lever into the “run” position. 4. Twist the throttle and hold it in the “open” position. 5.
855-833-6483 OR EMAIL US AT INFO@MONSTERMOTO.COM! ENGINE OIL Oil Filler Cap Dipstick Upper Mark Lower Mark OIL FILLER CAP & OIL FILLER HOLE OIL DRAIN BOLT & OIL TANK CHECKING & ADDING ENGINE OIL Before each ride, check the mini bike’s engine oil level and add oil if necessary. The Society of Automotive Engineers (SAE) 10W-30 oil is recommended for most climates.
PROBLEMS? DO NOT RETURN TO STORE! CALL US AT 7. Remove the oil filler cap and check for dark-colored oil on the dipstick. If the oil level is at or near the upper mark, you do not need to add oil. If the oil level is at or near the lower mark, continue to step 8. 8. Pour oil into the oil filler hole. Repeat steps 4 through 8 until the oil reaches the correct level. Do not overfill the oil tank. 9. Reinsert the oil filler cap and screw it in tightly. 10.
855-833-6483 OR EMAIL US AT INFO@MONSTERMOTO.COM! AIR FILTER AIR FILTER COVER AIR FILTER HOUSING TAB AIR FILTER (AIR FILTER COVER HAS BEEN REMOVED) CLEANING THE AIR FILTER The mini bike’s air filter must be clean in order for the mini bike to operate properly. Inspect the air filter in your mini bike as part of your regular maintenance routine and clean it whenever it appears dirty. Follow the steps below to clean the air filter: 1.
PROBLEMS? DO NOT RETURN TO STORE! CALL US AT BRAKES ADJUSTING NUT BRAKE MECHANISM ADJUSTING THE BRAKES If you cannot stop your mini bike properly, you will most likely need to adjust its rear disc brake. You will also need to adjust the brake as part of your regular maintenance routine, as regular use of the mini bike will cause the brake to loosen over time. Follow the steps below to complete a brake adjustment: 1.
855-833-6483 OR EMAIL US AT INFO@MONSTERMOTO.COM! TIRES INSPECTING YOUR TIRES Regularly perform an in-depth inspection of your tires as part of your maintenance routine. Park the mini bike on a firm, level surface and turn the engine stop switch to the “off” position. Look for bumps or bulges in the sidewall of the tire and inside of the treads. Look closely for cuts, slits or cracks. Check for signs of excessive wear. Check for rocks, screws, nails or other objects embedded in the tires or tread.
PROBLEMS? DO NOT RETURN TO STORE! CALL US AT DRIVE CHAIN DRIVE CHAIN FRONT SPROCKET REAR SPROCKET (DRIVE CHAIN AND SPROCKETS ARE COVERED BY THE CHAIN GUARD) CHAIN GUARD AXLE NUT CHAIN TENSIONER ADJUSTING THE DRIVE CHAIN CHAIN TENSIONER ADJUSTMENT NUT The drive chain needs to have a small amount of slack to operate properly. No slack or excessive slack in a drive chain can cause damage to the bike.
855-833-6483 OR EMAIL US AT INFO@MONSTERMOTO.COM! LUBRICATING THE DRIVE CHAIN The drive chain needs to be properly lubricated in order for the mini bike to operate properly. Normal use of the mini bike will cause the chain to dry and rust over time, therefore it is necessary to lubricate the chain as part of routine maintenance. Follow the steps below to lubricate the drive chain: 1. Park the mini bike on a firm, level surface and turn the engine stop switch to the “off” position. 2.
PROBLEMS? DO NOT RETURN TO STORE! CALL US AT TROUBLESHOOTING If you are having problems with your mini bike, please reference the troubleshooting steps below. If you have completed all of the troubleshooting steps and your mini bike is still not running properly, contact Monster Moto at 855-833-6483 or info@monstermoto.com or take your mini bike to an Authorized Monster Moto Service Center. Remember, always feel free to contact Monster Moto customer service with any questions.
855-833-6483 OR EMAIL US AT INFO@MONSTERMOTO.COM! IF THE MINI BIKE IS NOT PERFORMING WELL POTENTIAL PROBLEM SOLUTION Improper choke operation Ensure that the choke lever is in the correct position. See steps steps 3 through 7 under Starting Your Mini Bike on page 10 to ensure you are operating the choke correctly. Incorrect oil level Ensure oil is at the proper level. See Checking And Adding Engine Oil on page 15 for more information. Partial obstruction in fuel cap vent Clean the fuel cap vent.
PROBLEMS? DO NOT RETURN TO STORE! CALL US AT WARRANTIES LIMITED WARRANTY WHAT IS COVERED Monster Moto warrants only to the original retail purchaser of this product that this product is free from defects in material and/or workmanship for a period of ninety (90) days from the date of purchase. At Monster Moto’s sole discretion, Monster Moto agrees to either repair, provide replacement parts for, or replace without charge, any product or component having a material defect, except as limited below.
855-833-6483 OR EMAIL US AT INFO@MONSTERMOTO.COM! by the Environmental Protection Agency, Monster Moto makes no other warranty of any kind, express or implied. All implied warranties of merchantability and fitness for a particular purpose which exceed the obligations and time limits stated in this warranty are disclaimed and excluded from this warranty. You may have additional or different rights under your state’s laws.
PROBLEMS? DO NOT RETURN TO STORE! CALL US AT SPECIFICATIONS RECOMMENDATIONS 16 + Unleaded 87 Octane Gasoline SAE 10W-30 SPECIFICATIONS Engine Displacement 79.8 cc Strokes per Cycle Four Strokes per Cycle Cylinder Head Configuration Overhead Valve (OHV) Transmission Automatic Centrifugal Force Clutch Maximum Speed 26 mph Starter Type Pull Start Fuel Tank Capacity .32 gal Oil Tank Capacity 12 oz Spark Plug Gap 0.6 - 0.
855-833-6483 OR EMAIL US AT INFO@MONSTERMOTO.COM! MINI BIKE MM-B80 PRODUCT REGISTRATION Monster Moto 1001 South Jupiter Road Garland, TX 75042 855-833-6483 info@monstermoto.com www.monstermoto.com Please help us serve you better by registering your new mini bike. You may register your product by calling us at 855-833-6483, by emailing us at info@monstermoto.com, or by mailing the registration form below to us at 1001 South Jupiter Road, Garland, TX 75042.
IF YOU HAVE PROBLEMS, DO NOT RETURN TO STORE! CONTACT MONSTER MOTO AT 855-833-6483 OR INFO@MONSTERMOTO.COM! Monster Moto will handle all service, warranty, and return arrangements. Monster Moto 1001 South Jupiter Road Garland, TX 75042 855-833-6483 info@monstermoto.com www.monstermoto.