
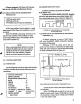
Service manual

ward
travel
and
white
keys
between
3/16
and
1/4
inch.
If
necessary,
rebend
by
gently
massaging
the
portion
of
the
wire
between
the
actuator
and
the
attachment
point.
The
contact
must
make
before
the
key
bottoms
on
the
touch
sensor
assembly.
6.2
KEYS
6.2.1
CLANKING
Keys
will
clank
or
thump
if
the
tails
hit
the
case
on
the
down
stroke.
This
problem
can
be
repaired
by
gluing
a thin
spacer
such
as
a
1/16
inch
thick piece
of
wood
to
the
case
immediately
above
the
plastic
strip
over
the
key
pivots.
The
case
will
be
forced
away
from
the
keys
upon
reassembly
and
clanking
should
cease.
6.2.2
STICKING
OR
SLUGGISH
FEEL
Check
the
pivot
for
being
too
tight.
Rotate
the
pivot
tab
about
the
vertical
axis
by
bending
a
few
degrees
with
a
pair
of
pliers.
Make
certain
the
key
tails
are
not
rubbing
on
the
back
of
the
case
necessitating
the
removal
of
some
of
the
wood
with
coarse
sandpaper.
Keys
near
either
end
of
the
key
board
may
stick
because
the
hex
head
screw
that
fastens
the
rear
mounting
brackets
to
the
keyboard
frame
does
not
have
its
flats
aligned
vertically.
In
this
case,
the
screw
head
will
rub
against
the
key
return
springs
and
cause
the
trouble.
6.2.3
LEVELING
If
a
key
does
not
return
to
the
same
height
as
its
neighbors,
the
key
leveling
tab
located
inside
the
front
end
of the
metal
body
of
the
key
must
be
bent
up
or
down
as
required.
Remove
the
key
screw
so
the
ivory
comes
off
and
reposition
the
tab
using
the
keyboard
adjusting
tool,
part
number
962-043031-001.
6.3
TOUCH
SENSOR
6.3.1
SENSOR
MOUNTING
The
touch
sensor
assembly
is
mounted
to
the
keyboard
frame
by
5
studs
attached
to
the
sensor
assembly.
The
height
of
the
assembly
must
be
set
so
that
the
keys
will
bottom
on
the
sensor
assembly
and
not
on
the
key
leveling
tabs.
The
5
studs
are
locked
into
position
by 10
nuts
on
either
side
of
the
keyboard
frame.
The
sensor
is
intentionally
warped
by
the
extreme
end
studs
when
mounted
so
that
its
ends
are
approximately
1/16
inch
further
away
from
the
keyboard
frame
than
its
center.
This
must
be
accomplished
before
the
keyboard
is
installed
in
the
chassis.
The
warp
ing
must
be accomplished
so
that
touch
sensitivity
for
keys
at
the
ends
of
the
keyboard
is
the
same
as
that
for
the
keys
in
the
center.
If
this
is
not
accomplished,
the
center
keys
will
be
overly
sen
sitive
while
the
end
keys
will
not have
enough
response.
6.3.2
ADJUSTING
SCREWS
Two
slotted
screws
set
the
pressure
with
which
the
rod
bears
against
the
foam
pad.
Adjust
these
screws
as
follows:
1
OCT
and
2
OCT
tab
switches
up
VIOLIN
and
PITCH
tab
switches
down
TOUCH
SENSE
variable
resistor
full
clockwise
Play over
the
entire
keyboard
"with
a
normal
light
playing
touch.
If
unwanted
pitch
bending
occurs,
tighten
slotted
screws
by
turning
counter
clockwise
until
bending
occurs
only
when
extra
pressure
is
applied
to
the
keys.
If
the
screws
are
over
tightened,
the
sensor
will
not
be
responsive
enough.
The
pitch
should
bend
upward
at
least
a
fifth
(7
semitones)
for
any
key
pressed
down
heavily.
Especially
check
the
keys
near
each
end
of
the
keyboard
as
they
nor
mally
will
be
less
responsive.
If
necessary,
loosen
screws
slightly
by
turning
clockwise
and
recheck
for
over
sensitivity.
6.3.3
TOUCH
SENSOR
INTERMITTENT
OPERATION
WHEN
DEPRESSED
OR
TOUCH
SENSOR
DEAD
This
trouble
may
be
due
to
open
contacts
between
the
shielded
cable
and
either
the
con
ductive
nylon
(snap
fastener)
or
the
touch
bar
(No.
6
screw
in
end)
or
there
may
be
a
short
between
the
touch
bar
and
the
nylon.
Shorts
may
occur
around
the
two
holes
in
the
rod
through
which
the
35