
User's Manual


6
GETTING STARTED
In order to get started, you will need to set up your new Theremini in a
suitable environment and conduct the quick calibration procedure. For
best results and the highest degree of satisfaction, please follow these
simple steps before exploring your Theremini.
UNPACKING
Inside the box, you will find the following:
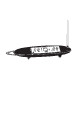
• Theremini
• AC Power Adaptor
• Warranty Card
• This User Manual
• Quick Start Guide
To begin go ahead and follow these few steps:
1. Remove your new Theremini from the box and packaging.
NOTE: Save this box in case you ever need to ship your Theremini back to Moog.
2. Remove the AC power adapter from the box and packaging.
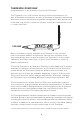
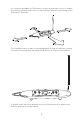
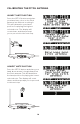
3. Remove the Pitch antenna from its storage slot on the bottom side
of the Theremini. Simply press the catch tab to release the antenna, and
then gently pull the antenna out.
4. Register your Theremini to be notified of new sounds, features, and
updates as they become available. Visit www.moogmusic.com/register
SETTING UP YOUR THEREMINI
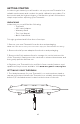
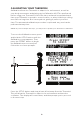
1. The ideal placement for your Theremini is on a microphone stand or
camera-style tripod. Attach the Theremini to a suitable stand using the
built-in 3/8” threaded mount located on the bottom of the unit.