
Specifications


Page 20
Taurus 3 User’s Manual - The Components
Page 21
Taurus 3 User’s Manual - The Components
Transposition:
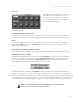
To set the transpose interval, press and release the TRANSPOSE/PGM footswitch. The TRANSPOSE
LED will blink slowly and the LCD will indicate that Transpose Mode is enabled:
➜
NOTE: The Transpose function affects all presets globally. That is, if you activate the
Transpose function and switch presets, Transpose remains active.
Here is an example of setting the transposition interval:
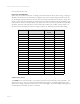
To transpose the pedalboard down seven half-steps, press the TRANSPOSE footswitch, then press
“F” (footpedal #6, MIDI Note 29), and press the TRANSPOSE footswitch again. This will shift the
pedalboard root note to an ‘F’ (MIDI Note 17) as shown:
The TRANSPOSE/PGM footswitch is a dual-function program switch. It operates either to initiate the
Transpose function, or to access alternate functions for the GLIDE, DECAY and OCTAVE footswitches.
The transposition interval is set with the pedalboard, which allows you to transpose down in half-step
increments up to -1 octave. The blinking LED indicates that the T3 sound engine has been temporarily dis-
connected from the pedalboard, and the pedalboard can now be used to set the transpose interval. At
this point, the next pedal that you press will use that note as the lowest pedal note, and all other notes on
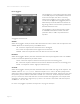
the pedalboard will be referenced to that root note. When you press a pedal, the LCD will display the
transposition note along with the number of half-step increments in the transposition interval:
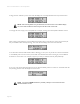
Press the TRANSPOSE/PGM footswitch again to complete the operation. The TRANSPOSE LED will be ON
continuously to indicate that the Transpose function is active. To turn off the Transpose function, press and
release the TRANSPOSE footswitch (the Transpose LED will blink), press the top-most pedal (C), then press the
TRANSPOSE footswitch. The Transpose LED turns OFF, indicating that the Transpose feature is inactive.