
User manual


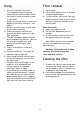


Using
1 Lift up the lid and fill the kettle.
The integrated water level gauge/
viewing lid (on certain models) allows
you to easily see the amount of water
in your kettle.
• Always put enough water to cover the
bottom of the kettle, minimum 1 cup
200cc.
• Boil only as much water as you need
as this saves electricity.
2 Place the kettle on the base unit,
ensuring the kettle locates on to the
360
o
connector.
• The 360
o
connector allows the kettle
to be located at any position - ideal for
left and right handed users and
convenient positioning on your
worktop.
3 Plug in and switch on at the wall
socket.
4 Switch the kettle on. The ‘power on’
indicator neon will light up.
5 When lifting the kettle from the base
unit by the handle ensure you hold
the kettle level.
• To reboil, switch to ON again. If the
kettle has just switched off wait
several seconds or so before
switching it back on again.
• If you do not put in enough water, or
switch on the kettle when it is empty,
the safety cut-out will switch off the
power automatically. If this happens,
wait a few minutes for the element to
cool, then refill and use as normal.
Filter removal
1 Open the lid.
2 Lift the filter upwards from its location
using the tab provided.
3 To refit the filter, slot into the side wall
guides and press down firmly. Ensure
the filter is correctly located into the
central guide.
Cool Steel kettle
1 Open and support the lid.
2 Pull the filter downwards from its
location.
3 To refit the filter locate the filter into
the grooves and click into place.
Note: Which way you have removed
the filter and replace the same way
after cleaning.
Warning : Unless the filter is fitted
correctly, the kettle lid may not
close and lock securely.
Cleaning the filter
1 To clean the filter run warm water over
the mesh and scrub lightly to remove
the soft deposits with a suitable brush.
A toothbrush would be ideal.
2 If the soft lime deposits have become
hard, the filter will need descaling, see
descaling page 5.
4