
User's Manual


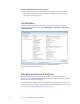
Table Of Contents
- Contents
- Getting Started
- Features
- Using the system
- Using Motion Dashboard
- Using the pen
- Using Tablet PC Input Panel
- Configuring pen options
- Enabling personalized handwriting recognition
- Using personalized handwriting recognition
- Configuring front panel buttons
- Using the display
- Using the bar code scanner
- Using the RFID reader
- Using the camera
- Using the smart card reader (optional)
- Using the built-in microphones
- Using speech recognition
- Using the battery
- Using power management
- Using Wi-Fi (802.11a/b/g)
- Using Mobile Broadband
- Using Bluetooth
- Using Motion OmniPass and the fingerprint reader
- Using Windows Security Center
- Setting up users and passwords
- Finding additional software
- Care and Maintenance
- Troubleshooting and Support
- Index

Chapter 4 Care and Maintenance 65
3. Follow the instructions in the Bootable Rescue Media Builder. For more information, see
the Acronis True Image Help.
Removing the Acronis OEM Zone
The Acronis OEM Zone is a special partition on the tablet’s hard disk drive that stores the
original factory backup archive. If you have created your own hard disk drive backup archive
and a bootable disk, you can delete the OEM zone to free up some disk space.
WARNING: Removing the Acronis OEM Zone will disable Acronis Startup Recovery
Manager and the original factory backup archive. Do not remove the Acronis OEM Zone
unless you have created your own bootable media and a backup archive.
To remove the OEM Zone
1. Start Acronis True Image by double-tapping the True Image icon on the
Windows desktop.
2. Tap Remove Acronis OEM Zone.
3. Follow the instructions in the wizard. For more information, see the Acronis True Image
Help.