
Operation Manual


34 Motion Computing LE-Series and LS-Series Tablet PCs User Guide
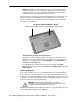
Changing display orientation. An interesting and useful feature of the Tablet PC
is the ability to change the screen orientation from landscape to portrait by pressing
a button. Also, you can rotate the screen in 90-degree increments. The Tablet PC
flexibility in changing the screen orientation enables you to set the view for your
viewing needs. You may be using an application where it is more advantageous to
have a portrait (vertical) view of the screen. You may be filling out a form that is
longer than the standard screen view. At other times you may want to view a wider
than normal page; in this instance you would use landscape view.
The Tablet PC provides several ways to change the display orientation quickly:
• The quickest way to rotate the screen is to press the Rotate button (See “LE-
Series Tablet PC Buttons, Slots, and Ports” on page 10 and “LS-Series Tablet
PC Buttons, Slots, and Ports” on page 14). Be aware that changing the screen
orientation may require you to recalibrate the pen; refer to “Calibrating and
Using Your Pen” on page 27.
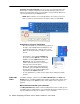
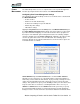
•From the Motion Dashboard > Power panel > Properties, in the Display tab,
use the pull-down menu to see the addtional orientation settings. You can also
change the sequence for rotating from one orientation to another.
Mirroring or extending your display. The Tablet PC has a Dual Head Video
Controller that lets you run a presentation from your Tablet PC on an external
monitor or data projector while taking notes in ink. You can also move applications
onto a second monitor to create additional work space.
How to connect the Tablet PC and a monitor or projector example.
1. Plug the VGA monitor cable into the VGA port on the Tablet PC or Motion
FlexDock for the LE-Series.
2. Connect the external monitor or data projector to a power outlet and turn it
on. The software recognizes the external monitor or data projector and
searches for a driver.
3. If necessary, install the driver from the CD supplied by the monitor’s manu-
facturer.
4. Configure your display, using the steps in the following sections.